Need OEM supplier support for this product type?
Contact KOLARWIN Tools for OEM mechanic tools, private label packaging, wholesale quotation and product range support. This gives overseas buyers a clear path from article reading to supplier discussion.
Pliers bring a small force advantage to gripping, bending, cutting, or holding work. Buyers often face dozens of names that describe overlapping designs, which makes assortment planning harder than it needs to be. Grouping types of pliers by working action, jaw shape, and joint helps narrow the field. This guide gives distributors a practical taxonomy and RFQ checklist. Manufacturer references support basic construction terms; model-specific claims need supplier documentation.
1. What jobs do pliers perform in a hand-tool assortment?
Pliers use two handles and a pivoting joint to move paired jaws. Most designs serve a primary action: grip or turn, cut, form, or hold. Combination pliers may grip and cut, while long-nose styles prioritize access. Group products by buyer task, then record model differences in product data.
For a first-pass range review, sort samples into these task buckets:
- Grip or turn: combination, slip-joint, tongue-and-groove, and locking designs.
- Reach or form: long-nose, bent-nose, flat-nose, and round-nose designs.
- Cut: diagonal cutters, end-cutting nippers, and task-specific cutters.
- Retain or service: snap-ring and hose-clamp pliers.
A useful starting point: map each item to a task and user before comparing handle color or finish. This keeps a catalog from filling with near-identical choices while leaving a service gap. Buyers can use the existing combination pliers uses guide for deeper application examples. Prioritize frequent tasks and confirm key dimensions with suppliers.
Assortment view by primary action
| Primary action | Common family examples | Buyer check |
|---|---|---|
| Grip or turn | Combination, slip-joint, tongue-and-groove | Jaw profile, opening range, joint travel |
| Reach or form | Long-nose, bent-nose, round-nose | Tip geometry, reach, access clearance |
| Cut | Diagonal cutter, end cutter | Rated material and size, cutting-edge form |
| Retain or service | Snap-ring, hose-clamp pliers | Target ring or clamp mechanism and range |
2. How does jaw form change gripping and access?
Jaw shape determines access and workpiece contact. Flat jaws hold broad, flat surfaces; round jaws support loops or curved forms. Long-nose pliers reach narrow spaces, while bent noses approach from an offset angle. Adjustable jaws cover varied shapes, but buyers need opening dimensions for comparison. No nose style suits every fixture.
Check geometry against real parts or representative samples:
- Compare jaw length and width for access.
- Review serration placement and pattern against the intended grip surface.
- Confirm maximum opening and jaw alignment from a drawing or sample.
- Check tip clearance around nearby walls.
For close work, measure the access path first. A long tip may reach farther yet provide less room around a fastener or clip. For detailed access comparisons, see the needle-nose pliers uses article and bent-nose versus straight-nose comparison. Ask for a dimensioned jaw drawing when tip access affects fit.
Jaw form selection table
| Jaw form | Typical task fit | Specification to compare |
|---|---|---|
| Flat | Holding flat or broad surfaces | Jaw width, face texture, tip thickness |
| Long-nose | Reaching into narrow spaces | Tip length, width, opening, alignment |
| Bent-nose | Angled access and positioning | Bend angle, tip reach, clearance |
| Round-nose | Forming loops or curved shapes | Taper, tip diameter, jaw symmetry |
| Adjustable | Gripping varied workpiece sizes | Opening range, adjustment positions, joint play |
3. Which pliers grip, turn, or hold workpieces?
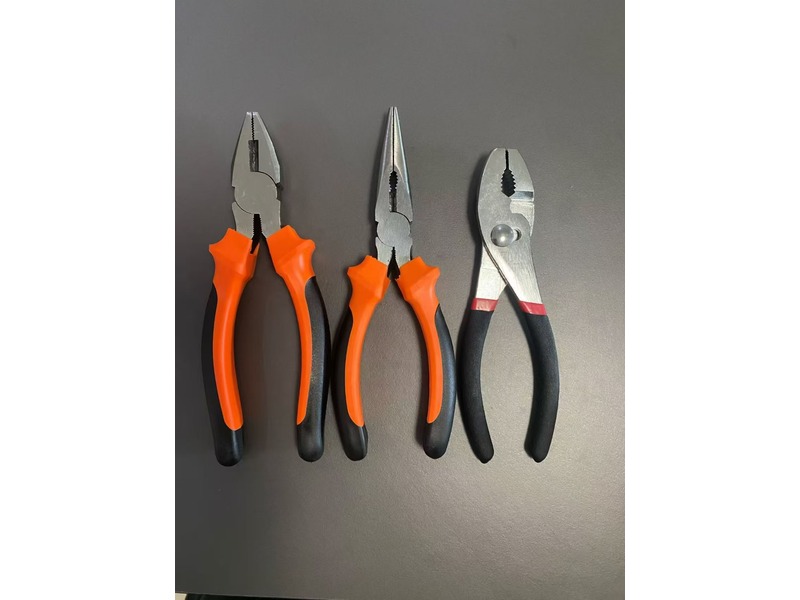
Several families grip workpieces but differ in adjustment and holding action. Combination pliers offer general-purpose jaws and often a cutting zone. Slip-joint designs provide alternate pivot positions; tongue-and-groove styles slide across a wider opening. Locking pliers retain a set position. Snap-ring pliers engage ring ends for installation or removal, so classify them as service-specific tools.
When choosing among these families, record the task and avoid treating a broad name as a complete specification:
- Confirm adjustment range and positions.
- Check whether jaws are intended for flat, round, or irregular stock.
- Identify whether the user needs sustained holding or repeated repositioning.
- Match snap-ring tips and opening action to the applicable ring type.
Match the mechanism to each work cycle. Repeated repositioning and hands-free holding call for different designs. See the separate locking pliers use guide, water-pump pliers versus pipe wrench comparison, and snap-ring pliers selection guide for those focused decisions. Compare range and tips on samples before consolidating SKUs.
Grip and holding families
| Family | Mechanism or form | Useful RFQ detail |
|---|---|---|
| Combination | General gripping jaws, often with cutter zone | Jaw pattern, cutting zone, overall length |
| Slip-joint | Pivot moves between positions | Position count, opening at each position |
| Tongue-and-groove | Sliding joint adjusts jaw opening | Range, groove engagement, handle length |
| Locking | Toggle mechanism holds a clamp position | Jaw profile, opening, release arrangement |
| Snap-ring | Tips engage ring holes or ends | Internal/external action, tip size and form |
4. Which pliers cut wire or small stock?
Cutting pliers differ by edge location and approach. Diagonal cutters suit side access; end-cutting nippers approach from the front. Specialty cutters may suit defined materials or geometries. Names alone do not confirm capacity. Buyers need maker-rated material and size limits, including restrictions for hardened wire or other difficult stock.
Use this checklist when comparing cutting families:
- Identify material and maximum cross-section for the task.
- Confirm edge hardness or construction only through product documentation.
- Check cutting-edge access, nose clearance, and expected cut position.
- Separate wire stripping from cutting; insulation removal needs a suitable stripping design.
Cutting capacity belongs in the specification sheet. A similar silhouette does not prove equal performance, and a buyer should not infer a rating from handle length. An existing end-cutting pliers versus diagonal cutters comparison covers that narrower distinction. Keep cutter type visible in product filters. Request rated materials and test methods before printing capacity claims.
Cutter comparison table
| Cutter family | Approach | Buyer should verify |
|---|---|---|
| Diagonal cutter | Side access across the nose | Rated material, size, edge form |
| End-cutting nipper | Front approach toward workpiece | Flush access, material rating, jaw width |
| Specialty cutter | Defined task geometry | Compatible material, replacement or maintenance details |
| Wire stripper | Removes insulation using a stripping feature | Conductor range, insulation range, adjustment method |
5. How should buyers compare joint and adjustment designs?
A joint controls how handles and jaws move. Fixed joints use one pivot position; slip-joint designs move between set positions, while tongue-and-groove styles slide through an adjustment track. Box joints capture one handle around the pivot. Compound-link mechanisms add links that alter motion. These labels describe construction, not quality or capacity.
Ask for evidence that relates to the model under review:
- Does the pivot move smoothly without unwanted lateral play?
- Do jaw faces meet as intended across their working length?
- Does adjustment remain secure during normal operation?
- Are replacement, lubrication, or maintenance instructions available?
Compare joint behavior on a physical sample. Close and open the tool through its range, then check alignment under ordinary hand pressure. Avoid publishing a generic claim that one joint type always lasts longer or multiplies force more effectively; product dimensions and construction vary. A useful review records observed fit, finish, and motion without turning a brief sample check into a formal durability test. Use joint style as a filter, then evaluate samples and documentation.
Joint and adjustment review
| Joint or adjustment style | What it describes | Sample check |
|---|---|---|
| Fixed pivot | Single pivot location | Smooth motion, jaw alignment, lateral play |
| Slip-joint | Pivot changes between positions | Secure seating and opening at each position |
| Tongue-and-groove | Sliding adjustment track | Engagement, range, smooth adjustment |
| Box joint | Captured joint arrangement | Joint fit and movement through full travel |
| Compound link | Added links between handles and jaws | Linkage motion and maker-stated task limits |
6. What handle and material details affect procurement?
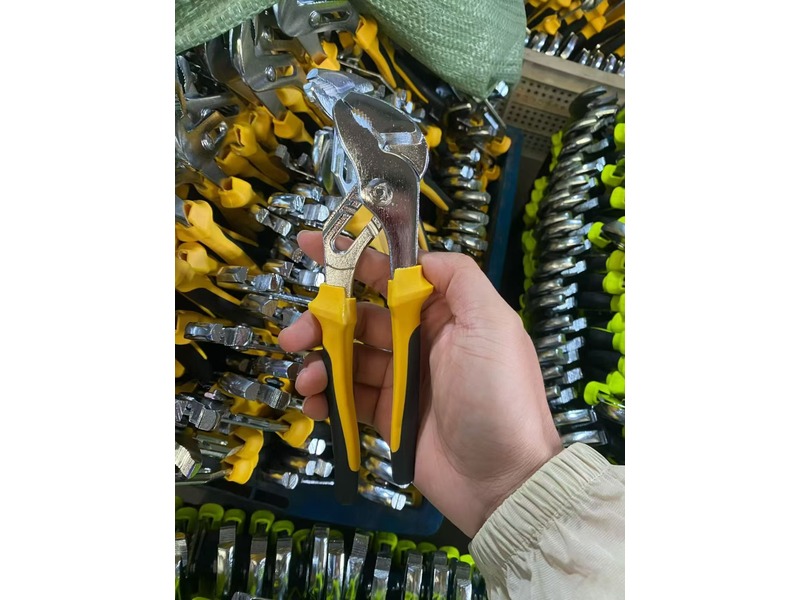
Handles affect purchase suitability, but color does not prove electrical rating or material. Confirm insulation claims from product markings and documentation. Compare grip shape, surface, length, and packaging with the work environment. Do not infer base material or finish from appearance. Specify any required corrosion resistance or alloy in the RFQ.
A product record should capture:
- Overall length and, where useful, weight.
- Handle construction and grip material as declared by the supplier.
- Jaw and joint material or finish when buyer requirements specify them.
- Packaging, barcoding, labels, and language requirements.
- Any ratings or compliance documents required by the market.
Separate visible features from verified claims. A dipped handle, bright coating, or polished surface is not enough evidence for a performance statement. The existing specialty pliers buying guide discusses task-specific styles and gives buyers another route for narrower assortment decisions. Before placing a product in a rated category, obtain product-specific documentation and confirm markings. If details are not confirmed, leave them out of the listing instead of filling gaps with assumptions.
Product data checklist
| Field | What to record | Evidence to request when needed |
|---|---|---|
| Dimensions | Overall length, jaw width, opening | Dimensioned drawing or approved sample |
| Handle | Shape, covering, declared material | Specification sheet or product marking |
| Base material and finish | Supplier-declared material and surface | Product documentation for required claims |
| Packaging | Pack quantity, label, barcode, carton | Artwork proof and packing details |
| Ratings | Only ratings applicable to intended sale | Product-specific certificates or declarations |
7. How can buyers build a pliers assortment by user and task?
An assortment works when each item fills a defined job. Maintenance may need broad gripping and cutting coverage; assembly can call for reach or loop-forming options. Electrical distribution may involve wire preparation, but rated insulated tools need verification. Automotive service can require hose-clamp, snap-ring, or locking styles. These examples are not a universal starter list.
To build a range, segment demand before adding duplicates:
- List user roles and recurring tasks from customer interviews or sales records.
- Mark which tool family covers each task and where access geometry changes.
- Keep distinct models only when they solve a documented fit or process need.
- Use specialist service pages as navigation, not substitutes for product specifications.
Start with a task map. Compare maintenance demand with category gaps, then request samples for the highest-priority needs. A hose-clamp task, for example, belongs in a specialist family; link to the hose-clamp pliers types guide instead of treating those tools as general combination pliers. Likewise, map cutting and holding tasks separately. Review overlap before assigning shelf space.
Role-to-family planning table
| User or work area | Possible family coverage | Question before adding SKUs |
|---|---|---|
| General maintenance | Combination, adjustable grip, diagonal cutter | Which tasks recur and what sizes appear? |
| Assembly | Long-nose, flat-nose, round-nose | Which tip geometry fits the fixture? |
| Electrical work | Stripping and gripping families | Which ratings and documentation apply? |
| Automotive service | Hose-clamp, snap-ring, locking families | Which service components and access paths recur? |
| Distributor assortment | Core and specialist groups | Can each SKU be tied to a distinct buyer need? |
8. What should an RFQ specify for pliers?
A clear RFQ describes the task and item, then asks suppliers to confirm specifications. Name the family, dimensions, and market. Add jaw shape, adjustment or cutting action, handle requirements, finish, and packaging as needed. Separate mandatory criteria from preferences so a proposed equivalent does not silently change a critical feature.
Include these details when relevant:
- Product family, intended operation, target overall length, and jaw geometry.
- Opening, tip, or cutting details that affect fit or use.
- Handle construction, markings, packaging, and market documentation.
- Sample quantity and review criteria; do not assume an MOQ or stock position.
- Requested drawings, declarations, test records, and label proofs.
A precise request saves a round of clarification. Attach a reference photo or dimensioned sketch where shape affects access, and state which measurements are mandatory. Ask the supplier to identify deviations in its quotation. If your project needs a pliers assortment rather than a single tool, provide the family list and expected packaging format. Confirm lead time, minimum order, certification, and stock for each project before commitment.
RFQ input table
| RFQ field | Example of useful input | Buyer action |
|---|---|---|
| Task and family | Grip round fittings; long-nose pliers | Name the operation and workpiece |
| Geometry | Jaw width and tip shape from drawing | Mark dimensions as required or preferred |
| Action | Fixed, adjustable, cutting, locking | Describe the working cycle |
| Handles and finish | Requested construction or declared surface | Request supplier confirmation |
| Commercial and documentation | Pack format, label language, records | Ask for project-specific quotation details |
9. How should pliers be checked and maintained?
A receiving check can catch visible fit or documentation problems. Compare samples with the approved drawing and product record. Move the joint through its range, inspect jaw alignment, and check handles for damage. For cutters, inspect edges and markings. These checks do not replace maker procedures or a required test plan.
A simple review can include:
- Confirm model identification, dimensions, and packaging against the purchase record.
- Open and close the tool through its range; note rough motion or loose pivots.
- Inspect jaw contact and cutting edges without testing beyond stated limits.
- Store tools dry and follow the supplier’s care instructions.
- Remove damaged tools from service and ask the supplier about corrective action.
Record what you can verify. A visual inspection should not become an unsupported claim about service life or cutting performance. Request supplier care guidance and any required inspection criteria. Keep notes with sample photos and lot identification. A consistent checklist makes supplier conversations more specific and helps teams distinguish a cosmetic concern from a functional mismatch.
Incoming review table
| Check | Review method | Record or action |
|---|---|---|
| Identity | Compare model and markings with purchase record | Hold mismatched items for clarification |
| Dimensions | Measure stated critical dimensions | Record sample readings and drawing revision |
| Joint and jaws | Move through range; inspect alignment | Document sticking, looseness, or uneven contact |
| Cutting edge | Visual check against approved sample | Do not exceed maker-stated test limits |
| Packaging and care | Review labels and supplier instructions | Request correction or missing documents |
10. How can a buyer narrow the shortlist?
Select pliers by operation, then filter by jaw form, access, joint action, dimensions, and documentation. This order ties choices to workpieces and user needs, while exposing differences hidden by broad family names. Keep only models with a clear role; specialist pages can answer narrow questions about locking, snap-ring, hose-clamp, cutting, and nose styles.
Before requesting a quotation, prepare a task list and mark required measurements. Ask suppliers to confirm specifications, identify deviations, and provide samples or drawings where geometry needs review. Group multi-tool programs by user task and packaging. Compare samples against one checklist. Send your pliers inquiry with target families, dimensions, intended work, packaging, destination market, and required documents; request current commercial terms directly from the supplier.
Keep the shortlist focused. Each model should solve a defined task or access problem. Compare drawings and samples before carrying two similar models. Leave uncertain requirements open in the RFQ instead of making catalog promises.
Before sending the inquiry, list:
- Required families and dimensions.
- Workpiece, access, and cutting needs.
- Packaging and documentation requirements.
Frequently asked questions
Q1: What are the main types of pliers?
Common groups include gripping, adjustable-joint, long-nose, cutting, locking, and service-specific pliers. Buyers should organize them around task and jaw geometry.
Q2: Which pliers should a distributor stock first?
Start with customer task data and local demand. Choose a compact range that covers recurring grip, reach, and cutting jobs, then add specialist families when buyers request them.
Q3: Are combination pliers suitable for every gripping and cutting task?
No, one model rarely fits every task. Access, material, cutting capacity, or holding needs may call for a specialized design. Confirm model limits with supplier documentation.
Q4: What details belong in a pliers RFQ?
Name the task, family, dimensions, jaw form, adjustment or cutting action, handles, packaging, market, and required documents. Mark all mandatory dimensions clearly.
Q5: How can buyers compare pliers samples?
Check identity, dimensions, joint motion, jaw alignment, edge condition, markings, and packaging against an approved specification. Follow supplier guidance for any functional test.
Looking for a reliable mechanic tools manufacturer in China?
If you are sourcing hand tools, socket tools, automotive repair tools, mechanic tool sets or OEM private label tools, contact KOLARWIN Tools for factory-direct quotation, customization support and product consultation.