Need OEM supplier support for this product type?
Contact KOLARWIN Tools for OEM mechanic tools, private label packaging, wholesale quotation and product range support. This gives overseas buyers a clear path from article reading to supplier discussion.
Combination pliers uses cover several working zones in one fixed-pivot tool: flat gripping, round-stock gripping, light wire forming, and model-rated cutting. Buyers still need limits for each zone. Handle length, visible cutter edges, or a product photograph cannot establish wire size, material range, crimp quality, electrical insulation, or grip force. Distributors and workshop buyers should map each application against documented model limits before approval.
Contents
- 1. What are combination pliers designed to do?
- 2. How do the flat jaws grip stock?
- 3. When does the round-grip section help?
- 4. Can combination pliers twist and form wire?
- 5. What can the cutter section handle?
- 6. Do some models include crimping or extra features?
- 7. Does a colored or cushioned handle mean insulation?
- 8. Which dimensions matter for assortment planning?
- 9. How should buyers test a proposed model?
- 10. How should a B2B buyer choose a combination plier range?
1. What are combination pliers designed to do?
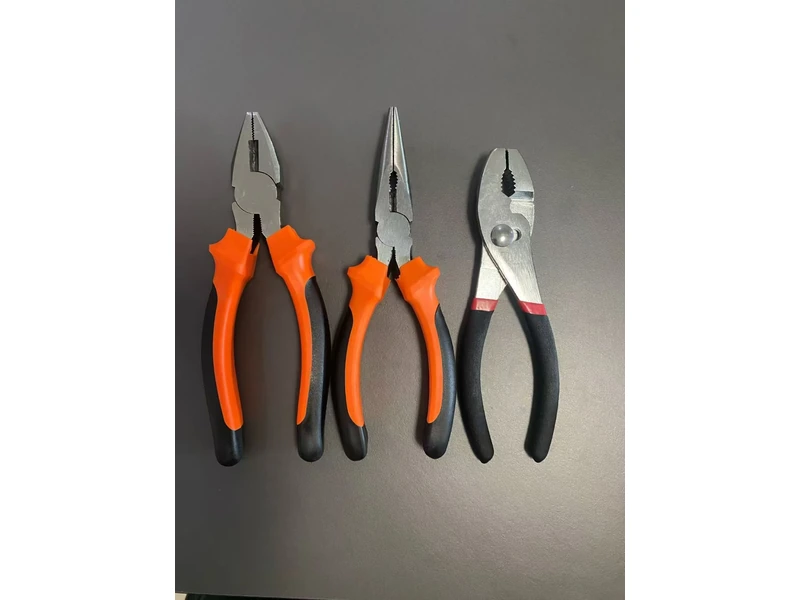
Combination pliers generally combine gripping and cutting zones around a fixed pivot. A typical pattern has flat serrated jaws near the nose, a shaped area for round work, and cutting edges near the hinge. Some models add forming or crimping features. The exact layout remains model-specific.
- Hold flat stock such as tabs, small brackets, or fastener flats where marks are acceptable.
- Grip suitable round stock such as wire, small rods, or a tube edge when the model shape fits.
- Twist or form loose wire during assembly and maintenance.
- Cut only materials and sizes listed for the quoted model.
The name describes combined working zones, not unlimited capability. Start a product matrix with a model drawing, jaw shape, cutter position, and stated limits. The specialty pliers buying guide can help you compare gripping, cutting, and forming tools for a wider range.
Buyer fields for the basic use map
| Working zone | Example workpiece | Evidence needed |
|---|---|---|
| Flat grip | Tab, bracket, small flat | Jaw width and contact drawing |
| Round grip | Wire, rod, suitable tube | Shape, opening, and jaw depth |
| Forming | Loose wire or lead | Model instructions and sample fit |
| Cutting | Listed wire or material | Model-rated material and size |
| Added feature | Crimp or forming die | Exact feature and use limits |
2. How do the flat jaws grip stock?
Flat serrated jaws hold suitable flat pieces through tooth contact. That can help with tabs, small brackets, and assembly parts where visible marks are acceptable. A serrated jaw can damage plating, paint, polished surfaces, or soft stock, especially when a workpiece shifts.
- Check flat width and jaw contact before approval.
- Seat both jaw faces instead of catching one edge.
- Record whether marks are acceptable on the buyer’s workpiece.
- Use a smoother interface when appearance or sealing depends on the finish.
A firm hold begins with full contact and a defined marking limit. Put the workpiece material, finish, and acceptable marks in the RFQ. Do not describe a serrated combination plier as non-marring without model and application evidence.
Flat-jaw fit fields
| Buyer field | Practical example | Approval question |
|---|---|---|
| Shape | Tab or flat bracket | Can both jaws seat? |
| Surface | Painted or plated | Are tooth marks acceptable? |
| Width | Narrow or broad flat | Does jaw width cover it? |
| Edge condition | Sound or damaged edge | Will contact slip? |
| Access | Open or recessed | Can the head enter? |
3. When does the round-grip section help?
A shaped or toothed zone can hold round work where jaw form, opening, and material suit one another. Examples include positioning a loose wire bundle, holding a small rod during assembly, or turning a suitable tube edge. Those examples do not establish a universal diameter or load rating.
- Give the round workpiece diameter or cross-section.
- Identify bare, coated, soft, or thin-wall material.
- Check jaw depth and contact around the full shape.
- Stop when the part rotates, deforms, or slips.
Round contact works through fit, not through a broad family label. Request a representative workpiece sample and record the contact area. The water pump pliers versus pipe wrench comparison covers a different tool decision; use it only when a buyer has moved into pipe-tool selection.
Round-stock comparison
| Workpiece | Useful check | Limit to state |
|---|---|---|
| Small bare wire | Stable seat without edge catch | Avoid unsupported size claims |
| Small rod | Jaw shape and access | Marks may remain |
| Coated tube | Finish and wall condition | Test marking and deformation |
| Thin-wall tube | Full contact and pressure control | Crushing risk needs qualification |
| Irregular section | Contact stability | Stop if the part can roll |
4. Can combination pliers twist and form wire?
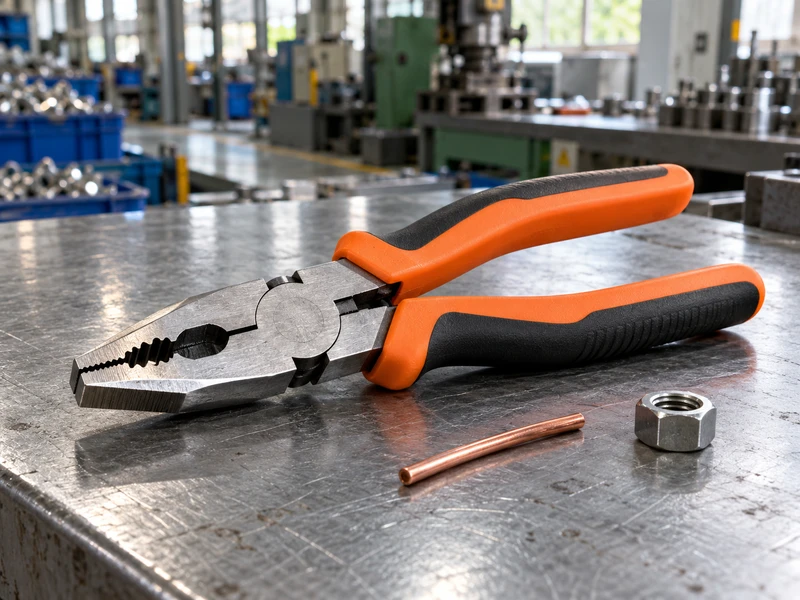
They can help with light forming of loose wire when the wire size, material, and work pattern suit the model. A buyer may use the jaws to make a simple bend, hold a lead during assembly, or twist two loose conductors before a separate termination step. Pliers do not replace a specified forming tool for repeatable geometry.
- Identify wire material, approximate diameter, and finish.
- Define the bend or twist shape required.
- Keep conductor handling separate from terminal crimping.
- Use a dedicated forming or crimping tool when repeatability matters.
Wire forming is a handling use with a defined workpiece, not a blanket wire claim. Describe the operation in the sample brief and reject wording that promises a bend radius or cycle life without model evidence. For terminal work, consult the types of crimping tools guide and specify the terminal system separately.
Wire-forming review
| Task | Workpiece detail | Buyer decision |
|---|---|---|
| Hold a lead | Conductor size and coating | Confirm stable jaw contact |
| Make a bend | Wire diameter and target shape | Use forming evidence |
| Twist loose wire | Number and lay of conductors | Keep operation model-specific |
| Prepare a terminal | Terminal and conductor system | Use a dedicated crimp tool |
| Repeat geometry | Required consistency | Avoid general plier substitution |
5. What can the cutter section handle?
A combination plier cutter can support wire work only within the materials and sizes listed for the exact model. A visible cutting edge does not prove a range for copper, aluminum, steel, hard wire, or any other material. The same family name may cover models with different edge treatment and limits.
- Request the model’s listed material categories and sizes.
- Keep conductor cutting separate from terminal preparation.
- Do not infer capacity from handle length, hinge position, or a photo.
- Choose a dedicated cutter when wire falls outside listed limits.
A cutter feature needs a model rating before it belongs in product copy. File the model sheet with the approved claim, then remove unsupported phrases such as “cuts all wire.” The wire stripper versus wire cutter comparison helps buyers separate insulation removal from cutting.
Cutter-use evidence
| Evidence field | Buyer request | Copy boundary |
|---|---|---|
| Material | Named category from model sheet | Do not broaden the category |
| Size | Listed diameter or gauge | Do not infer from opening |
| Edge | Model-rated cutting zone | Photo shows presence only |
| Task | Cut conductor or other stock | Do not imply stripping |
| Alternate tool | Dedicated cutter if needed | State when limits are exceeded |
6. Do some models include crimping or extra features?
Some combination pliers include a forming or crimping area, but that feature does not automatically produce an approved terminal connection. Terminal type, conductor size, die profile, and inspection requirements belong in a separate specification. An extra notch may also serve a different purpose.
- Name the exact feature and its location on the tool.
- Identify terminal family, conductor size, and required finish.
- Separate wire forming from terminal crimping in listings.
- Use a dedicated crimper when connection quality must be controlled.
An added feature expands a model’s use map only after its task is defined. Ask the supplier for a model drawing and instructions. Keep a crimping reference beside the SKU record rather than presenting every combination plier as a terminal tool.
Added-feature matrix
| Feature | Possible task | Evidence before listing |
|---|---|---|
| Crimping die | Named terminal work | Die profile and terminal limits |
| Forming notch | Light wire shaping | Model instructions |
| Pipe-grip zone | Suitable round work | Shape and opening data |
| Cutter | Listed material cutting | Model-rated size and material |
| No added zone | General gripping and cutting | Keep copy within shown geometry |
7. Does a colored or cushioned handle mean insulation?
No. Handle color, plastic dipping, and a soft comfort grip describe appearance or handling. They do not establish electrical insulation. Electrical work requires an explicit insulated, VDE, or 1000 V designation for the named model plus relevant documentation. A standard combination plier should not be presented as suitable for energized work.
- Keep comfort-grip wording separate from insulation wording.
- Request model-level marking and documentation.
- Remove voltage language when evidence is absent.
- Follow the buyer’s electrical safety process for any rated tool.
Only an explicit model rating supports an electrical claim. Put the required marking in the RFQ and product approval record. Do not infer a safe-live use from color, coating, or a photograph.
Handle-claim table
| Visible feature | May indicate | Cannot prove |
|---|---|---|
| Plastic-dipped grip | Comfort or finish | Electrical insulation |
| Colored handle | Family or appearance | Voltage rating |
| Soft overmold | Hand comfort | Safe energized work |
| Insulation marking | Rated configuration claim | Any unmarked model |
8. Which dimensions matter for assortment planning?
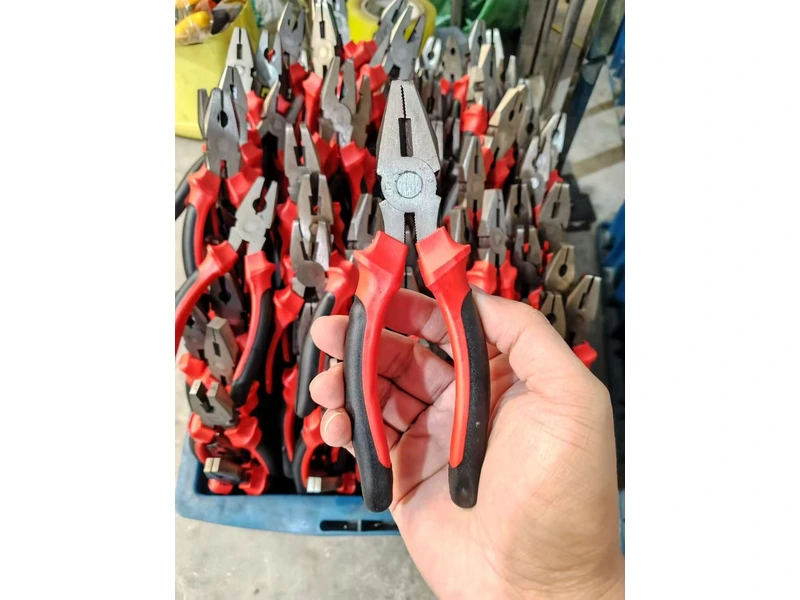
Total length helps organize trays and reach, yet it does not establish jaw opening, jaw depth, handle span, or cutter-edge length. A model with a similar handle label may suit a different workpiece. Record dimensions alongside each use zone.
- List total length and jaw length.
- Record opening and jaw depth for the intended workpiece.
- Check head width and handle span in the tightest location.
- Record cutter position and edge length when a cutter is part of the use.
A useful size record describes contact and access, not only storage length. Request a side-view drawing and a fit review. Use the industrial maintenance repair tools buyers guide and complete mechanic tools list for distributors and importers for range planning without turning broader kit scope into a model rating.
Size and access table
| Field | Why it matters | Evidence |
|---|---|---|
| Total length | Reach and storage | Measured model dimension |
| Jaw length | Contact depth | Drawing or sample |
| Opening | Workpiece coverage | Model value at stated setting |
| Head width | Clearance around parts | Side-view drawing |
| Cutter position | Access to wire | Feature location and length |
9. How should buyers test a proposed model?
Sample review should follow actual uses instead of a dramatic demonstration. Hold a representative flat, seat a suitable round workpiece, form the specified loose wire, and review any model-rated cut within stated limits. Do not turn an informal sample exercise into a force, hardness, service-life, or cycle claim.
- Identify the sample by model number and revision.
- Record fit, marks, slippage, and visible damage.
- Check hinge alignment, jaw condition, and cutter edges.
- File any forming or terminal review separately from grip testing.
A simple use record protects the range from claims that exceed a sample. Keep photographs, dimensions, and approved wording in the same SKU file. For adjacent cutter geometry, consult the flush cutters versus diagonal cutters comparison.
Sample report fields
| Inspection point | Record | Escalate when |
|---|---|---|
| Flat grip | Contact and marks | Workpiece slips or finish fails |
| Round grip | Seating and deformation | Part rolls or crushes |
| Wire forming | Shape and handling | Required geometry is inconsistent |
| Cutting | Named material and size | Task exceeds model limit |
| Handle and hinge | Finish, alignment, movement | Damage or excessive play appears |
10. How should a B2B buyer choose a combination plier range?
Choose models from workpieces and repeatable tasks. Use flat jaws for suitable flat stock, a shaped zone for documented round work, the body for light wire forming, and the cutter only within model-rated limits. Add a crimping tool when a terminal system needs a defined die and process.
- Map each SKU to actual grip, round-stock, forming, and cutting uses.
- Separate conductor cutting from terminal crimping.
- Mark finish limits and insulation evidence clearly.
- Request model drawings before packaging or publishing use claims.
A clear use map turns a general plier into a defensible assortment choice. Send suppliers the largest, smallest, and most finish-sensitive workpieces before approval. Place model-specific dimensions, limits, and sample notes beside every listing so buyers can choose by task rather than handle color or length. Keep the approved range organized within the hand-tools category so adjacent plier families do not inherit unsupported use claims.
Q1: What are the main combination pliers uses? Flat and round gripping, light wire forming, and model-rated cutting are common uses.
Q2: Can combination pliers replace a dedicated crimper? Not automatically. Terminal work needs a compatible die, terminal system, and documented process.
Q3: Can a visible cutter edge cut any wire? No. Follow material and size limits for the exact model.
Q4: Does a colored or cushioned handle prove insulation? No. Require explicit insulated, VDE, or 1000 V documentation.
Q5: What should a distributor request first? Request a model drawing, use limits, dimensions, and sample checks tied to actual workpieces.
Looking for a reliable mechanic tools manufacturer in China?
If you are sourcing hand tools, socket tools, automotive repair tools, mechanic tool sets or OEM private label tools, contact KOLARWIN Tools for factory-direct quotation, customization support and product consultation.