Home/Blog/ Types of Crimping Tools: An Assortment Guide for Distributors

Types of Crimping Tools: An Assortment Guide for Distributors

Get OEM Tool Catalog + Quote Back to Tool Sourcing Blog
Types of crimping tools displayed with loose terminal and ferrule samples
This KOLARWIN Tools article is written for overseas distributors, wholesalers, importers and private label tool brands sourcing mechanic tools, automotive repair tools, socket tools, hand tools and OEM tool sets from China. Use this guide to compare product options, check supplier quality points and move from reading to a faster B2B inquiry.

Need OEM supplier support for this product type?

Contact KOLARWIN Tools for OEM mechanic tools, private label packaging, wholesale quotation and product range support. This gives overseas buyers a clear path from article reading to supplier discussion.

Common types of crimping tools serve terminals, ferrules, cable lugs, modular plugs and coaxial connectors. Each matched tool forms a connection through controlled deformation. Distributors should specify connection family and conductor, then compare mechanisms, dies, sample checks and documented acceptance requirements.

Contents
  1. 1. What are the main types of crimping tools?
  2. 2. When do basic manual crimpers fit a distributor range?
  3. 3. When should buyers specify ratcheting hand crimpers?
  4. 4. Which crimpers suit insulated and non-insulated terminals?
  5. 5. What makes ferrule crimpers a separate tool family?
  6. 6. When are cable-lug and hydraulic crimpers appropriate?
  7. 7. Do modular and coaxial connectors need dedicated tools?
  8. 8. How should buyers compare interchangeable dies and tool systems?
  9. 9. What sample and incoming checks support an order?
  10. 10. How should distributors build an assortment and send an RFQ?

1. What are the main types of crimping tools?
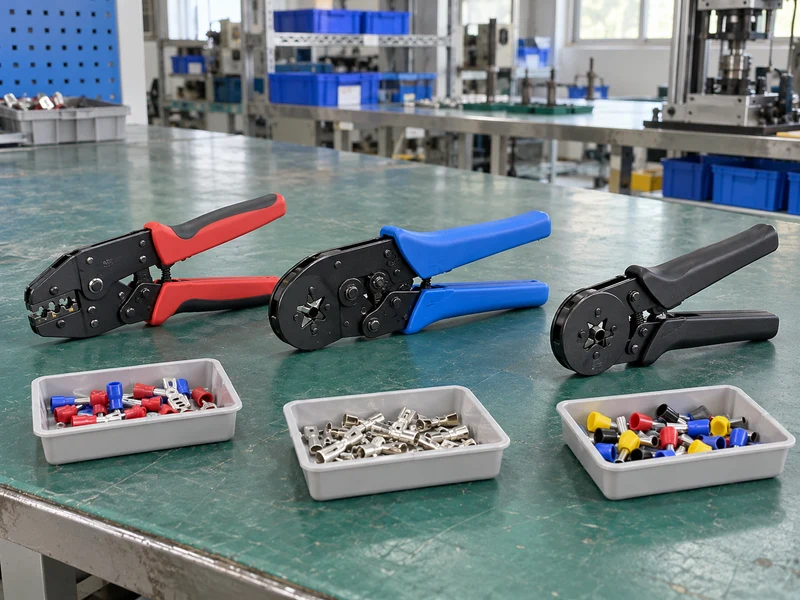
Types of crimping tools displayed with loose terminal and ferrule samples
Illustrative hand-crimper assortment.

Crimping tools fall into two separate maps. One follows the connection: insulated terminal, bare terminal, wire-end ferrule, cable lug, modular plug, coaxial connector, or specialized contact. Another follows actuation: non-ratcheting hand, ratcheting hand, hammer, mechanical compound, hydraulic, electro-hydraulic, or another powered format. A ratchet frame can serve multiple families when compatible dies exist. These labels overlap: a hydraulic unit may use a hand pump or battery power.

Start with the terminal family. Build a range from the parts your customers already install, then attach a tool class to each part.

  • Record connector family, conductor construction, size system, and terminal maker.
  • Separate tool purpose from handle mechanism in catalog data.
  • Treat every tool, die, terminal, and wire combination as a specific approval question.

The hand tools product range can sit beside crimpers without blurring application fields.

Types of crimping tools by application

Connection family Common tool class Buyer evidence
Insulated terminals Hand crimper with matched cavities Terminal series and conductor range
Bare terminals Dedicated hand or powered crimper Barrel geometry and die profile
Wire-end ferrules Ferrule-specific hand or powered tool Ferrule construction, wire and entry fit
Cable lugs Mechanical, hydraulic, or battery tool Lug material, cable, and approved dies
Modular or coaxial connectors Dedicated connector tool Plug or connector series and process

Make this two-axis map the opening tab in your product-range workbook.

2. When do basic manual crimpers fit a distributor range?
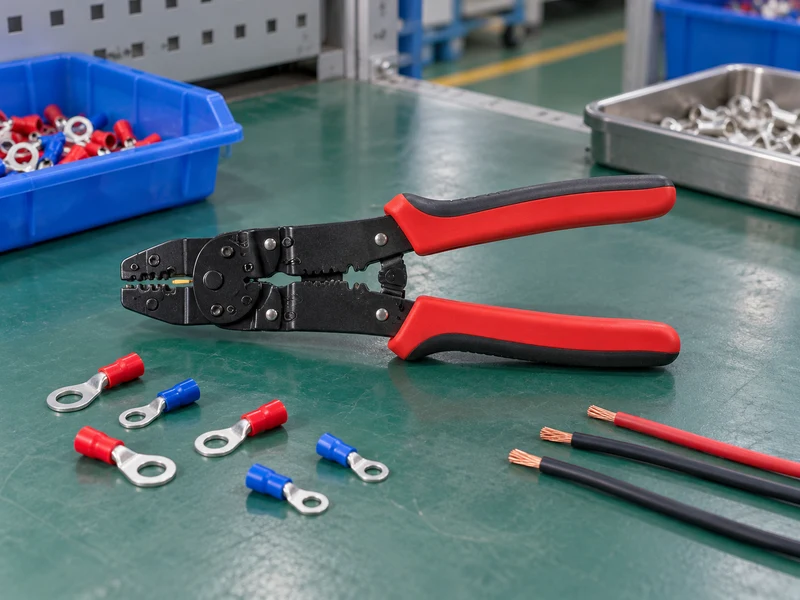
Manual crimping tool beside loose terminal and wire samples
Illustrative manual-tool sample layout.

Basic manual crimpers suit light, occasional, or compact work where an operator can position a terminal and close the jaws with controlled effort. A non-ratcheting frame may combine stripping, cutting, gripping, and crimp cavities. Each extra function still needs its own stated range. Cutting capacity and crimping range require separate model documentation.

The tradeoff sits in process control. An operator can stop before full closure, apply uneven force, or place a terminal off-center. That may fit a repair bench with visual inspection and low cycle demand. Repeated work across many operators needs tighter controls.

Keep the entry model honest. List the job, accepted terminal family, and approved conductor conditions rather than labeling a manual tool as a universal crimper.

  • Ask for separate stripping, cutting, and crimping ranges.
  • Check jaw alignment with an empty tool and a representative terminal.

The specialty pliers buying guide shows how similar-looking tools can be separated by operation and evidence.

Manual-crimper buying checks

Check Why it matters Evidence to request
Terminal family Cavities are not interchangeable by appearance Terminal drawing or part number
Conductor type Solid and stranded wire can behave differently Approved wire construction
Operator control Partial closure can change the finished profile Work instruction or sample method

Position basic manual models as task-specific SKUs, then verify each printed range against a sample.

3. When should buyers specify ratcheting hand crimpers?
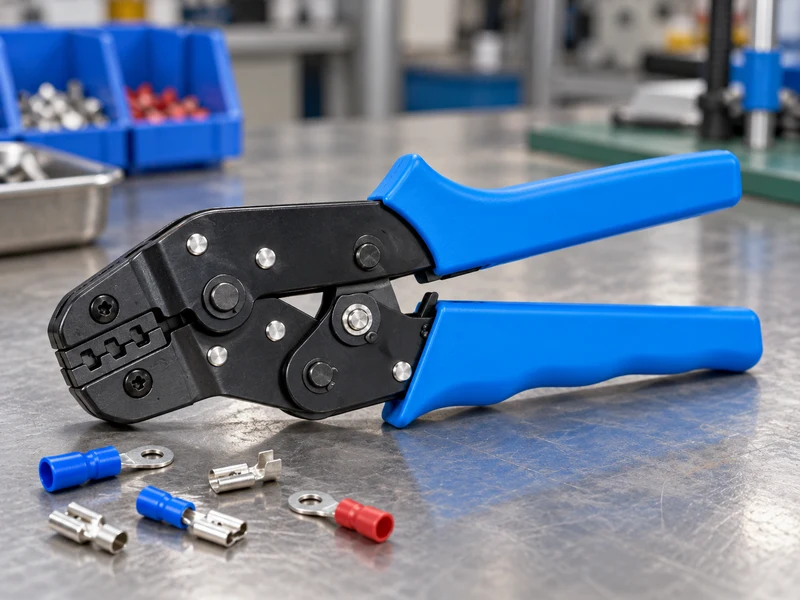
Blue-handled ratcheting terminal crimper displayed with its die area visible
Illustrative ratcheting-frame detail.

Ratcheting hand crimpers add a controlled handle sequence that normally keeps jaws engaged until a defined release point or release action. That feature can help operators repeat a full stroke and can reduce accidental opening during placement. It does not guarantee a sound connection. Terminal choice, strip length, die profile, conductor position, and tool condition still govern the result.

Specify a ratcheting frame when repeatability matters more than the lowest entry price. Ask about release before completion, adjustment, wear limits, and service parts. A fixed die may simplify training; a replaceable die may broaden the line.

Look at the release path. A ratchet becomes useful only when its sequence matches the operator’s real loading and inspection routine.

  • Confirm full-cycle behavior with the intended terminal.
  • Record release, adjustment, and spare-part provisions.
  • Keep the approved die and terminal pair visible in product data.

Ratchet-frame comparison

Feature Fixed-die frame Interchangeable-die frame
Range planning Narrower, easier SKU story Broader, more compatibility records
Training One cavity layout Die identification required
QC focus Terminal-to-tool match Terminal-to-die-to-frame match

Request a complete-cycle sample using your terminal, then record ratchet behavior in the approved specification.

4. Which crimpers suit insulated and non-insulated terminals?
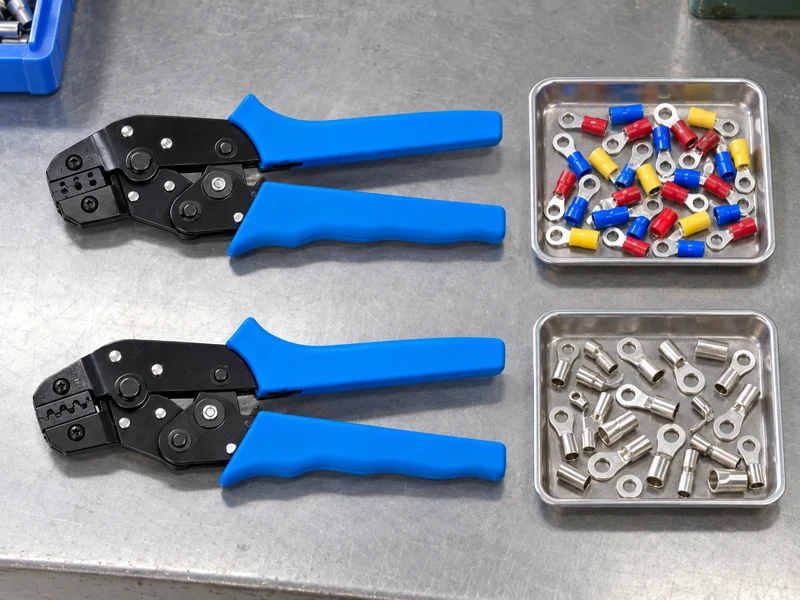
Separate crimping tools and samples for insulated and bare terminals
Illustrative terminal-family matching layout.

Insulated and non-insulated terminals share a broad purpose, yet their working cavities differ. A pre-insulated terminal has a sleeve or collar that needs supported compression while its metal barrel receives the conductor crimp. A non-insulated terminal exposes its barrel and needs a profile matched to that metal geometry. The plastic sleeve belongs to its terminal assembly. It does not mean a tool handle provides electrical insulation.

Manufacturers commonly list these as separate families. Open-barrel contacts, ring terminals, butt connectors, and heat-shrink terminals may need different profiles. A photograph cannot establish an approved terminal series.

Match the metal work zone. Put terminal series, conductor size, and die cavity in one line of your buyer specification.

  • Separate insulated, bare, open-barrel, and heat-shrink categories.
  • Confirm whether insulation support and conductor crimp use separate cavities.
  • Ask for a drawing when a die mark is unclear.

Insulated versus non-insulated checks

Terminal style Tool question Sample check
Pre-insulated ring or fork Does cavity support sleeve and barrel? Sleeve stays intact; barrel forms correctly
Bare ring or lug Does die match barrel profile? Approved profile without unintended splits or looseness
Open-barrel contact Are wings formed in the approved sequence? Contact geometry and conductor position

Approve separate samples for each terminal construction before combining products under one catalog family.

5. What makes ferrule crimpers a separate tool family?
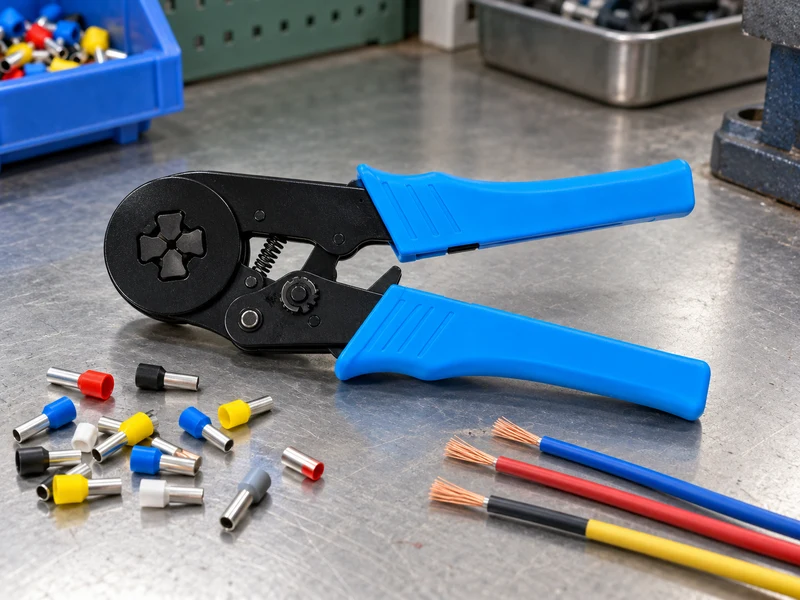
Ferrule crimping tool beside loose tubular ferrules and wire coupons
Illustrative ferrule-tool sample scene.

Ferrule crimpers form tubular wire-end ferrules around conductor strands before insertion into a terminal block. Their cavities can create square, hex, trapezoid, or another model-specific profile. A ferrule's collar, barrel length, and conductor cross-section affect insertion and finished geometry. Ferrule work differs from ring-terminal or cable-lug crimping.

Self-adjusting tools can reduce manual die selection within a stated range. They still need the correct ferrule construction and conductor condition. Twin ferrules need a tool that lists twin-ferrule use. Show ferrule type, collar style, and metric or AWG fields separately.

Treat the ferrule as part of a system. The tool profile, ferrule barrel, conductor strands, and terminal entry must agree.

  • Ask whether the tool accepts insulated, uninsulated, or twin ferrules.
  • Confirm the crimp profile and loading direction.
  • Test insertion into the intended terminal block after crimping.

Ferrule-tool specification table

Field Buyer decision Verification evidence
Ferrule type Single, twin, insulated, or bare Manufacturer compatibility list
Crimp profile Square, hex, trapezoid, or other Die drawing or sample section
Conductor Stranded construction and cross-section Approved wire sample

Ask suppliers for one ferrule tool sample and matching ferrules, then inspect the finished entry fit before range approval.

6. When are cable-lug and hydraulic crimpers appropriate?
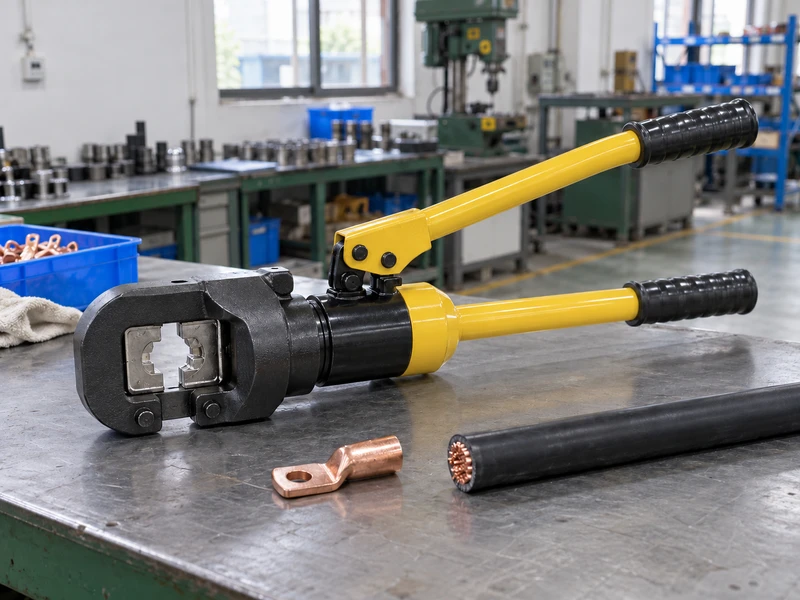
Manual hydraulic crimper displayed with a separate copper cable lug
Illustrative cable-lug tooling layout.

Cable-lug tools serve larger conductor and lug assemblies where a compact hand terminal crimper cannot supply the required forming action. Mechanical compound tools, hammer tools, manual hydraulic tools, and battery-assisted hydraulic systems can all appear in this family. Powered does not mean hydraulic in every product category; specify each tool’s mechanism.

Select a tool from the lug and cable system outward. Lug material, barrel geometry, conductor construction, die profile, and compression sequence must match terminal-maker instructions. A range without a die list leaves gaps.

Specify die compatibility before choosing a drive mechanism. Buyers need a traceable connection between lug, cable, die, and tool head.

  • Request lug and conductor combinations rather than a broad capacity headline.
  • Record die part numbers, profile, and replacement method.
  • Define sample inspection, safe handling, and service documentation.

For automotive channels, the automotive repair tools range can support adjacent repair products while keeping cable-lug tooling separately specified.

Cable-lug tool comparison

Mechanism Good fit Buyer question
Mechanical compound Moderate force with hand control Does handle effort suit the lug and work position?
Manual hydraulic Higher forming force without repeated jaw effort Which dies and lug conditions are approved?
Battery-assisted hydraulic Repeated work where mobility matters What service, charging, and documentation apply?

Approve a lug-and-cable coupon with the exact die set before printing any range or capacity claim.

7. Do modular and coaxial connectors need dedicated tools?
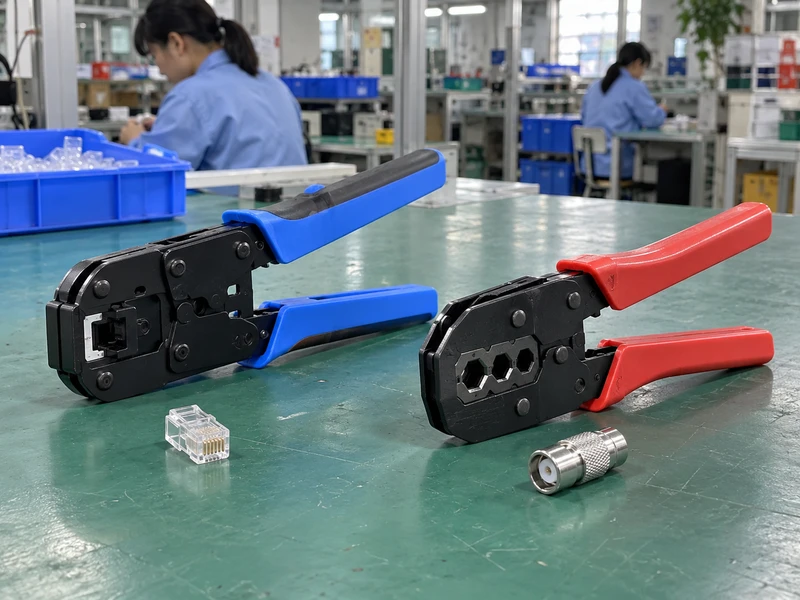
Distinct modular-plug and coaxial-connector hand tools with loose connector samples
Illustrative connector-specific tooling.

Modular plugs and coaxial connectors need dedicated tooling because their contact layouts and bodies differ. A modular frame positions contacts across a plug cavity. A coaxial tool may use stepped openings for a shield, ferrule, or connector body. Compression is not automatically the same as crimping.

Specify plug or connector series, conductor construction, cable jacket, contact arrangement, and finished dimensions. Some families also use insertion tools. Visual fit alone cannot show where force lands.

Keep connector families apart. A shared display can help sales, but shared wording can create costly returns.

  • List modular plug positions and cable type.
  • List coaxial connector family, cable series, and process name.
  • Ask for a finished sample and connector-maker instruction.

Before specifying termination, review wire stripping and cutting functions so preparation tools have separate capacity and acceptance records.

Connector-tool separation

Tool family Working target Approval evidence
Modular plug crimper Plug body and contact positions Plug series and finished contact check
Coaxial crimper Connector ferrule or body Cable and connector series
Coaxial compression tool Compression sleeve or connector body Process instruction and finished length

Place the process name beside every connector SKU so compression and crimp products do not merge in catalog copy.

8. How should buyers compare interchangeable dies and tool systems?
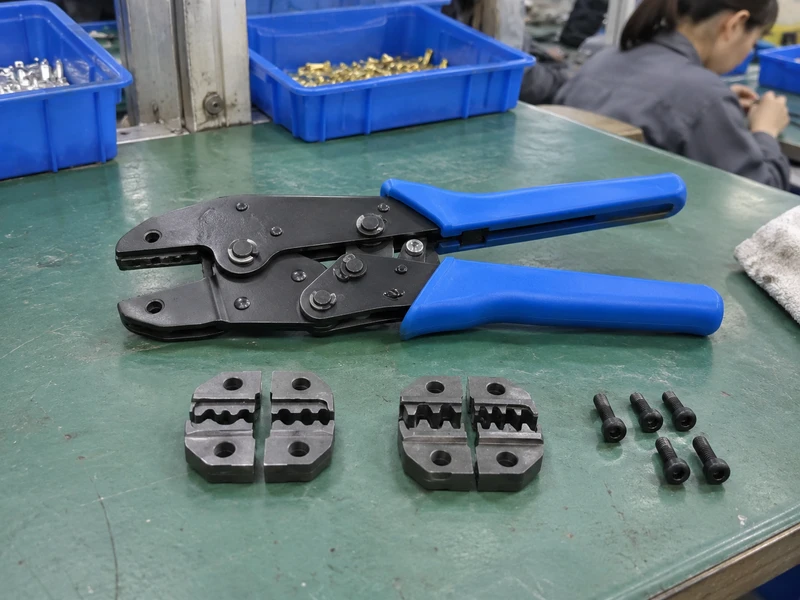
Crimping frame beside separate replaceable die inserts
Illustrative interchangeable-die components.

Interchangeable dies can reduce duplicate frames, but physical fit alone proves little. A die insert must match the frame, terminal family, conductor construction, closing position, and approved profile. Systems may use screw-mounted inserts, magazines, rotating heads, or cartridges. The buyer needs part-number logic, not only a photograph.

Build a matrix with one row per approved combination. Include replacement availability, storage, marking, and changeover instructions. Ask for drawings when two inserts appear similar.

Make compatibility visible. A die system earns its shelf space when staff can select the right insert without guessing.

  • Record frame model, die model, terminal model, and wire condition.
  • Check closed height, orientation, and retention method.
  • Keep obsolete or unapproved inserts out of sample kits.

For plant-maintenance assortments, carry model and replacement-part records into your maintenance tool purchasing brief.

Die-system matrix

Matrix field Example entry type Why it belongs
Frame Model or family code Confirms physical carrier
Insert Die pair or cartridge code Confirms working profile
Terminal Maker and series Connects tool to part
Wire Size and construction Controls conductor fit

Require a completed frame-die-terminal-wire matrix before accepting a multi-die quotation.

9. What sample and incoming checks support an order?
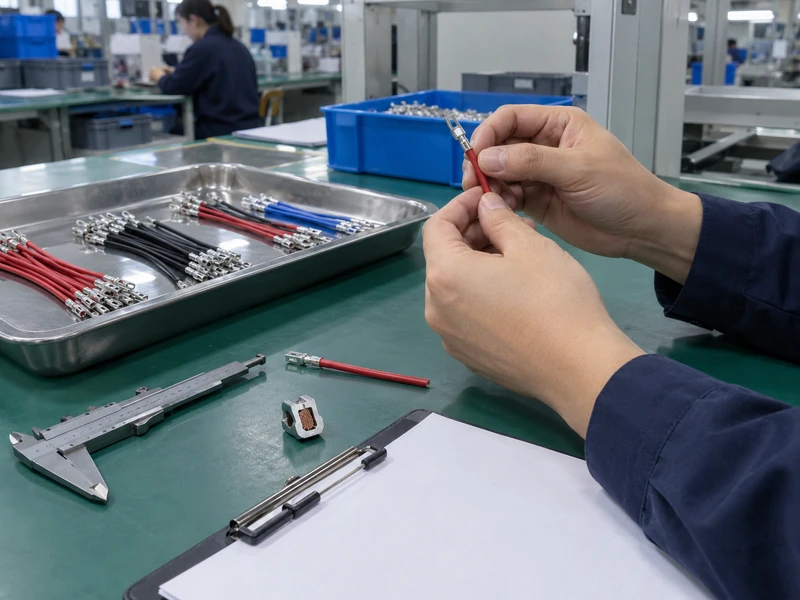
Loose crimped terminal samples and inspection tools on a QC bench
Illustrative sample-inspection setup.

A sample check should show that a specified combination can produce an acceptable result under written conditions. Use loose, de-energized coupons. Follow terminal-maker instructions for strip length, conductor placement, die position, and completion. Visual review can find cracks, asymmetry, strand escape, insulation damage, or, where specified, an incorrect bell mouth.

Pull testing can support acceptance when a written method and threshold come from the applicable terminal or product owner. A casual hand tug does not replace that method. Keep sample and revision records together.

Write the acceptance rule before sampling. A pass decision has value only when another incoming batch can be checked against the same rule.

  • Photograph representative samples beside an identifier.
  • Record visual and dimensional checks separately.
  • Use appropriate pull or electrical tests only where the approved scope requires them.

Incoming-check record

Check stage Record Escalation
Identity Tool, die, terminal, wire, revision Hold mismatched sample
Visual Cracks, burrs, asymmetry, strand position Reject or investigate
Dimension Crimp height or finished feature Compare with written limit
Functional Insertion, retention, or specified pull test Use qualified method
Traceability Date, lot, operator, result Keep with approval file

Attach an acceptance sheet to every approved sample so incoming inspection can repeat the same checks.

10. How should distributors build an assortment and send an RFQ?
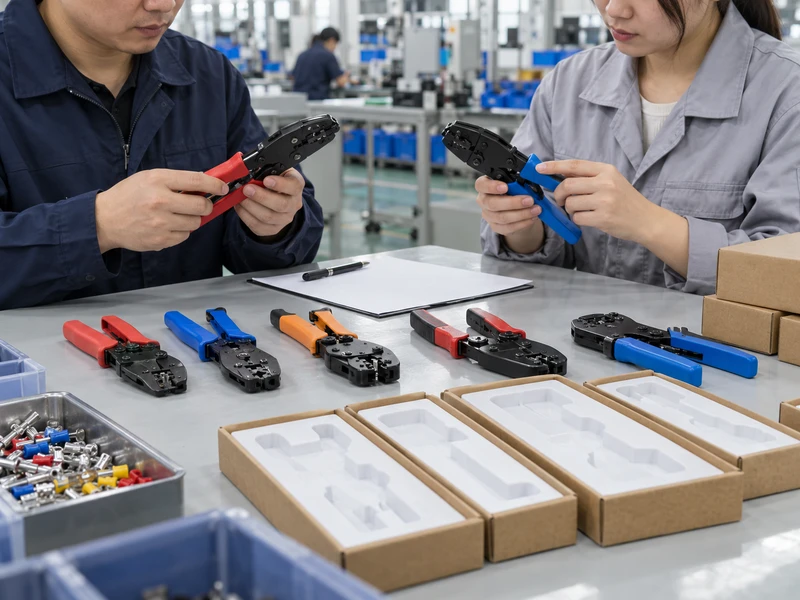
Crimping tool samples and neutral packaging prepared for a buyer review
Illustrative distributor sample review.

Start with customer jobs, not a long list of mechanisms. A workshop may need ratcheting terminal, ferrule, and cable-lug tools. Another channel may need modular and coaxial tools. Use demand evidence, then choose a short range staff can explain and inspect.

Put your decision rule in the RFQ. A useful inquiry lets suppliers quote matching tools instead of guessing from a handle photograph.

  • State terminal or connector family, part number, conductor, and size system.
  • Request tool mechanism, die profile, range, replacement parts, and instructions.
  • Separate standard-product questions from private-label artwork and packaging.

Use your industry application brief to identify customer tasks and review supplier background before comparing quotations. Send a model-by-model inquiry through the contact page.

RFQ fields worth sending

State the application, terminal or connector part, wire construction, size system, process, die details, sample checks, packaging, and required documents. Ask for a compatibility matrix plus itemized assumptions.

Send one representative terminal or connector with the RFQ whenever a supplier must confirm a new combination.

Q1: What are the main types of crimping tools?

They include tools for insulated terminals, bare terminals, ferrules, cable lugs, modular plugs, coaxial connectors, and specialized contacts. Each family can use different hand, ratcheting, mechanical, hydraulic, or powered mechanisms.

Q2: Does a ratcheting crimper guarantee a correct connection?

No. It can control the closing sequence, but terminal, conductor, die, strip length, tool condition, and inspection method still determine acceptance.

Q3: Are ferrule crimpers interchangeable with terminal crimpers?

Usually not. Ferrules use tubular barrels and model-specific profiles. Confirm the ferrule type, conductor, crimp shape, and terminal-entry fit.

Q4: Are coaxial compression tools the same as coaxial crimpers?

No. Both can terminate coaxial connectors, yet their processes and connector requirements differ. Keep process names and approved connector series in the specification.

Q5: What should a distributor include in a crimping-tool RFQ?

State the application, terminal or connector part, wire construction, size system, process, die details, sample checks, packaging, and documents. Ask for a compatibility matrix before approval.

Looking for a reliable mechanic tools manufacturer in China?

If you are sourcing hand tools, socket tools, automotive repair tools, mechanic tool sets or OEM private label tools, contact KOLARWIN Tools for factory-direct quotation, customization support and product consultation.
Common types of crimping tools serve terminals, ferrules, cable lugs, modular plugs and coaxial connectors. Each matched tool forms a connection through controlled deformation. Distributors should specify connection family and conductor, then compare mechanisms, dies, sample checks and documented acceptance requirements.

Contents
  1. 1. What are the main types of crimping tools?
  2. 2. When do basic manual crimpers fit a distributor range?
  3. 3. When should buyers specify ratcheting hand crimpers?
  4. 4. Which crimpers suit insulated and non-insulated terminals?
  5. 5. What makes ferrule crimpers a separate tool family?
  6. 6. When are cable-lug and hydraulic crimpers appropriate?
  7. 7. Do modular and coaxial connectors need dedicated tools?
  8. 8. How should buyers compare interchangeable dies and tool systems?
  9. 9. What sample and incoming checks support an order?
  10. 10. How should distributors build an assortment and send an RFQ?

1. What are the main types of crimping tools?

Types of crimping tools displayed with loose terminal and ferrule samples
Illustrative hand-crimper assortment.

Crimping tools fall into two separate maps. One follows the connection: insulated terminal, bare terminal, wire-end ferrule, cable lug, modular plug, coaxial connector, or specialized contact. Another follows actuation: non-ratcheting hand, ratcheting hand, hammer, mechanical compound, hydraulic, electro-hydraulic, or another powered format. A ratchet frame can serve multiple families when compatible dies exist. These labels overlap: a hydraulic unit may use a hand pump or battery power.

Start with the terminal family. Build a range from the parts your customers already install, then attach a tool class to each part.

The hand tools product range can sit beside crimpers without blurring application fields.

Types of crimping tools by application

Connection family Common tool class Buyer evidence
Insulated terminals Hand crimper with matched cavities Terminal series and conductor range
Bare terminals Dedicated hand or powered crimper Barrel geometry and die profile
Wire-end ferrules Ferrule-specific hand or powered tool Ferrule construction, wire and entry fit
Cable lugs Mechanical, hydraulic, or battery tool Lug material, cable, and approved dies
Modular or coaxial connectors Dedicated connector tool Plug or connector series and process

Make this two-axis map the opening tab in your product-range workbook.

2. When do basic manual crimpers fit a distributor range?

Manual crimping tool beside loose terminal and wire samples
Illustrative manual-tool sample layout.

Basic manual crimpers suit light, occasional, or compact work where an operator can position a terminal and close the jaws with controlled effort. A non-ratcheting frame may combine stripping, cutting, gripping, and crimp cavities. Each extra function still needs its own stated range. Cutting capacity and crimping range require separate model documentation.

The tradeoff sits in process control. An operator can stop before full closure, apply uneven force, or place a terminal off-center. That may fit a repair bench with visual inspection and low cycle demand. Repeated work across many operators needs tighter controls.

Keep the entry model honest. List the job, accepted terminal family, and approved conductor conditions rather than labeling a manual tool as a universal crimper.

The specialty pliers buying guide shows how similar-looking tools can be separated by operation and evidence.

Manual-crimper buying checks

Check Why it matters Evidence to request
Terminal family Cavities are not interchangeable by appearance Terminal drawing or part number
Conductor type Solid and stranded wire can behave differently Approved wire construction
Operator control Partial closure can change the finished profile Work instruction or sample method

Position basic manual models as task-specific SKUs, then verify each printed range against a sample.

3. When should buyers specify ratcheting hand crimpers?

Blue-handled ratcheting terminal crimper displayed with its die area visible
Illustrative ratcheting-frame detail.

Ratcheting hand crimpers add a controlled handle sequence that normally keeps jaws engaged until a defined release point or release action. That feature can help operators repeat a full stroke and can reduce accidental opening during placement. It does not guarantee a sound connection. Terminal choice, strip length, die profile, conductor position, and tool condition still govern the result.

Specify a ratcheting frame when repeatability matters more than the lowest entry price. Ask about release before completion, adjustment, wear limits, and service parts. A fixed die may simplify training; a replaceable die may broaden the line.

Look at the release path. A ratchet becomes useful only when its sequence matches the operator’s real loading and inspection routine.

Ratchet-frame comparison

Feature Fixed-die frame Interchangeable-die frame
Range planning Narrower, easier SKU story Broader, more compatibility records
Training One cavity layout Die identification required
QC focus Terminal-to-tool match Terminal-to-die-to-frame match

Request a complete-cycle sample using your terminal, then record ratchet behavior in the approved specification.

4. Which crimpers suit insulated and non-insulated terminals?

Separate crimping tools and samples for insulated and bare terminals
Illustrative terminal-family matching layout.

Insulated and non-insulated terminals share a broad purpose, yet their working cavities differ. A pre-insulated terminal has a sleeve or collar that needs supported compression while its metal barrel receives the conductor crimp. A non-insulated terminal exposes its barrel and needs a profile matched to that metal geometry. The plastic sleeve belongs to its terminal assembly. It does not mean a tool handle provides electrical insulation.

Manufacturers commonly list these as separate families. Open-barrel contacts, ring terminals, butt connectors, and heat-shrink terminals may need different profiles. A photograph cannot establish an approved terminal series.

Match the metal work zone. Put terminal series, conductor size, and die cavity in one line of your buyer specification.

Insulated versus non-insulated checks

Terminal style Tool question Sample check
Pre-insulated ring or fork Does cavity support sleeve and barrel? Sleeve stays intact; barrel forms correctly
Bare ring or lug Does die match barrel profile? Approved profile without unintended splits or looseness
Open-barrel contact Are wings formed in the approved sequence? Contact geometry and conductor position

Approve separate samples for each terminal construction before combining products under one catalog family.

5. What makes ferrule crimpers a separate tool family?

Ferrule crimping tool beside loose tubular ferrules and wire coupons
Illustrative ferrule-tool sample scene.

Ferrule crimpers form tubular wire-end ferrules around conductor strands before insertion into a terminal block. Their cavities can create square, hex, trapezoid, or another model-specific profile. A ferrule's collar, barrel length, and conductor cross-section affect insertion and finished geometry. Ferrule work differs from ring-terminal or cable-lug crimping.

Self-adjusting tools can reduce manual die selection within a stated range. They still need the correct ferrule construction and conductor condition. Twin ferrules need a tool that lists twin-ferrule use. Show ferrule type, collar style, and metric or AWG fields separately.

Treat the ferrule as part of a system. The tool profile, ferrule barrel, conductor strands, and terminal entry must agree.

Ferrule-tool specification table

Field Buyer decision Verification evidence
Ferrule type Single, twin, insulated, or bare Manufacturer compatibility list
Crimp profile Square, hex, trapezoid, or other Die drawing or sample section
Conductor Stranded construction and cross-section Approved wire sample

Ask suppliers for one ferrule tool sample and matching ferrules, then inspect the finished entry fit before range approval.

6. When are cable-lug and hydraulic crimpers appropriate?

Manual hydraulic crimper displayed with a separate copper cable lug
Illustrative cable-lug tooling layout.

Cable-lug tools serve larger conductor and lug assemblies where a compact hand terminal crimper cannot supply the required forming action. Mechanical compound tools, hammer tools, manual hydraulic tools, and battery-assisted hydraulic systems can all appear in this family. Powered does not mean hydraulic in every product category; specify each tool’s mechanism.

Select a tool from the lug and cable system outward. Lug material, barrel geometry, conductor construction, die profile, and compression sequence must match terminal-maker instructions. A range without a die list leaves gaps.

Specify die compatibility before choosing a drive mechanism. Buyers need a traceable connection between lug, cable, die, and tool head.

For automotive channels, the automotive repair tools range can support adjacent repair products while keeping cable-lug tooling separately specified.

Cable-lug tool comparison

Mechanism Good fit Buyer question
Mechanical compound Moderate force with hand control Does handle effort suit the lug and work position?
Manual hydraulic Higher forming force without repeated jaw effort Which dies and lug conditions are approved?
Battery-assisted hydraulic Repeated work where mobility matters What service, charging, and documentation apply?

Approve a lug-and-cable coupon with the exact die set before printing any range or capacity claim.

7. Do modular and coaxial connectors need dedicated tools?

Distinct modular-plug and coaxial-connector hand tools with loose connector samples
Illustrative connector-specific tooling.

Modular plugs and coaxial connectors need dedicated tooling because their contact layouts and bodies differ. A modular frame positions contacts across a plug cavity. A coaxial tool may use stepped openings for a shield, ferrule, or connector body. Compression is not automatically the same as crimping.

Specify plug or connector series, conductor construction, cable jacket, contact arrangement, and finished dimensions. Some families also use insertion tools. Visual fit alone cannot show where force lands.

Keep connector families apart. A shared display can help sales, but shared wording can create costly returns.

Before specifying termination, review wire stripping and cutting functions so preparation tools have separate capacity and acceptance records.

Connector-tool separation

Tool family Working target Approval evidence
Modular plug crimper Plug body and contact positions Plug series and finished contact check
Coaxial crimper Connector ferrule or body Cable and connector series
Coaxial compression tool Compression sleeve or connector body Process instruction and finished length

Place the process name beside every connector SKU so compression and crimp products do not merge in catalog copy.

8. How should buyers compare interchangeable dies and tool systems?

Crimping frame beside separate replaceable die inserts
Illustrative interchangeable-die components.

Interchangeable dies can reduce duplicate frames, but physical fit alone proves little. A die insert must match the frame, terminal family, conductor construction, closing position, and approved profile. Systems may use screw-mounted inserts, magazines, rotating heads, or cartridges. The buyer needs part-number logic, not only a photograph.

Build a matrix with one row per approved combination. Include replacement availability, storage, marking, and changeover instructions. Ask for drawings when two inserts appear similar.

Make compatibility visible. A die system earns its shelf space when staff can select the right insert without guessing.

For plant-maintenance assortments, carry model and replacement-part records into your maintenance tool purchasing brief.

Die-system matrix

Matrix field Example entry type Why it belongs
Frame Model or family code Confirms physical carrier
Insert Die pair or cartridge code Confirms working profile
Terminal Maker and series Connects tool to part
Wire Size and construction Controls conductor fit

Require a completed frame-die-terminal-wire matrix before accepting a multi-die quotation.

9. What sample and incoming checks support an order?

Loose crimped terminal samples and inspection tools on a QC bench
Illustrative sample-inspection setup.

A sample check should show that a specified combination can produce an acceptable result under written conditions. Use loose, de-energized coupons. Follow terminal-maker instructions for strip length, conductor placement, die position, and completion. Visual review can find cracks, asymmetry, strand escape, insulation damage, or, where specified, an incorrect bell mouth.

Pull testing can support acceptance when a written method and threshold come from the applicable terminal or product owner. A casual hand tug does not replace that method. Keep sample and revision records together.

Write the acceptance rule before sampling. A pass decision has value only when another incoming batch can be checked against the same rule.

Incoming-check record

Check stage Record Escalation
Identity Tool, die, terminal, wire, revision Hold mismatched sample
Visual Cracks, burrs, asymmetry, strand position Reject or investigate
Dimension Crimp height or finished feature Compare with written limit
Functional Insertion, retention, or specified pull test Use qualified method
Traceability Date, lot, operator, result Keep with approval file

Attach an acceptance sheet to every approved sample so incoming inspection can repeat the same checks.

10. How should distributors build an assortment and send an RFQ?

Crimping tool samples and neutral packaging prepared for a buyer review
Illustrative distributor sample review.

Start with customer jobs, not a long list of mechanisms. A workshop may need ratcheting terminal, ferrule, and cable-lug tools. Another channel may need modular and coaxial tools. Use demand evidence, then choose a short range staff can explain and inspect.

Put your decision rule in the RFQ. A useful inquiry lets suppliers quote matching tools instead of guessing from a handle photograph.

Use your industry application brief to identify customer tasks and review supplier background before comparing quotations. Send a model-by-model inquiry through the contact page.

RFQ fields worth sending

State the application, terminal or connector part, wire construction, size system, process, die details, sample checks, packaging, and required documents. Ask for a compatibility matrix plus itemized assumptions.

Send one representative terminal or connector with the RFQ whenever a supplier must confirm a new combination.

Q1: What are the main types of crimping tools?

They include tools for insulated terminals, bare terminals, ferrules, cable lugs, modular plugs, coaxial connectors, and specialized contacts. Each family can use different hand, ratcheting, mechanical, hydraulic, or powered mechanisms.

Q2: Does a ratcheting crimper guarantee a correct connection?

No. It can control the closing sequence, but terminal, conductor, die, strip length, tool condition, and inspection method still determine acceptance.

Q3: Are ferrule crimpers interchangeable with terminal crimpers?

Usually not. Ferrules use tubular barrels and model-specific profiles. Confirm the ferrule type, conductor, crimp shape, and terminal-entry fit.

Q4: Are coaxial compression tools the same as coaxial crimpers?

No. Both can terminate coaxial connectors, yet their processes and connector requirements differ. Keep process names and approved connector series in the specification.

Q5: What should a distributor include in a crimping-tool RFQ?

State the application, terminal or connector part, wire construction, size system, process, die details, sample checks, packaging, and documents. Ask for a compatibility matrix before approval.

Why Partner with Kolarwin Tools?

Factory-Direct Pricing Skip the middleman — access competitive wholesale prices and protect your margins
Private Label & OEM Ready Your brand, our expertise — full customization from logo to packaging
Fast Global Shipping Reliable delivery to 60+ countries with full export documentation support
Low MOQ, High Flexibility Start small, scale fast — flexible order quantities to fit your business
Dedicated B2B Support One-on-one account management from quote to delivery, every time

Get Your Free Quote in 24 Hours

Tell us your sourcing needs — we'll respond with a tailored quote, product specs, and the best pricing for your market. No commitment required.

Chat on WhatsApp Email Us Directly