Need OEM supplier support for this product type?
Contact KOLARWIN Tools for OEM mechanic tools, private label packaging, wholesale quotation and product range support. This gives overseas buyers a clear path from article reading to supplier discussion.
Locking pliers hold work with jaws that close and remain locked. Inspect the tool and object. Choose a suitable jaw and adjust in small steps. Close without crushing; test gently, perform a controlled task, and release per model instructions. Keep fingers clear of pinch points. Never support a person or vehicle, work on live electrical parts, or replace a correctly sized wrench on an undamaged fastener.
1. What is the safe sequence for using locking pliers?
Support the workpiece and select pliers for its shape. Adjustment and release details vary by model. The IRWIN VISE-GRIP Jaw Configuration Guide describes loose jaw placement, screw adjustment until contact, then squeezing handles to lock. Use instructions for the exact model when controls differ.
Follow the sequence, then verify. A safe routine keeps setup, locking, work, and release distinct:
- Inspect tool and workpiece; support object against movement.
- Select jaw shape and capacity for the work.
- Open jaws and set the adjustment screw gradually.
- Place jaws squarely; keep fingers outside the jaw and handle pinch zones.
- Squeeze handles until the lock engages; avoid excessive force.
- Test retention with a gentle controlled pull before starting.
- Perform task, then release using the control shown for that model.
A lock does not make these pliers a lifting device, electrical barrier, or universal wrench. Stop if the part shifts or deforms. See the straight-jaw versus curved-jaw locking pliers guide for jaw selection.
Use sequence table
| Step | Check | Stop when |
|---|---|---|
| Inspect | Tool, jaws, release control, workpiece | Cracks, binding, or unstable setup appears |
| Adjust | Jaw opening and contact | Tool cannot close without forceful overtravel |
| Lock | Handles close and mechanism engages | Workpiece deforms or tool slips |
| Work | Controlled task with supported object | Load changes or grip becomes uncertain |
| Release | Model-specific control and clear hands | Release mechanism is unclear or damaged |
Practical action: add this sequence to product inserts, then include each model’s adjustment and release instructions.
2. How should I inspect the tool and workpiece first?
Before use, check for bent handles, worn jaws, loose screws, damaged release parts, or binding. Do not compensate by tightening harder. Remove damaged tools from service.
Check the object, too. Thin sheet, soft tubing, delicate finishes, and brittle parts can deform under jaw pressure. Use a stable fixture or protective clamp when needed; do not rely on your hand to resist movement.
Check:
- A firm support that will not slide or tip.
- Clear access around both handles and jaws.
- Surface condition and material thickness at the gripping point.
- Hazards such as exposed live conductors or unsupported heavy parts.
Never use locking pliers to hold a person, support a vehicle, or work on live electrical parts. Avoid delicate parts unless a suitable pad or alternate clamp protects them. The woodworking clamps buyer guide can help buyers plan a separate workholding range.
Pre-use inspection table
| Item | What to look for | Buyer or operator response |
|---|---|---|
| Handles and frame | Cracks, bends, loose joints | Remove damaged tool from service |
| Jaws | Missing teeth, chips, distortion | Replace or service per model guidance |
| Screw and linkage | Binding, loose adjustment, unusual play | Stop and check the manual or supplier |
| Workpiece | Fragility, unstable position, finish | Add suitable protection or use another fixture |
Practical action: include tool condition and workpiece stability in the operator’s pre-use checklist.
3. How do I choose the right jaw type and size?
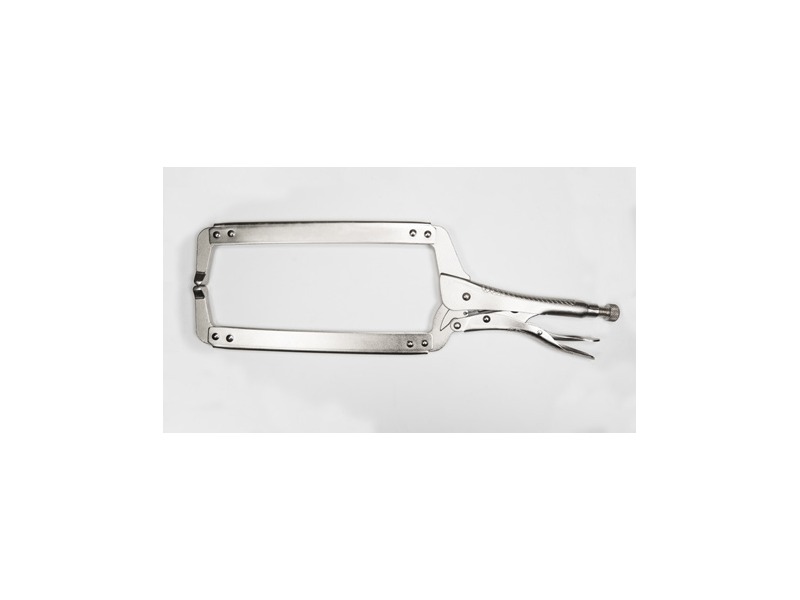
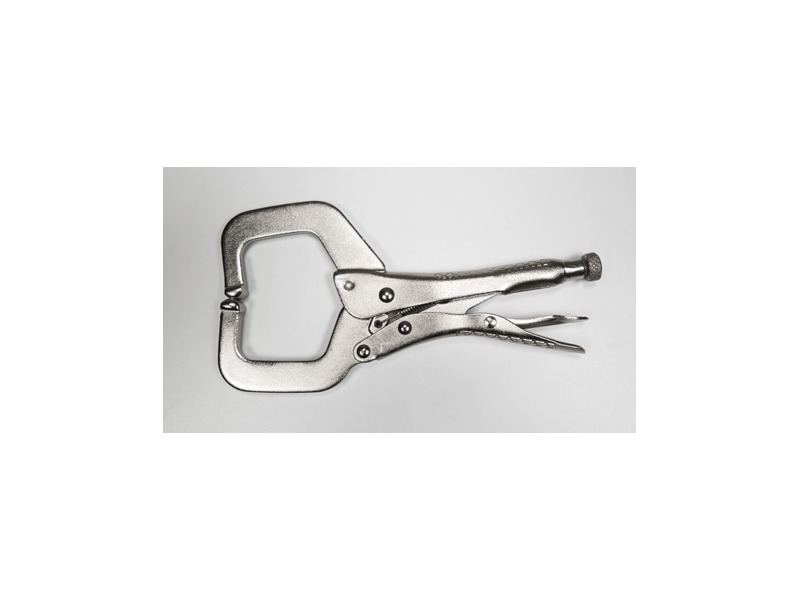
Match the jaws to workpiece shape and access. Curved jaws suit round stock; straight jaws contact flat or hex stock. Long-nose jaws reach narrow areas; C-clamp styles serve larger throats or swivel-pad needs. Gripping capacity varies by model.
Choose by contact. Check model jaw opening, throat depth, and stated capacity. “10-inch” may identify tool length rather than gripping range. IRWIN’s guide catalogs separate configurations for round stock, flat stock, narrow access, and panels; verify offered model.
Confirm:
- Jaw profile covers the intended surface without rocking.
- Workpiece width falls within the model’s stated range.
- Nose or throat reaches the intended grip point.
- Any replaceable pads suit the material and task.
See the straight and curved jaw article for jaw tradeoffs and water pump pliers versus pipe wrench for a separate tool choice.
Jaw selection table
| Work shape or access | Starting jaw form | Fit check | Avoid assuming |
|---|---|---|---|
| Round stock | Curved jaw | Contact is stable without rocking | Every curved jaw fits every diameter |
| Flat or hex stock | Straight jaw | Jaws contact intended faces | Handle length equals capacity |
| Narrow access | Long nose | Tip reaches without side-loading | Nose length proves gripping strength |
| Panel or awkward surface | C-clamp or swivel pads | Pad contact protects the surface | Pads remove all marking risk |
Practical action: match jaw form and actual model capacity against a sample workpiece before standardizing the SKU.
4. How should I adjust the jaw opening?
Open pliers and place jaws loosely around workpiece. Turn the screw in small increments until jaws approach contact. Seat workpiece squarely inside jaws. Avoid settings that require forceful closure or prevent lock engagement.
Let the model guide adjustment. Screw direction and release design vary. Follow labels or manual; do not assume clockwise always tightens. IRWIN’s VISE-GRIP guide shows its model-specific procedure: lever slightly open, adjust until jaws touch, then squeeze to lock.
Make a small adjustment and check:
- Jaws contact the intended faces evenly.
- Handles can close through their normal travel.
- Workpiece stays in place without visible crushing or bending.
- Release control remains accessible after locking.
If pressure is excessive or the lock will not engage, release and reset. Do not force a mismatched tool.
Adjustment check table
| Condition before locking | Adjustment response | Continue when |
|---|---|---|
| Jaws too wide | Reduce opening gradually | Jaws sit square on intended faces |
| Jaws touch but handles will not close | Increase opening slightly | Handles close without excessive force |
| Object shifts during trial | Reposition or select another jaw | Test grip holds with light movement |
| Object begins to deform | Release and reassess | Another tool or protective pad fits better |
Practical action: instruct operators to adjust in small increments and stop before the workpiece distorts.
5. How do I close and lock the pliers without overforce?
Align jaws, keep fingers clear, then squeeze handles through their designed locking action. Stop once mechanism engages and workpiece stays held. Thin stock, soft materials, and fragile finishes may deform under pressure.
Use only enough closure for a controlled hold. If the tool will not lock, release and readjust. Never hammer handles or add extensions unless model instructions allow it. Avoid jerking or violent twisting during a grip test.
During closure:
- Hold the tool by its intended handles.
- Keep skin outside the jaws and moving links.
- Check that the workpiece remains aligned.
- Stop if the tool twists sideways or leaves marks.
Mechanisms vary, so include model-specific instructions. CHANNELLOCK’s product description identifies an extended-release lever as a pinch-control feature; that does not describe every locking plier.
Locking check table
| Observation | Meaning | Safe next step |
|---|---|---|
| Mechanism engages and object remains aligned | Basic hold may be established | Verify with a gentle controlled pull |
| Handle will not close normally | Opening or tool choice may be wrong | Release and readjust |
| Jaws twist or walk off | Contact or size may not suit work | Stop and select another jaw form |
| Surface dents or cracks | Excess pressure or unsuitable contact | Release; protect or change tools |
Practical action: stop closure at the first secure engagement and use a protective fixture for sensitive surfaces.
6. How do I verify the grip before starting work?
After locking, test the workpiece with a gentle movement and clear hands. Confirm it stays seated and the tool does not shift. This check is not a force rating; it catches obvious looseness before work starts.
Test the whole setup. Check tool, workpiece, and fixture together. If the task adds heat, vibration, rotation, or impact, use a fixture designed for those loads.
Verify these points:
- Jaws remain at the intended contact point.
- Workpiece does not rotate or slide under light test pressure.
- Supporting vise or bench stays stable.
- Planned operation must not overload pliers or fixture.
If anything moves, release and reset. Never use locking pliers as fall arrest, jack support, or a substitute for a rated clamp. Compare slip-joint versus combination pliers and combination pliers uses for other hand tools.
Grip verification table
| Test result | Decision | Follow-up |
|---|---|---|
| Stable under gentle check | Continue with controlled task | Recheck if load or position changes |
| Workpiece rotates | Stop | Change jaw form or fixture |
| Surface moves or deforms | Stop | Reduce pressure or protect surface |
| Support shifts | Stop | Secure workholding before continuing |
Practical action: repeat a gentle grip check whenever workpiece, jaw position, or task changes.
7. Which jobs suit locking pliers, and which need another tool?
Locking pliers can temporarily hold selected workpieces. Curved jaws suit round stock, straight jaws contact flats, and long-nose or C-clamp styles solve different access needs. For undamaged fasteners, use a correctly sized wrench or tool designed for that joint.
Match tool and motion. Locking pliers are not a general wrench; serrated jaws can mark surfaces or damage thin parts. See pipe wrench versus adjustable wrench and needle-nose pliers uses for other tasks.
Avoid using locking pliers to:
- Support people, vehicles, suspended loads, or heavy equipment.
- Hold or work on live electrical parts.
- Crush thin tubing, fragile components, or protected finishes.
- Replace a correctly sized wrench on an undamaged fastener.
For broad surface protection or repeat clamping, select a suitable fixture. See the specialty pliers buying guide for adjacent product families.
Tool choice table
| Task | Possible starting tool | Why verify the choice | Boundary |
|---|---|---|---|
| Hold round stock temporarily | Curved-jaw locking pliers | Check stable contact and surface | Not a pipe wrench by default |
| Hold flat stock in position | Straight-jaw or C-clamp style | Check pad and jaw pressure | Not a rated lifting device |
| Turn undamaged hex fastener | Correct-size wrench | Match fastener and wrench | Avoid locking pliers as primary wrench |
| Protect delicate work | Padded clamp or fixture | Check contact material | Serrated jaws may mark surfaces |
Practical action: classify required work as clamping, holding, turning, or support before issuing a tool.
8. How should I release locking pliers safely?
Support the work before unlocking. Find the exact model’s release control, clear fingers from linkage and jaw path, then follow its instructions. Ease pressure off while controlling tool and object. Release controls and directions vary.
Keep hands clear during release. CHANNELLOCK’s product description identifies an extended lever as pinch-control. The IRWIN guide shows a guarded trigger for one VISE-GRIP design. Follow the exact model instructions.
Before release:
- Support the object so it cannot fall or spring away.
- Move fingers and loose clothing away from jaws and handles.
- Check which release control the manufacturer specifies.
- Stop if the mechanism binds, bends, or appears damaged.
If pliers stick, do not strike the release or pry against fragile work. Consult instructions or seek service.
Release table
| Situation | Response | Avoid |
|---|---|---|
| Normal release | Support object and operate documented control | Reaching between jaws |
| High pressure or springing object | Restrain object with suitable fixture first | Letting the part jump free |
| Unfamiliar release design | Check manual or product diagram | Guessing lever direction |
| Binding or damaged mechanism | Stop and seek service guidance | Hammering or prying blindly |
Practical action: place a model-specific release diagram in the user instructions for each locking-plier SKU.
9. What should operators do after the task?
Release without dropping the workpiece, then check contact area for damage. Clean and store per the manual. Recheck jaws, screw, and release parts; remove defective tools from use.
Record repeat problems. Note model, jaw form, and reported slip or surface damage. Use those records when revising tool choice or range contents.
Record:
- Which jaw styles operators use regularly.
- Workpiece types and access conditions.
- Surface protection or release concerns.
- Missing sizes, replacement demand, and packaging needs.
Post-use review table
| Finding | Record | Action |
|---|---|---|
| Tool remains in good condition | Model and task | Return to assigned storage |
| Jaw wear or linkage issue | Defect and affected SKU | Remove from use and contact supplier |
| Workpiece marking | Material and jaw contact | Review pad or tool alternative |
| Grip failure | Workpiece shape and load condition | Reassess selection and procedure |
Practical action: log repeated slip, pinch, or surface-damage reports against the specific model and application.
10. What should a locking-pliers sourcing RFQ include?
An RFQ connects jaw design with workpiece and operator use. Name configuration, jaw opening, throat or reach, model capacity, release design, and pads. Ask suppliers to confirm model ratings and instructions.
Send a real application sample. Include sample or annual unit quantity, destination market, packaging, marking, and required product documents. Ask for model-specific adjustment and release instructions. If surface protection matters, name finish and accepted contact method. Do not assume one jaw style or release system fits every range.
State:
- Jaw type, tool size, and stated model capacity.
- Workpiece material, shape, dimension, and sample or drawing.
- Release mechanism and user-instruction requirement.
- Quantity, destination market, package, and markings.
- Sample evaluation plan and required documentation.
Send those fields and a sample with a KOLARWIN quotation request. Ask suppliers to flag model mismatches before sample or package approval.
Q1: How do you adjust locking pliers?
Seat jaws loosely around the workpiece, then adjust in small steps using model instructions.
Q2: How do I know the pliers are locked securely?
Handles should engage normally and workpiece should stay put during a gentle check.
Q3: How do you release locking pliers?
Support workpiece, clear fingers, and follow release instructions for exact model.
Q4: Can locking pliers replace a wrench?
Use a correctly sized wrench on undamaged fasteners; locking pliers can mark or distort surfaces.
Q5: Can I use locking pliers on electrical equipment?
Never use them on live electrical parts. Follow the site’s isolation procedure and approved tools list.
Looking for a reliable mechanic tools manufacturer in China?
If you are sourcing hand tools, socket tools, automotive repair tools, mechanic tool sets or OEM private label tools, contact KOLARWIN Tools for factory-direct quotation, customization support and product consultation.