Need OEM supplier support for this product type?
Contact KOLARWIN Tools for OEM mechanic tools, private label packaging, wholesale quotation and product range support. This gives overseas buyers a clear path from article reading to supplier discussion.
Hose clamp pliers open, hold, move, crimp, or tighten a particular clamp family around a hose and fitting. “Hose clamp pliers” alone leaves too many variables unresolved: flat-band springs, wire clamps, cable tools, ear clamps, and worm-drive bands need different interfaces.
For a distributor or private-label buyer, a sound choice starts with clamp geometry, access, retention, and a sample fit record. This guide separates those families and shows which fields belong in a quotation request. Hot or pressurized hose work belongs to an approved service procedure and trained personnel.
1. Which clamp type should a buyer identify first?
Clamp type comes before handle shape. A spring-band clamp uses stored spring force. A wire clamp may need a narrow hook or pin. An ear clamp needs a defined crimp surface, while a worm-drive clamp needs a driver that matches its screw head. One broad catalog label can hide four different tool actions.
Start with the clamp, then match the jaws.
- Record band, wire, ear, click, or screw-drive construction.
- Note whether the tool must open, hold, move, crimp, or turn it.
- Measure the clamp’s working diameter range from its drawing or approved sample.
- Record obstruction, hose material, fitting shape, and operator access.
The hand tools range gives buyers a useful category boundary. List a clamp family rather than promise universal fit.
Create one compatibility row per clamp family. A row can cover several models only when jaw contact and operating limits stay identical.
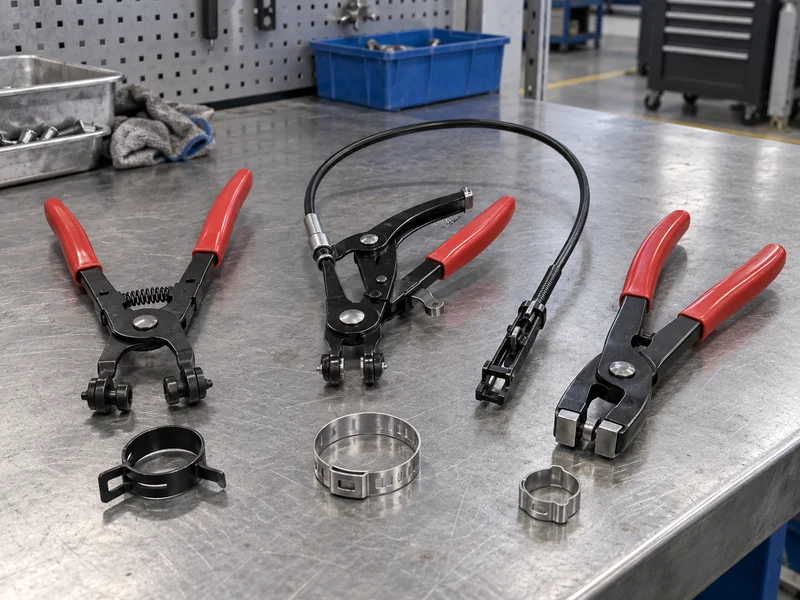
Clamp family fit matrix
| Clamp family | Main tool action | Interface to confirm | Common buying error |
|---|---|---|---|
| Flat-band spring | Compress, hold, and move | Rotating or fixed grip inserts | Treating diameter as universal |
| Wire clamp | Compress or release wire loop | Narrow hook, pin, or jaw | Using a broad jaw that slips |
| Ear clamp | Press a defined ear | Front or side crimp profile | Calling a generic plier suitable |
| Screw or worm-drive | Turn screw head | Nut driver, bit, or socket | Ignoring head size and access |
Record clamp family and action in the RFQ title.
2. How do flat-band spring clamp pliers differ?
Flat-band spring clamps maintain radial load as a hose changes slightly with temperature and age. Their pliers need a dependable grip on clamp tabs or band edges. A narrow head helps in crowded compartments.
Look at jaw movement under load, not only at the open position.
- Specify fixed, rotating, or universal grip inserts.
- Ask whether the jaws can hold the clamp open without continuous hand force.
- Separate nominal clamp diameter from actual jaw opening.
- Check handle mechanical advantage against the largest approved clamp.
- Include replacement inserts when wear changes clamp contact.
For an automotive program, place this family beside the automotive repair tools assortment. Ask for a production-intent hose fixture, not a loose clamp.
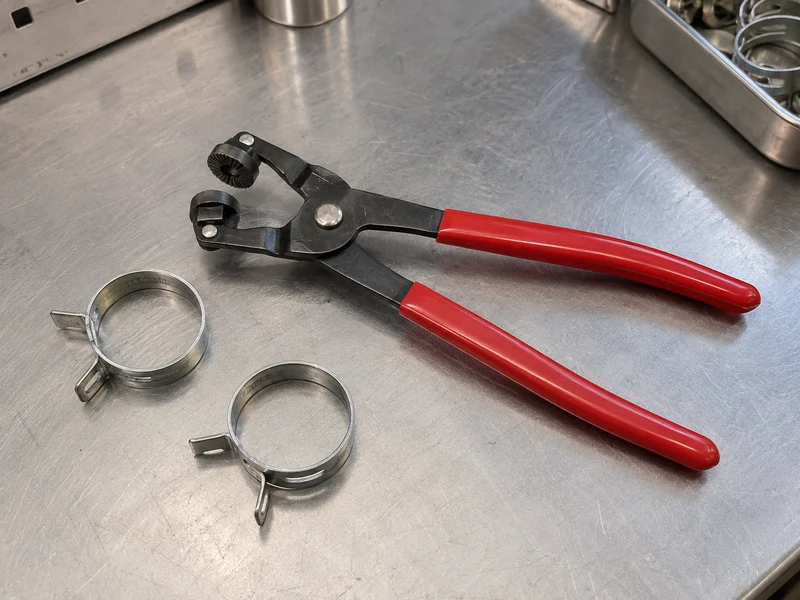
Flat-band specification matrix
| Field | What to request | Approval evidence |
|---|---|---|
| Jaw insert | Material, profile, rotation, spare part | Drawing and sample |
| Adjustment | Positions or direct-slide method | Function check |
| Holding action | Hold-open feature and release behavior | Cycle sample |
| Opening range | Clamp basis and measured limit | Fixture measurement |
| Access | Head width and approach angle | Assembly mock-up |
Approve a flat-band model only after it grips the largest and smallest clamp in your defined range without band distortion.
3. When do wire clamp pliers fit better?
Wire clamps use a formed wire loop or spring section rather than a broad stamped band. Tool contact therefore concentrates at a small area. Pliers with narrow tips can engage the wire, but a tip that is too sharp, too wide, or poorly aligned may slide off or mark the clamp.
Wire clamps reward controlled contact.
- Identify loop diameter, wire section, and release direction.
- Specify tip radius, width, and working length.
- Confirm whether the tool must move the clamp along a hose.
- Check spring return and handle clearance.
- Keep a separate model row for wire clamps with different loop geometry.
Use the industrial maintenance solutions page to plan where wire-clamp pliers sit in a broader maintenance assortment. Keep a wire-clamp fit drawing with the SKU.
A supplier should state whether a tool is intended for a standard wire clamp, a proprietary loop, or named clamp designs. “Fits all” wording has little value without tip dimensions and sample limits.
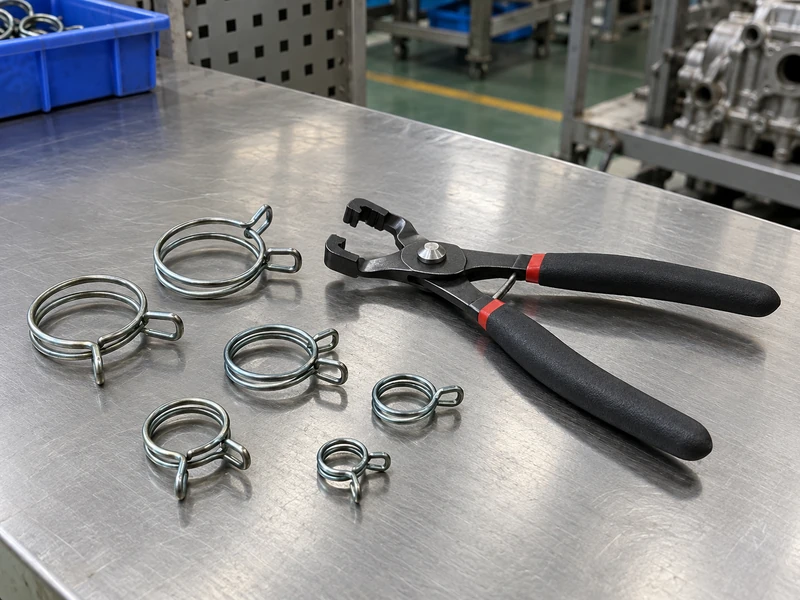
Wire-clamp specification matrix
| Wire-clamp variable | Why it affects fit | Buyer check |
|---|---|---|
| Wire diameter | Changes contact pressure | Measure approved clamp |
| Loop shape | Controls hook or jaw seating | Sample engagement |
| Release direction | Sets handle approach | Assembly trial |
| Tip profile | Controls slip and marking | Magnified inspection |
| Working length | Determines reach | Fixture with obstruction |
Add one approved wire-clamp sample to the supplier’s golden sample file. Keep it tied to the model and revision rather than to a generic tool family.
4. Why specify cable-operated remote pliers?
Cable-operated pliers move the hand controls away from the clamp. That separation helps when a hose clamp sits behind a fan shroud, bracket, or deep engine-bay structure. Cable routing becomes part of the tool’s mechanical design, so length, bend radius, spring protection, and clamp retention need equal attention.
Remote access works only when the cable path stays predictable.
- Specify cable length and usable working radius.
- State whether the cable may cross a fixture edge or must remain supported.
- Check cable return after repeated opening cycles.
- Confirm the end clamp matches flat-band or named wire designs.
- Request a replacement cable and clamp assembly part number.
An official flexible tool example lists a 24-inch cable, a spring within its cable assembly, and a hold-open action. Use those as RFQ fields, not universal claims.
Include cable tools in mechanics tool sets only after the case layout protects the cable from sharp bends.
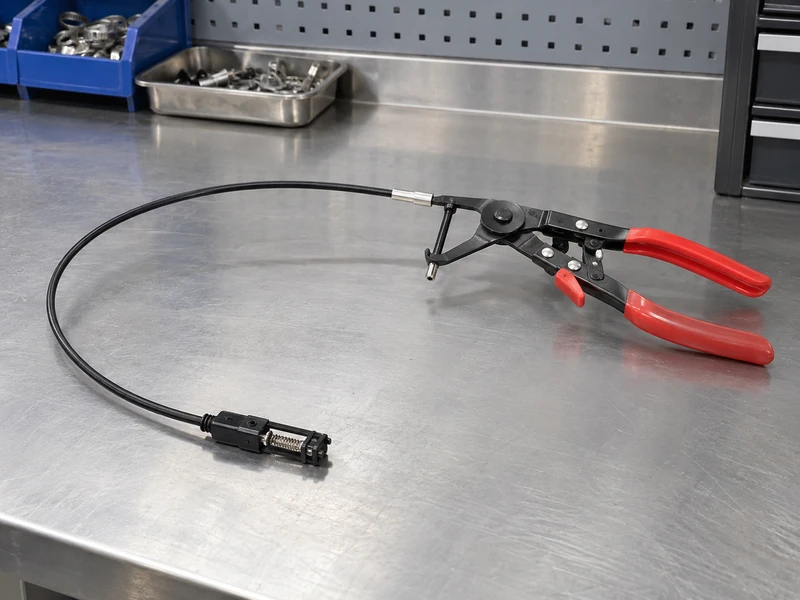
Cable-operated specification matrix
| Cable field | Supplier response | QC method |
|---|---|---|
| Cable length | Nominal and usable length | Measure sample |
| Bend condition | Minimum supported radius | Routed fixture |
| End mechanism | Clamp family and jaw type | Engagement check |
| Retention | Hold-open and release behavior | Cycle test |
| Spare path | Cable and end assembly numbers | Parts list |
Route the sample through the intended obstruction before approval.
5. What do locking swivel jaws add?
Locking jaws can hold a spring clamp open while an operator moves a hose or checks a fitting. Swivel inserts can align with a clamp that sits at an angle. Those features reduce hand force during a defined task, yet they add parts that need inspection: pivots, locks, springs, pins, and jaw seats.
A holding feature earns its place when it stays controlled.
- Specify whether the lock holds a clamp open or only stores the plier.
- Check swivel freedom without side play that lets the jaw roll off.
- Verify release can happen deliberately with gloves.
- Inspect pivot fasteners and jaw retention.
- Test the lock at both ends of the approved clamp range.
When assembling a distributor range, cross-reference the complete mechanic tool list so locking clamp pliers have a clear use case.
Swivel does not mean self-aligning. The clamp’s tab, wire, or band still needs full jaw contact.
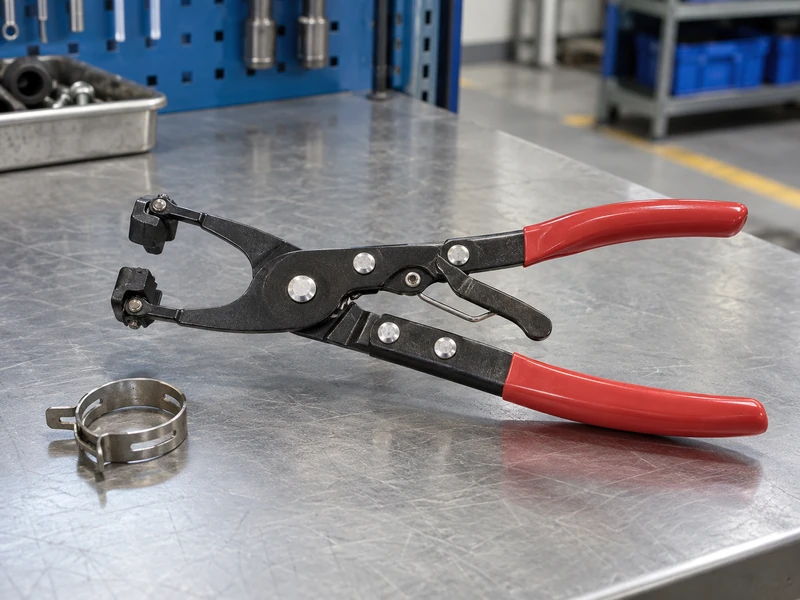
Locking-jaw specification matrix
| Feature | Buyer benefit | Risk to test |
|---|---|---|
| Locking action | Frees one hand during movement | Lock slips under load |
| Swivel insert | Aligns with angled clamp | Side play or roll-off |
| Pivot joint | Supports movement | Wear or loose hardware |
| Release control | Speeds changeover | Accidental release |
Make a lock-and-release video part of the sample record. Show the clamp, jaw contact, and operator hand position in one frame.
6. How should ear clamps be crimped?
Ear clamps use a defined ear or ears that are pressed during assembly. Their tool is a crimping pincer with a front, side, or compound-action profile matched to the clamp. This family needs careful wording because generic pliers can deform the ear or load the band unevenly.
Press the specified ear surface with the specified jaw profile.
- Identify one-ear, two-ear, stepped, or low-profile clamp construction.
- State front or side crimping access.
- Request jaw width, nose shape, and closing-force guidance.
- Verify the clamp maker’s installation and replacement policy.
- Keep hot or pressurized hose work outside a DIY recommendation.
Official pincer pages list standard, side-jaw, and closing-force conditions. Such evidence supports model-specific RFQ fields.
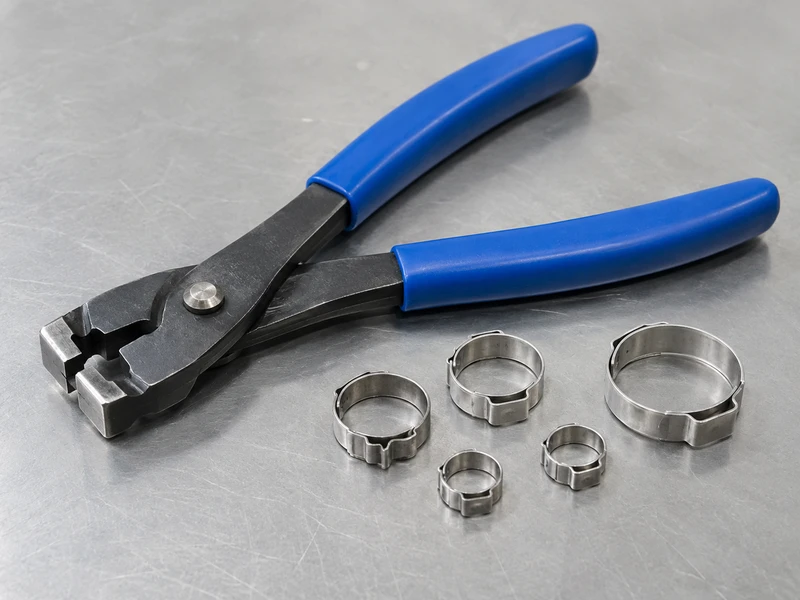
Ear-clamp specification matrix
| Ear-clamp field | Why it matters | Evidence |
|---|---|---|
| Ear count | Changes crimp sequence and access | Clamp drawing |
| Crimp direction | Selects front or side jaw | Assembly fixture |
| Nose profile | Controls ear contact | Tool drawing |
| Closing force | Prevents under- or over-crimping | Tool or clamp guidance |
| Replacement rule | Defines repeat-use boundary | Clamp maker instruction |
Ask for an approved crimp sample with dimensional or visual acceptance criteria. Do not promise reuse unless the clamp maker explicitly permits it.
7. What changes with screw or worm-drive clamps?
Screw and worm-drive clamps are tightened by turning a screw head, not by squeezing spring tabs. A plier may help position a loose band, yet the final tool usually needs a compatible nut driver, bit, socket, or specified hand tool. The clamp head, band slots, and access angle control the choice.
A screw clamp belongs in a driver specification.
- Record hex size, slot type, or proprietary drive interface.
- Check driver length and angle around the fitting.
- Confirm the band can seat without twisting.
- Request torque or closing guidance from the clamp maker.
- Separate hand-driver use from powered or impact use.
For hex-head clamps, compare compatible socket tools by drive size, reach, and clearance. Keep the clamp maker’s tightening limit with the selected driver.
For a private-label program, list clamp material, band width, screw head, and driver interface.
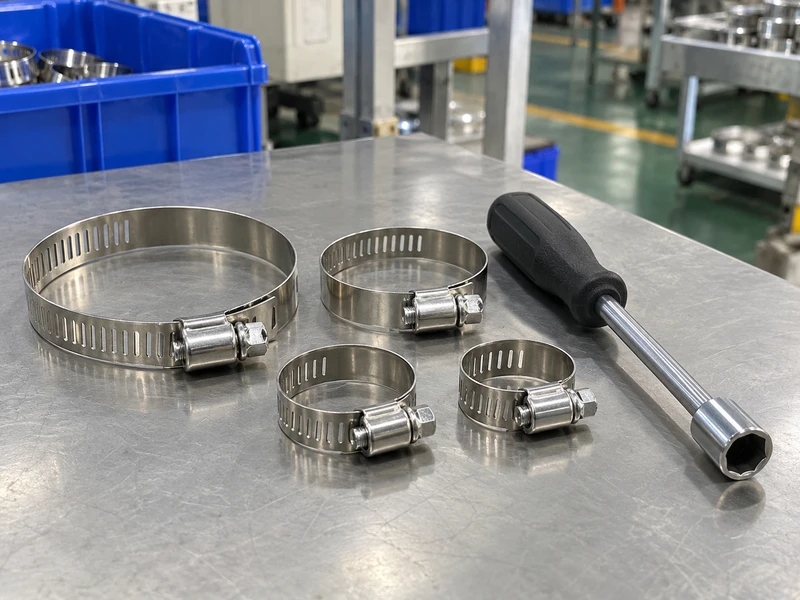
Screw-drive specification matrix
| Screw-clamp field | Tool implication | Approval check |
|---|---|---|
| Head style | Driver or socket choice | Engagement sample |
| Hex size | Socket or nut-driver dimension | Gauge check |
| Band width | Access and slot alignment | Fixture trial |
| Tightening guidance | Hand or powered boundary | Supplier document |
| Band seating | Prevents skewed load | Visual inspection |
Request a driver sample with the clamp. Review access and band seating together before listing a kit.
8. How do fit and cable-retention limits affect QC?
QC should prove that a named plier, clamp, and fixture work as one system. Incoming inspection can cover jaw dimensions, alignment, pivot movement, handle return, cable retention, lock release, markings, and package contents. It cannot turn an unapproved clamp application into a valid one.
A fit record is stronger than a catalog photograph.
- Match tool model and revision to the purchase order.
- Measure jaw opening, tip width, angle, and head width.
- Fit the tool to the approved clamp on the actual hose fixture.
- Route a cable through the intended obstruction and check retention.
- Record slips, jaw marks, lock release, and permanent clamp deformation.
Use supplier information for company context, then keep technical acceptance in the product file.
For fluid systems, use a trained service process covering isolation, temperature, pressure, and leak checks. This article gives no DIY hot or pressurized hose procedure.
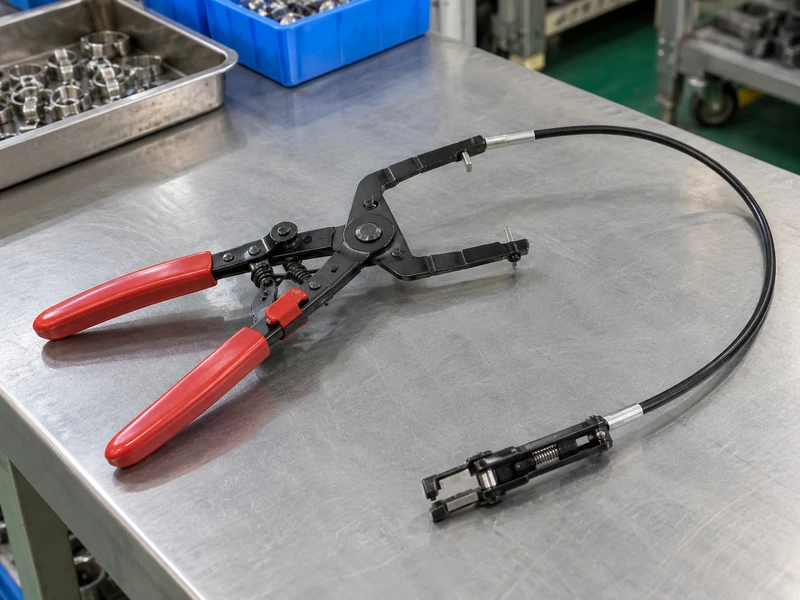
QC acceptance matrix
| QC point | Sample evidence | Hold point |
|---|---|---|
| Jaw fit | Photo and measurement | Before bulk approval |
| Cable retention | Routed cycle record | Before remote-tool listing |
| Locking action | Open, hold, release record | Before kit packing |
| Crimp profile | Approved ear sample | Before ear-clamp launch |
| Marking and pack | SKU, instructions, spare count | Before shipment |
Set a written acceptance limit for each tool family. If a supplier changes parts, repeat the fit check.
9. How should kits and replacement parts be planned?
A hose clamp program rarely needs one universal body. It needs a base range covering the clamp families customers actually service, plus spare jaws, cables, pivots, locks, and fasteners. Kits should make each configuration visible instead of mixing parts in one untraceable pouch.
The spare part is part of the product plan.
- Choose base tools by clamp family and access condition.
- Give each jaw, cable, and lock a reorder identifier.
- Separate production-intent parts from demonstration accessories.
- Label mixed kits by clamp type, not only by piece count.
- Keep a replacement forecast based on service frequency and wear.
Review the complete mechanic tool list when building a broader assortment. Keep the hose-clamp module identifiable inside a mechanics set.
Product data should state clamp family, jaw configuration, range basis, and cable or lock limits.
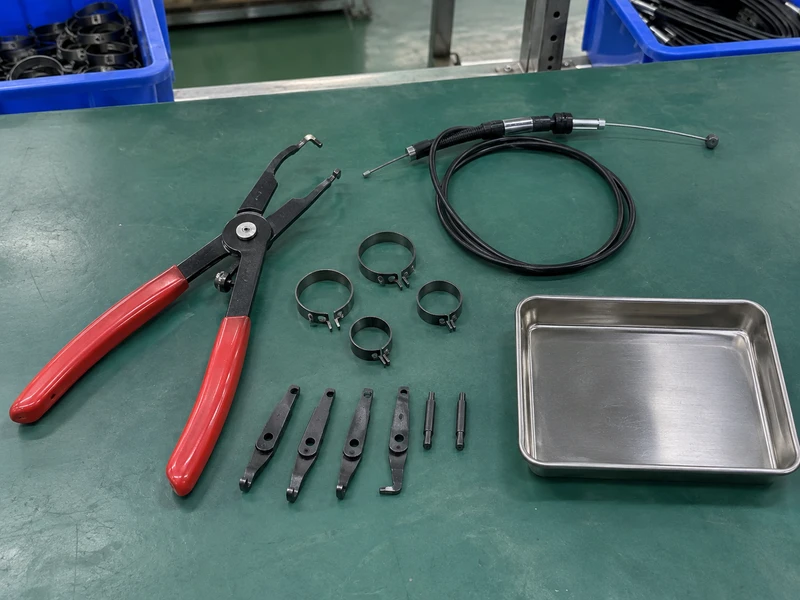
Kit and spare-parts matrix
| Kit element | Buyer decision | Record to keep |
|---|---|---|
| Base plier | Which clamp family? | Model and drawing |
| Jaw set | Fixed, rotating, or crimp profile? | Part number and fit |
| Cable assembly | What length and routing? | Length and replacement ID |
| Lock or pivot | What service role? | Cycle check |
| Storage | How are parts identified? | Packing diagram |
Build a pilot kit with one sample of every spare. Count, label, and test the kit before approving a production pack.
10. What should an RFQ for hose clamp pliers include?
An effective RFQ turns a clamp problem into measurable fields. Send the clamp drawing or sample, hose and fitting geometry, access photo, required action, expected quantity, packaging, and evidence request. Ask the supplier to separate standard product data from model-specific claims.
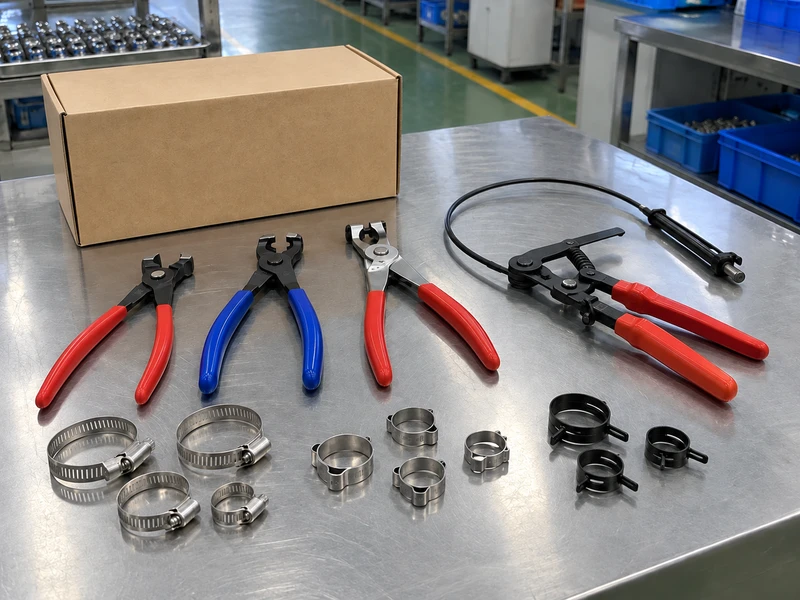
A good RFQ makes the sample easy to reject or approve.
- Name each clamp family and intended action.
- State jaw or driver interface, range basis, and access angle.
- Request drawings, replacement-part IDs, and cable data.
- Define fit, retention, marking, and packaging checks.
- State that hot or pressurized hose service follows an approved procedure.
Use the contact page after the specification pack is complete. Include the target market, SKU mix, sample quantity, package format, and required inspection records.
Ask for a sample response that fills every field. A blank range column should trigger technical follow-up.
Q1: Are spring-band and wire clamp pliers interchangeable?
Only when the supplier documents both clamp geometries and the approved sample confirms contact, opening, movement, and release. A similar diameter does not prove a similar jaw interface.
Q2: Does a locking feature make a clamp tool safer for every job?
No. It can hold a defined clamp open, yet the lock, jaws, and clamp load still need model-specific inspection. The feature does not replace a trained service procedure.
Q3: Can ear-clamp pliers be sold as reusable clamp tools?
Do not make that promise without the clamp maker’s written reuse policy. Many ear-clamp systems use a defined crimp, and the accepted replacement rule belongs in the product file.
Q4: What cable length should a remote tool use?
Choose length from the actual obstruction and routing path. Request usable reach, bend limits, end assembly details, and retention evidence. A longer cable may add routing problems.
Q5: What should a distributor request with a hose clamp plier sample?
Request the tool drawing, clamp compatibility basis, fit photos, range limits, replacement-part list, operating instructions, marking, and packing sample. Keep the approved fixture record with the SKU.
Looking for a reliable mechanic tools manufacturer in China?
If you are sourcing hand tools, socket tools, automotive repair tools, mechanic tool sets or OEM private label tools, contact KOLARWIN Tools for factory-direct quotation, customization support and product consultation.