Need OEM supplier support for this product type?
Contact KOLARWIN Tools for OEM mechanic tools, private label packaging, wholesale quotation and product range support. This gives overseas buyers a clear path from article reading to supplier discussion.
Traditional tin snips use a direct pivot and lever action. Aviation snips add compound linkage, which multiplies hand force through more than one pivot. That mechanism is the main difference. Cut direction, offset geometry, spring return, and handle color are separate model features. Buyers should verify each feature against a manufacturer’s model number, label, and rating instead of guessing from appearance. Material capacity depends on alloy, hardness, thickness, jaw condition, and maker specification, not handle count alone.
1. What is the main difference between aviation snips and tin snips?
Traditional tin or tinner snips often have a straightforward pivot that works like a heavy hand shear. Aviation snips use compound linkage between handles and cutting jaws. That extra linkage can increase mechanical advantage, while a spring return appears on many models but should be confirmed for each product. Retail names sometimes overlap; compare mechanism, blade geometry, and product rating.
Use these details for a first decision:
- Choose traditional tin snips when a direct lever pattern and intended material rating fit the task.
- Consider aviation snips when compound linkage and model-specific cutting options serve the job.
- Treat spring return, cut direction, blade length, and offset as separate characteristics.
- Confirm rated alloy and thickness in the manufacturer’s specifications.
Mechanism first, label second. Sterling describes aviation snips with compound leverage and distinguishes them from tin snips. Malco’s aviation product information also identifies compound linkage. Those sources support the basic comparison, but neither justifies a universal capacity number. For nearby cutting-tool choices, see the flush cutters versus diagonal cutters guide; those tools address different stock and work conditions.
Quick comparison
| Feature | Traditional tin/tinner snips | Aviation snips |
|---|---|---|
| Handle-to-jaw action | Typically direct single-pivot lever | Compound linkage on aviation models |
| Spring return | May vary by design | Common on many models; verify SKU |
| Cut options | Straight, pattern, or other maker-specific forms | Straight, left, right, and offset variants exist |
| Selection basis | Rated material, cut path, hand feel | Mechanism, cut path, offset, rating |
2. How does compound leverage change the tool?
Compound linkage uses multiple pivots that transfer hand force through the jaws. It may let an operator cut a specified sheet material with less hand force than a direct-pivot design of similar size, though performance still depends on geometry and material. The linkage does not create a universal multiplier for every product. Handle spread, blade condition, pivot adjustment, material alloy, and hardness affect effort and result.
When comparing samples, inspect the mechanism and operating cycle:
- Count the linked pivot points, but do not treat count as a force rating.
- Check whether a return spring opens the handles after each cut.
- Look for a latch or lock and confirm its intended position.
- Follow manufacturer guidance for pivot adjustment and lubrication.
Linkage explains action, not capacity. Sterling describes the compound mechanism as a set of joints and pivots, while Malco identifies compound linkage on aviation models. Buyers should record those design facts without adding an unsupported force ratio. For general hand-tool range planning, the industrial maintenance tool buyer guide can help position snips within a broader category. Keep actual material and gauge limits with each SKU.
Mechanism review
| Feature | What it tells a buyer | What it does not establish |
|---|---|---|
| Compound linkage | Multiple pivots transfer handle motion | No universal force ratio or capacity |
| Return spring | May reopen handles after a cut | Not proof of better cutting performance |
| Pivot bolt | Holds blade alignment and movement | Does not replace maker maintenance guidance |
| Latch | May hold handles closed for storage | Does not confirm cutting direction or rating |
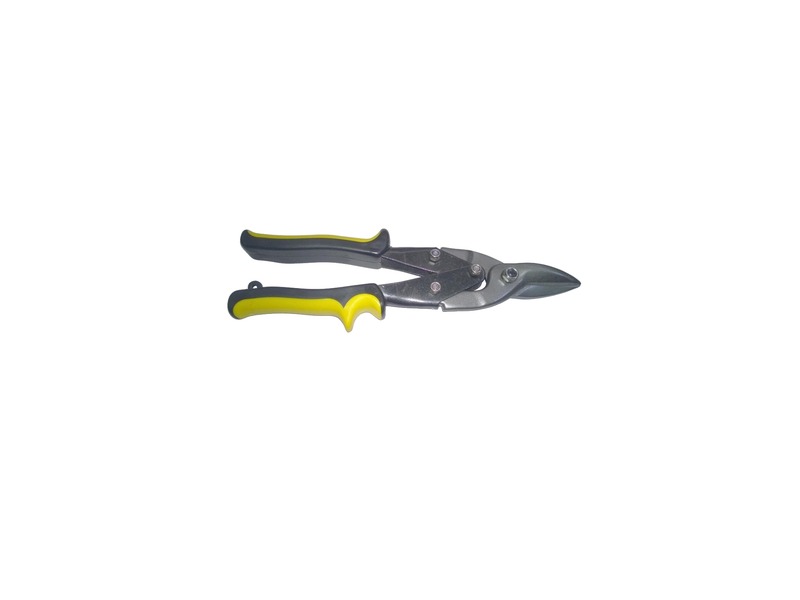
3. What do left-cut, right-cut, and straight-cut labels mean?
These labels describe the cut path as a maker defines it. They do not tell which hand must hold the tool. Aviation snips commonly appear in left-cut, right-cut, and straight or combination options. Handle colors may help identify a model family, but colors are not a universal specification. Malco’s catalog, for example, associates red with left-cut, green with right-cut, and yellow with straight or combination on named models. Another model or maker may use a different scheme.
Before ordering by color, confirm:
- Full model number and product description.
- Whether the tool cuts straight, left, right, or multiple paths.
- Manufacturer’s color mapping for that exact family.
- Any difference between standard, long-cut, vertical, or offset versions.
Use model numbers over color alone. Eastwood outlines a red/green/yellow convention, and Malco lists colors for specific AV models. The article treats those as examples, not a universal code. Buyers should specify “left-cut,” “right-cut,” or “straight-cut” with a maker part number. If your project involves layout before cutting, the center punch use guide covers a related marking tool; its use does not determine snip direction.
Direction and color examples
| Example in Malco AV catalog | Named cut option | Buyer instruction |
|---|---|---|
| AV1/red | Left cut | Verify current model label and catalog |
| AV2/green | Right cut | Verify current model label and catalog |
| AV3/yellow | Straight, left, and right | Verify exact combination capability |
| Other brand/model | May differ | Order by model number and written cut description |
4. How is offset geometry different from cut direction?
Offset describes cutting-head position relative to handle and hand; left or right describes cut path. A snip can be left-cut and offset, right-cut and offset, or configured without that offset. The angle, clearance, and hand position vary by design. A raised or angled head may keep a hand farther from sheet edges or improve access in a particular orientation, but buyers should verify the product drawing instead of relying on broad claims.
For a model review, check:
- Head angle and clearance above the sheet.
- Whether offset is named in the catalog or model suffix.
- Cut direction separately from head orientation.
- Handle shape and clearance around a panel edge or flange.
Treat offset as geometry, not handedness. Malco’s catalog lists offset left- and right-cut aviation models as separate descriptions, showing those terms can coexist. Ask for a photo or drawing of the actual SKU when hand clearance matters. For sheet-metal assemblies, stable workholding also matters; match any clamp to the workpiece and setup.
Geometry checklist
| Term | Describes | Confirm separately |
|---|---|---|
| Left/right/straight cut | Cut path named by maker | Model’s stated cutting direction |
| Offset | Head position relative to handles/sheet | Angle, clearance, and model variant |
| Long cut | Cutting-edge length or model feature | Exact cut length, not overall tool length |
| Vertical | Jaw orientation in named models | Clearance and intended access direction |
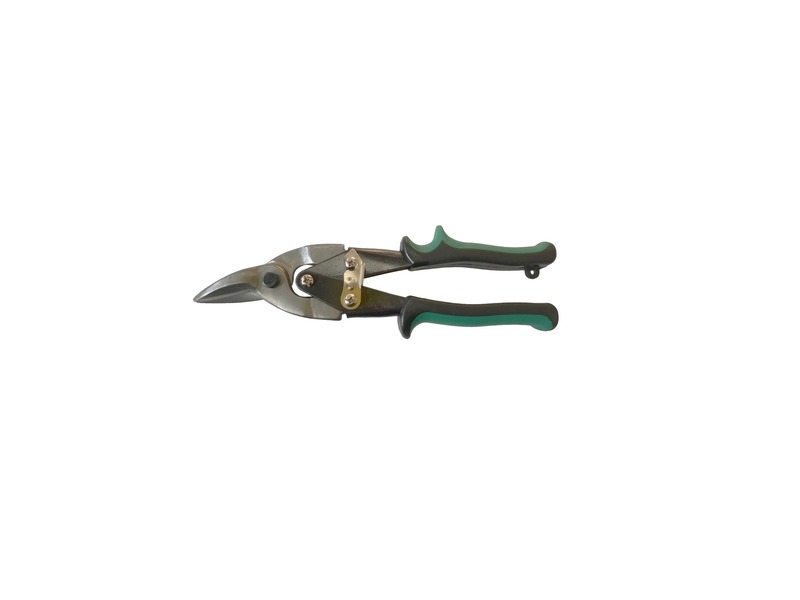
5. Which snips fit straight lines, curves, and tight shapes?
The cutting task matters more than a color cue. Straight-cut models may suit straight lines and limited curves; left- and right-cut versions may help follow curves in their specified direction. Offset models change clearance, while long-cut models change edge length. The cut can also depend on sheet support, material thickness, blade sharpness, and operator control. No snip guarantees a perfect curve or clean edge across every material.
Match the intended path to actual model features:
- Review the maker’s stated straight, left, right, or combination capability.
- Compare cutting-edge length with the planned cut length and access.
- Check whether the design is offset, vertical, or standard.
- Use an approved sample material when supplier documentation permits evaluation.
Choose for the path you need to follow. A short radius, long straight seam, or corner cut may call for different geometry. Avoid describing red and green as left-handed and right-handed tools; labels refer to cut direction in these cited examples.
Task-to-feature map
| Task | Feature to consider | Evidence to confirm |
|---|---|---|
| Straight line | Straight-cut or combination model | Maker’s stated path and material rating |
| Left or right curve | Matching cut-direction model | Direction shown in model documentation |
| Long seam | Long-cut edge, where offered | Published cutting-edge length |
| Tight access | Offset or vertical geometry | Drawing, photo, and clearance details |
6. How should buyers evaluate material and gauge capacity?
A gauge number alone does not determine whether a snip can cut a workpiece. Capacity depends on alloy, hardness, thickness, blade geometry, tool condition, and the maker’s test or rating basis. “Mild steel,” stainless steel, aluminum, and other materials can behave differently at the same thickness. Use a published rating for each named material; never infer capacity from handle size, linkage count, or another model’s specification.
Ask suppliers to provide:
- Rated material types and maximum thickness for each material.
- Whether the rating assumes a particular alloy or hardness.
- Model-specific cutting length and limitations.
- Instructions for sheet support and approved use.
- Confirmation that a sample test will not void warranty or exceed guidance.
Capacity belongs to the exact model. A manufacturer may publish different ratings across snip families or materials. Keep those values tied to SKU, revision, and rating conditions. For related maintenance assortment planning, see the mechanic tools list, while avoiding any assumption that its general tool mix confirms a snip’s capacity. Record limits in product data and on buyer-facing pages only when documentation supports them.
Capacity qualification table
| Capacity detail | What to ask for | Do not infer from |
|---|---|---|
| Material | Named alloy or material family | Generic “metal” wording |
| Thickness/gauge | Maker’s rating for that material | Gauge alone across different alloys |
| Model | Exact part number and version | Similar handle color or overall length |
| Use condition | Blade condition and allowed cutting mode | Compound linkage or pivot count |
7. What ergonomic and maintenance factors affect daily use?
Daily use can involve repeated opening, closing, and turns through sheet material. Handle spread, grip profile, spring return, latch location, and tool weight affect user fit. Those details differ by model and should be checked with the intended users. Cutting edges and pivots also need care under maker guidance. Freshly cut sheet metal can have sharp edges, so work practices should account for handling and storage, not just snip selection.
For product and user review:
- Check handle opening and grip with the intended user group.
- Confirm spring return and latch operation, if fitted.
- Inspect pivot movement and blade alignment.
- Keep cutting edges clean and follow maker maintenance instructions.
- Separate damaged or dull tools for evaluation or replacement.
Test fit before standardizing. A handle that suits one user may not suit every shift or glove size. The hand tools for home repairs guide covers broader hand-tool kit planning; for commercial ranges, collect user feedback on repeated tasks and packaging. Do not make claims about fatigue reduction unless supported by product-specific evidence or an approved evaluation.
Daily-use review
| Detail | Check | Record |
|---|---|---|
| Handle spread | Comfortable close and release for user | Model and feedback group |
| Return spring/latch | Operates and engages as designed | Present/absent and condition |
| Pivot and edges | No visible looseness or damage | Inspection result and action |
| Storage | Latch or packaging protects tool as intended | Pack style and care instructions |
8. How should a distributor structure a snips range?
A useful range separates mechanism, direction, and geometry. A single-pivot traditional tin snip is not the same product as an aviation snip with compound linkage. Within aviation snips, straight, left, right, offset, vertical, or long-cut options may solve distinct access problems. Build variants only when buyer demand or documented work conditions justify them. Avoid duplicate SKUs distinguished only by handle color unless model and cut descriptions are also clear.
A product matrix can track:
- Traditional tin/tinner versus compound aviation mechanism.
- Cut direction and whether the model supports multiple paths.
- Offset, vertical, or long-cut geometry.
- Material ratings and replacement or service information.
- Packaging, labels, and regional requirements.
Keep the catalog filters independent. A customer may want a right-cut offset model; that is two attributes, not one. A catalog should let buyers compare them separately. The mechanic tool set guide for distributors and auto mechanic tools must-haves guide can support broader kit planning, while snip-specific fields remain tied to maker data.
Assortment map
| Range field | Example values | Why separate it |
|---|---|---|
| Mechanism | Traditional pivot; compound linkage | Defines action and design family |
| Cut direction | Straight; left; right; combination | Defines path, not user handedness |
| Geometry | Standard; offset; vertical; long cut | Defines clearance and edge layout |
| Material rating | Maker-listed material/thickness | Prevents unsupported capacity claims |
| Color/model | Maker-specific code and part number | Avoids color-only identification |
9. What belongs in a metal snips RFQ?
A strong RFQ names the workpiece and asks for model-specific evidence. State the material, alloy if known, thickness, cut path, and access limits. Then specify mechanism, offset, handle preference, and packaging. If the team has a color preference, treat it as secondary to model number and cut description. Ask suppliers to identify deviations rather than silently offering a similar-looking tool.
Include these inputs where relevant:
- Traditional tin snips or compound aviation snips.
- Straight, left, right, or combination cut path.
- Offset or vertical head requirement.
- Material, thickness, and published capacity requirement.
- Tool length, cutting-edge length, finish, packaging, and documents.
List required features clearly. Use the maker’s full model number and request a current data sheet or catalog page. If adding a photo to an RFQ, label visible geometry only after confirming sample identity. Broader product pages, such as household tool kit buying guidance, can help with category layout; it cannot replace metal snips’ model specifications. Request current MOQ, price, and timing directly for the project instead of assuming them.
RFQ checklist
| RFQ field | Buyer input | Supplier response needed |
|---|---|---|
| Mechanism | Tin/tinner or compound aviation | Exact model and mechanism description |
| Cut and geometry | Direction, offset, long-cut, or vertical | Model-specific diagram and label |
| Material | Alloy and thickness | Published rating and test basis |
| Product data | Dimensions, finish, model number | Current data sheet or catalog reference |
| Commercial | Pack, label, market, documents | Project-specific quotation terms |
10. How can buyers verify samples before approval?
Start by checking model number, packaging, handle color, and cut description against the approved data sheet. Confirm that color is consistent with that maker’s model information, then inspect mechanism and geometry. Move the pivot through its range and check spring and latch function where fitted. If a sample cut is appropriate, use only the manufacturer-rated material and thickness under its guidance. Do not test beyond published limits to “prove” a product claim.
Before approval:
- Match SKU, cut path, and offset against the quotation.
- Record material and thickness used for any approved sample review.
- Note pivot, blade, spring, and packaging condition.
- Resolve gaps in documentation before releasing product information.
Approve the specific model, not a visual impression. Hold approval if a sample differs from its data sheet or intended geometry; request clarification. Snip approvals require current maker records, regardless of any broader kit assortment. Send model numbers, target materials, cut direction, offset, packaging, and documentation needs through KOLARWIN’s contact page.
Frequently asked questions
Q1: What is the main difference between aviation snips and tin snips?
Traditional tin snips generally use a direct pivot, while aviation snips use compound linkage. Check the exact product construction because naming can vary.
Q2: Do red and green handles always mean left and right cut?
No. Makers use color on particular models, but buyers should verify model number and cut description instead of assuming a universal code.
Q3: Does a right-cut snip mean it is for a right-handed user?
No. Left and right indicate cut path as described by a maker; they do not specify operator hand.
Q4: Can gauge alone tell me if snips will cut a sheet?
No. Capacity depends on material, alloy, hardness, thickness, model, and manufacturer rating.
Q5: What should be included in an aviation snips RFQ?
Specify mechanism, cut path, offset, material and thickness, model requirements, packaging, and required product documentation.
Looking for a reliable mechanic tools manufacturer in China?
If you are sourcing hand tools, socket tools, automotive repair tools, mechanic tool sets or OEM private label tools, contact KOLARWIN Tools for factory-direct quotation, customization support and product consultation.