Need OEM supplier support for this product type?
Contact KOLARWIN Tools for OEM mechanic tools, private label packaging, wholesale quotation and product range support. This gives overseas buyers a clear path from article reading to supplier discussion.
Choosing between a C clamp and an F clamp comes down to workpiece geometry, required opening, throat reach, and model-specific force. A C frame suits compact setups with a known gap; a sliding-arm F clamp adjusts across a rail. Buyers should compare actual specifications rather than assume one style always grips harder or reaches farther.
1. What is the difference between a C clamp and an F clamp?
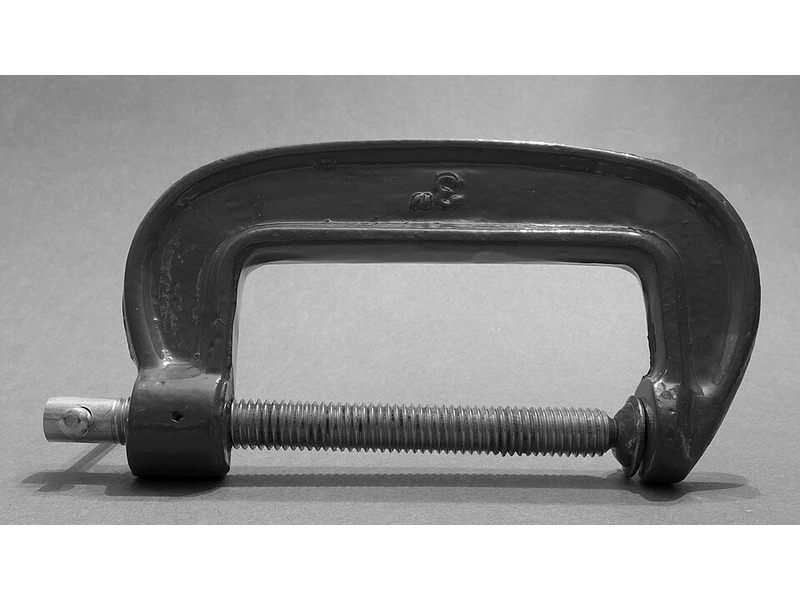
A C clamp has a rigid, C-shaped frame. A threaded spindle advances through one end of that frame and presses a pad against the workpiece, while the opposing frame end supplies the reaction surface. Its opening changes as the screw turns, within the model’s stated capacity.
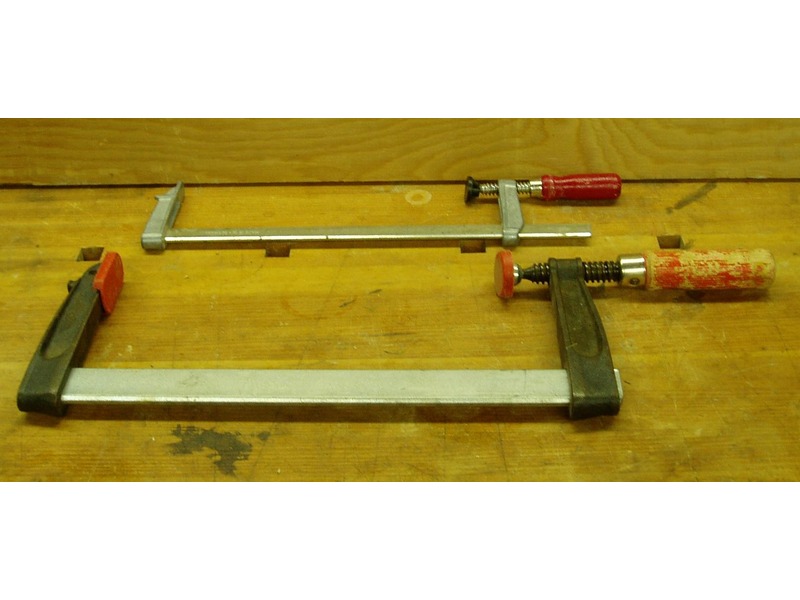
An F clamp uses a long rail with a fixed jaw at one end and a sliding arm that carries the screw and pressure pad. The sliding arm moves along the rail for a rough opening adjustment, then the screw applies pressure. Many people also call this style an F-style bar clamp or sliding-arm clamp.
Here’s the useful distinction: the frame establishes the reach and structure; the screw supplies controlled pressure. Neither shape alone tells a buyer the clamp’s rated force, stiffness, or suitable duty cycle. Those details vary by model and construction.
- Choose a C frame when a compact, fixed throat suits the access path.
- Consider an F style when adjustable jaw spacing along a rail helps setup.
- Check each model’s opening, throat depth, pad design, and rated force.
For a broader overview of clamp families, see types of clamps. Use the model drawing to confirm where each dimension is measured.
Quick comparison
| Buyer check | C clamp | F clamp |
|---|---|---|
| Main structure | Rigid C-shaped frame | Rail with fixed and sliding jaws |
| Opening adjustment | Screw advances through frame | Sliding jaw sets rough opening; screw applies pressure |
| Throat | Fixed by frame geometry | Fixed by jaw and rail geometry for that model |
| Typical selection question | Does the frame fit around the work? | Does the rail opening and jaw reach fit the setup? |
| Force expectation | Verify model rating | Verify model rating |
2. How does each clamp adjust its opening?
On a C clamp, the screw moves through a threaded boss in the frame. Retract it, place the work between the pad and anvil, then turn the handle until both contact points seat. The screw’s travel determines usable opening, subject to the manufacturer’s stated maximum capacity.
On an F clamp, the sliding jaw first travels along the rail. Many designs use a clutch, plate, or other engagement system to hold that jaw in position; the exact mechanism depends on the model. Once the jaw sits near the workpiece, turn its screw for final pressure. This two-stage adjustment can reduce repeated spinning across a wide opening.
For setup speed, measure before you reach for the handle. Record the workpiece thickness and where the clamp must land. A nominal opening that barely clears the work may leave too little travel for seating or pad alignment.
- Check maximum opening against the full stack, including cauls or spacers.
- Leave screw travel for contact and release; avoid running a spindle to its limit.
- Confirm the F-clamp jaw locks or engages as its maker specifies.
Opening and adjustment checks
| Setup factor | C clamp check | F clamp check |
|---|---|---|
| Work stack | Fits within model capacity | Fits between fixed jaw and sliding jaw |
| Coarse adjustment | Retract spindle | Slide movable jaw along rail |
| Final adjustment | Turn spindle by hand | Seat sliding jaw, then turn spindle by hand |
| Before loading | Pad and anvil sit squarely | Jaw engagement and pad alignment are correct |
3. What do opening capacity and throat depth tell you?
Opening capacity describes the maximum gap a clamp can span between its contact surfaces. Throat depth describes how far those surfaces reach inward from the frame or rail. A part may fit through the opening yet remain unreachable if its clamping point sits too far from an edge.
Measure both dimensions on the actual workpiece. Include a fixture, protective pad, or caul when one will sit between the clamp and the part. Then compare your measurements with the maker’s drawing, since product pages may use “capacity,” “opening,” or “reach” differently.
A quick sketch saves a wrong-size order. Mark the edge, target pressure point, full stack thickness, and nearby obstructions. For a C clamp, note whether the frame can pass around the assembly. For an F clamp, note where its rail and sliding arm will sit during tightening.
- Measure opening at the intended clamp location.
- Measure from the workpiece edge to the pressure point.
- Check clearance for the frame, rail, handle, and operator’s hand.
Dimension check before ordering
| Dimension | What it answers | Common fit problem |
|---|---|---|
| Opening or capacity | Will the jaws span the stack? | Work exceeds the rated opening |
| Throat depth | Can pressure reach the target point? | Clamp fits only near an edge |
| Frame or rail clearance | Can the tool sit in position? | Nearby fixtures block the frame or bar |
| Screw travel | Can the pad seat and release? | Screw bottoms out or has insufficient travel |
4. Does a C clamp always provide more force?
No style label settles that question. Listed force depends on the clamp’s size, frame and rail materials, screw design, intended duty, and the manufacturer’s test or rating method. A small C clamp and a heavy-service C clamp can differ substantially; F clamps also span light to heavy designs.
BESSEY’s product data illustrates why model-level comparison matters. Its regular-duty CDF C-clamp listings show different force values across sizes, while BESSEY’s one-hand trigger-clamp range lists another force band. These are different product families, so they do not establish a universal C-versus-F ranking. Compare like-for-like intended service and stated test conditions where available.
Use the published rating as a limit, not a target to beat. Extra leverage from a pipe or wrench can overload the screw or frame. Hand-tighten unless the manufacturer explicitly approves another method for that specific clamp.
- Compare stated force only when the maker identifies the relevant model.
- Ask how a rating was determined if applications require a defined load.
- Do not infer load capacity from appearance, weight, or frame shape.
Model-level force comparison
| Published example | Product detail | What it supports |
|---|---|---|
| BESSEY CDF402 | 2 in capacity; 2 1/8 in throat; 3,500 lb listed force | A specific C-clamp model has a stated rating |
| BESSEY CDF406 | 6 in capacity; 4 1/8 in throat; 6,900 lb listed force | C-clamp ratings vary across sizes |
| BESSEY EHK360 range | Listed force varies by model from 85 to 300 lb | Another clamp family uses its own model-specific ratings |
| Buyer conclusion | Compare the exact models and intended use | Do not generalize one style as stronger |
5. Which design works better around awkward parts?
Access decides more jobs than the clamp’s letter-shaped silhouette. A C frame must pass around the part and fixture; its closed frame can be awkward when an obstruction blocks that path. An F clamp’s rail and sliding jaw can suit a long span, yet the rail still needs a clear route beside or behind the work.
For example, a narrow edge with a nearby wall may accept a compact C clamp if its throat reaches the pressure point. A wide panel may suit an F clamp if its opening covers the stack and its rail clears the bench. A deep assembly could defeat either option when the jaw throat is too shallow.
Mock up the clamp path before choosing a family. Use a cardboard outline or a dimensioned drawing to check the frame, jaw, spindle, and handle at full travel. Include room for your hand and any nearby fixture.
- Check clamp approach from the open side of the assembly.
- Check whether the handle can rotate through its working arc.
- Use a different clamp family if either frame obstructs the process.
Access and geometry checks
| Work condition | C clamp question | F clamp question |
|---|---|---|
| Obstructed edge | Can the frame pass around the part? | Can the rail enter without hitting nearby equipment? |
| Deep pressure point | Does the model’s throat reach it? | Does the jaw reach clear the rail and reach the point? |
| Tight handle clearance | Can the screw handle turn? | Can the screw handle turn after sliding-jaw placement? |
| Multiple clamp positions | Does the frame fit at each position? | Can the rail fit at each position and span the layout? |
6. How should you protect the workpiece and distribute pressure?
The screw pad concentrates force at a small contact area. On a finished surface, soft material, or thin edge, a bare pad can leave marks or distort the work. A replaceable pad, protective block, or caul can spread contact, but the accessory must remain stable and suit the workpiece material.
For a glue-up, plan clamp placement before applying adhesive. Use enough clamps to hold the joint closed and aligned, then tighten in a controlled sequence. A bar clamp may suit a longer panel; a C clamp may help with a local point where its frame fits. See the separate bar clamp vs pipe clamp guide for another long-span comparison.
Pressure should hold a sound fit together, not force a poor fit into shape. BESSEY’s safe-use guidance warns against over-tightening and advises hand tightening for ordinary clamps. Follow the chosen model’s instructions where they differ.
- Place pads or cauls where surface protection or load spread is needed.
- Tighten in small increments and inspect alignment as pressure rises.
- Stop if the frame bends, the rail slips, or the work shifts unexpectedly.
Contact and workholding checks
| Risk | Practical control | Buyer detail to specify |
|---|---|---|
| Surface marking | Use a compatible pad or caul | Pad material and replaceability |
| Local crushing | Spread contact over a suitable area | Workpiece material and contact geometry |
| Joint movement | Tighten progressively; verify alignment | Number and placement of clamps in process |
| Clamp slip or damage | Inspect parts and follow maker instructions | Model-specific safe-use guidance |
7. Which clamp is more practical for repeat workshop setups?
Repeat work changes the buying question. A one-off repair may call for whichever clamp fits the job. A production or maintenance bench may need repeatable opening, accessible handles, replaceable pads, clear model identification, and consistent instructions across a set.
F clamps can be convenient where sliding jaws reduce coarse-adjustment time across varying widths. C clamps can be easier to stage where a fixed frame profile fits repeated local clamping points. Those are workflow considerations, not guaranteed speed claims. Run a representative setup with the exact model before standardizing a range.
Try the awkward job, not only the easy sample. Include the largest opening, deepest reach, most delicate finish, and tightest handle clearance in a trial. Record whether operators can seat and release the clamp without improvised extensions.
- Standardize by measured capacity and throat, not broad style names.
- Include spare pads or parts only when the manufacturer lists them.
- Keep operating instructions attached to the selected model.
For a mixed retail range, the household tool kit guide offers broader assortment context; clamp fit still needs its own model checks.
Repeat-use evaluation
| Trial item | What to record | Why buyers need it |
|---|---|---|
| Setup | Time and jaw-position steps for representative work | Shows whether coarse adjustment suits the workflow |
| Fit | Opening, throat, handle clearance, and pad contact | Confirms use across the planned range |
| Repeatability | Slippage, alignment, and operator variation | Identifies process risks before standardization |
| Service | Available pads, parts, and care instructions | Supports maintenance planning |
8. What should a distributor or importer verify before sourcing?
An RFQ should identify the clamp family and the dimensions that determine fit. “C clamp” or “F clamp” alone leaves key choices unresolved. Request model-specific capacity, throat depth, frame or rail section, pad construction, handle type, finish, and declared force when the supplier publishes one.
Also define how samples will be reviewed. Match the intended workpiece, clearance, and surface condition; check jaw travel and contact alignment. If the project requires a force rating, request its documented basis and make acceptance criteria explicit. Never assume a supplier can meet an unlisted material, coating, package, certification, or minimum order quantity.
Make the specification easy to quote. Attach a marked-up sketch or representative sample, then ask the supplier to identify the proposed model and deviations in writing. For broader purchasing context, see woodworking clamps for wholesale and supplier selection for mechanical distributors.
- State opening and throat requirements separately.
- Identify workpiece material, surface, and intended holding task.
- Ask for current drawings, model data, and care instructions.
- Agree sample review and acceptance criteria before order approval.
RFQ checklist
| RFQ field | Information to provide or request |
|---|---|
| Clamp family and model | C frame or F style; exact model reference |
| Fit dimensions | Opening, throat, overall clearance, rail or frame section |
| Contact | Pad type, size, replaceability, and workpiece surface |
| Rating | Published clamping force and its stated basis, if available |
| Commercial details | Packaging, sample plan, order terms, and any deviations confirmed in writing |
9. How do you compare clamp models fairly?
Build a short specification matrix before comparing quotations. Put opening, throat, mass, frame or rail dimensions, pad details, and published force in separate fields. Keep units consistent, and mark missing values as “not stated” rather than estimating them from a photograph.
Do not compare a heavy-duty C clamp with a light-duty F clamp and call the result a style verdict. Compare models intended for similar work, then test fit, handling, and pressure behavior against a defined sample. If force values use different methods or remain unexplained, treat them as non-comparable until the maker clarifies.
A clean comparison keeps evidence attached to each model. Save the product sheet, drawing revision, sample notes, and approved deviations with the quotation. For a wider assortment decision, the industrial maintenance tools buyer guide and mechanic tool list for distributors provide broader category context.
- Compare the same units and measurement definitions.
- Separate published facts from sample observations.
- Record the exact revision or date of each specification sheet.
Fair comparison matrix
| Comparison field | Model A | Model B | Evidence required |
|---|---|---|---|
| Opening and throat | Record stated value | Record stated value | Current maker drawing or product sheet |
| Frame or rail | Record material/section if stated | Record material/section if stated | Manufacturer specification |
| Pad and handle | Record contact design and handle type | Record contact design and handle type | Product data plus sample check |
| Force | Record rating or “not stated” | Record rating or “not stated” | Rating source and method where available |
| Sample result | Record fit and handling notes | Record fit and handling notes | Dated evaluation against agreed criteria |
10. Which clamp should you choose?
Choose by fit first. A C clamp suits a work point when its frame can pass around the assembly and its throat reaches the contact location. An F clamp suits a setup when its sliding jaw and rail provide the opening range and access you need. Either style can be wrong if its model lacks the required clearance, travel, or documented rating.
For purchasing, shortlist models by opening, throat, pad contact, handling clearance, and stated duty. Test a representative sample where repeatability or surface protection matters. Then request written model data and settle acceptance criteria before committing to an assortment.
Send the dimensions with your enquiry. A sketch showing workpiece thickness, reach, contact surfaces, and nearby obstructions gives a supplier a concrete basis for identifying candidate models. Product and sourcing questions can go through KOLARWIN’s contact page.
- Use C-frame geometry when compact access suits the measured job.
- Use an F-style rail when its adjustable jaw helps position the opening.
- Let verified model data decide force, fit, and order details.
FAQs
Q1: Are C clamps and F clamps used for the same jobs?
They can both hold work, but frame access, opening, throat, and model rating determine suitability for a specific task.
Q2: Does an F clamp always have a larger opening?
No. Compare each model’s stated capacity; style names do not set a universal size range.
Q3: Which clamp has more clamping force?
There is no reliable style-wide answer. Compare force ratings for the exact models and intended duty.
Q4: How do I measure throat depth?
Use the manufacturer’s drawing. BESSEY describes throat depth for identification as the distance from the spindle center to the nearest edge of the rail.
Q5: Can I add a pipe to the handle for more force?
Do not add leverage unless the manufacturer expressly approves it for that model. Follow its safe-use instructions.
Looking for a reliable mechanic tools manufacturer in China?
If you are sourcing hand tools, socket tools, automotive repair tools, mechanic tool sets or OEM private label tools, contact KOLARWIN Tools for factory-direct quotation, customization support and product consultation.