Need OEM supplier support for this product type?
Contact KOLARWIN Tools for OEM mechanic tools, private label packaging, wholesale quotation and product range support. This gives overseas buyers a clear path from article reading to supplier discussion.
A buyer comparing automatic vs manual wire strippers is choosing how operators will control cut depth, stripping length, and repeatability across a defined wire mix. Fixed-gauge hand tools, self-adjusting pliers, and powered machines solve different production problems. This guide explains the tradeoffs and gives importers a sample-approval checklist grounded in manufacturer specifications.
1. What does “automatic” mean in wire strippers?
“Automatic wire stripper” can describe two quite different products. A handheld self-adjusting stripper uses a linked jaw mechanism to grip insulation and remove a slug as an operator closes the handles. A powered bench machine feeds or clamps wire and runs a programmed stripping cycle. Some sellers also call spring-opening fixed-notch pliers “automatic,” although the spring only reopens handles; operators still select a notch and control placement.
This distinction changes the buying decision. A self-adjusting hand tool can reduce repeated gauge selection; a powered machine suits a stable workstation. Neither label guarantees universal compatibility or a particular output rate. Phoenix Contact lists model-specific ranges for WIREFOX hand tools and separate settings for its powered WF 1000.
- Fixed-gauge manual stripper: operator selects a marked notch.
- Adjustable manual stripper: operator sets blade depth or a stop.
- Self-adjusting hand stripper: jaws adapt within a stated model range.
- Powered stripping machine: settings and cycle depend on machine design.
Name the mechanism before comparing price. Ask a supplier for an operating video or manual showing how size, depth, and length are set.
Mechanism terminology at a glance
| Buyer term | What it usually describes | What to confirm |
|---|---|---|
| Manual, fixed-gauge | Marked notches cut insulation at set sizes | Listed wire types and gauges |
| Manual, adjustable | Hand tool with a user-set blade or stop | Adjustment method and lock stability |
| Automatic, handheld | Self-adjusting or linked stripping jaws | Supported conductor and insulation range |
| Automatic, powered | Bench machine with powered cycle | Feed, settings, throughput conditions |
2. How do manual and automatic mechanisms differ?
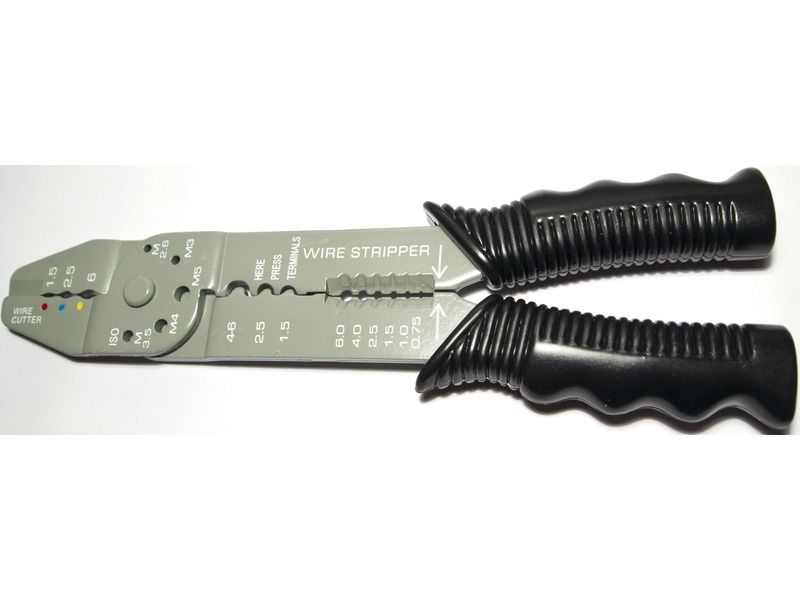
A fixed-notch tool presents separate openings. An operator matches size to a marked slot, seats a conductor, and squeezes. A wrong notch can nick strands or leave insulation behind. An adjustable tool adds a screw, stop, or blade setting, though setup still needs a repeatable procedure.
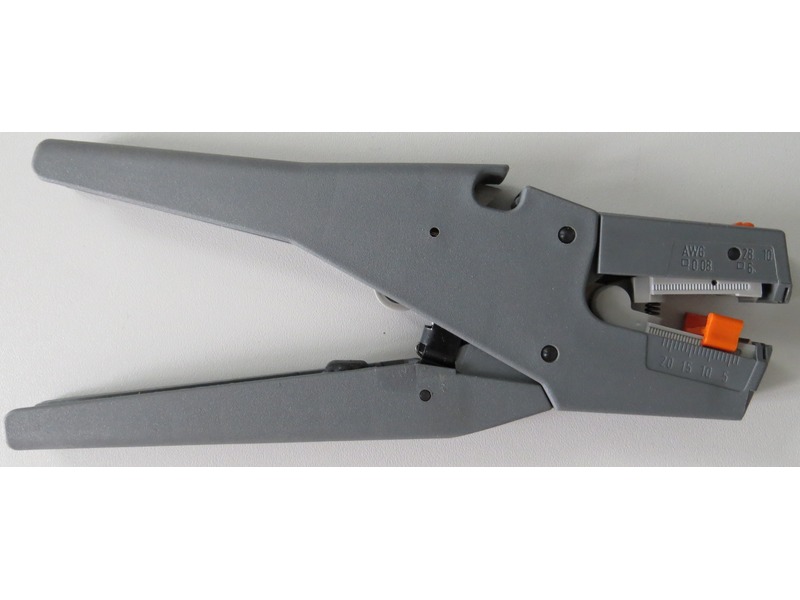
A self-adjusting hand stripper coordinates gripping, cutting, and insulation removal through moving jaws. The name alone says little about blade geometry, cutting capacity, or compatible insulation. A powered unit adds controls, setup, power, and workspace requirements.
Keep stripping and cutting capacity separate when a model combines both functions. For related tool-family context, see our wire stripper versus wire cutter guide and our specialty pliers buying guide.
- Identify whether the tool is fixed-notch, adjustable, self-adjusting, or powered.
- Request separate limits for stripping, cutting, and any additional function.
- Confirm how the tool resets between pieces.
Watch a full cycle, not just a product photo. Ask your supplier to show insertion, cut, pull-off, and release on a representative sample.
Mechanism and operator input
| Tool style | Operator selects size? | Main setup variable | Typical buying concern |
|---|---|---|---|
| Fixed-notch hand tool | Yes | Correct notch and insertion position | Gauge-selection error |
| Adjustable hand tool | Usually | Blade depth or stop | Setting drift or inconsistent setup |
| Self-adjusting plier | Often less selection | Wire position and strip length | Range and insulation compatibility |
| Powered machine | Program or control setting | Wire, length, clamping, and feed | Changeover and maintenance needs |
3. Which tool suits frequent wire-size changes?
Frequent size changes favor tools with recognizable, repeatable setup. A fixed-notch stripper can work well for a small, familiar gauge set, especially when markings are clear. Risk grows when sizes are close together or labels are hard to read.
Self-adjusting hand tools may reduce notch selection within a supported range. Fine-stranded and solid conductors or unusual insulation can still behave differently. Check instructions and test exact wire constructions. Stored settings and changeover speed on powered machines are model-specific.
- List each wire size and estimate its share of total work.
- Include solid, stranded, or fine-stranded construction for every size.
- Record how often operators change between wire families.
Map the wire mix first. Choose a mechanism only after sample trials cover common sizes and boundary cases.
Changeover fit
| Work pattern | Starting point | Approval check |
|---|---|---|
| One or two repeated sizes | Fixed-notch tool may be adequate | Verify notch markings and strip quality |
| Several sizes in rotation | Compare notched and self-adjusting tools | Time realistic changeovers and inspect samples |
| Frequent job changes at one bench | Adjustable or powered equipment may help | Record setup steps and recipe control |
| Mixed construction across sizes | No mechanism removes compatibility testing | Test each construction separately |
4. How does production volume affect the choice?
Production volume matters, but unit count alone cannot select the tool. Varied repair work may favor a compact hand stripper. Repeated assembly may suit a fixed-gauge tool or powered machine when settings and wire feed remain stable. Multiple operators may need simple instructions and visible checks.
Estimate total work content rather than buying on a headline cycle rate. Include loading, measuring, adjustment, inspection, cleaning, and changeover. For a mixed-volume catalog, buyers may carry more than one tool type rather than force every task into a single model.
- Estimate pieces per shift and number of wire setups.
- Include operator handling and inspection time in trials.
- Compare full workstation footprint, not the tool alone.
Run a timed sample batch. Use the same wire mix and quality criteria for each candidate, then include rejected pieces and setup time.
Workload and equipment fit
| Work condition | Manual hand tool | Self-adjusting hand tool | Powered stripper |
|---|---|---|---|
| Low volume, varied jobs | Portable; select notch or setting | Portable; verify each wire falls within its range | May add setup effort |
| Repeated batch at one station | Known sizes simplify selection | Check repeated strip length and hand effort | Verify repeatability on actual wire |
| Many operators | Teach notch selection and setup | Teach insertion, stop setting, and inspection | Control program and training |
| Frequent wire changes | Switch notch or blade setting | Check grip and blade response on each insulation | Verify recipe and changeover features |
5. Which tool handles different insulation and conductor types?
Wire compatibility depends on more than nominal gauge. Check conductor construction and material, insulation type and thickness, and required strip length. Solid and fine-stranded wire of similar area may need different handling. Some insulation types require special blade geometry or settings.
Specify conductor and insulation in separate fields. If the tool includes a cutter, ask for its approved material and capacity independently. Never assume colored or cushioned grips provide electrical insulation. For crimping after stripping, select a compatible terminal and tool through separate evidence; the crimping-tool assortment guide explains why crimp functions need their own scope.
- State conductor material and construction.
- Identify insulation family and outer diameter if relevant.
- Give the target strip length and downstream connection type.
Match samples to your actual wire. Send representative wire with the RFQ whenever material or insulation differs from standard PVC construction.
Compatibility fields
| Field | Example of useful detail | Why it matters |
|---|---|---|
| Conductor construction | Solid, stranded, fine-stranded | Changes how conductor damage appears |
| Conductor size | AWG or mm², tied to construction | Avoids ambiguous range claims |
| Insulation | PVC, rubber, silicone, or named type | Affects blade and pull-off behavior |
| Strip requirement | Length and full or partial strip | Defines the acceptable end result |
6. What affects strip quality and conductor damage?
A good strip removes the intended insulation length while leaving conductor and remaining insulation intact. Watch for nicks, missing or stretched strands, crushed wire, residue, and uneven edges. A quick glance at outer insulation will not reveal every defect.
Safety comes first. Work only on isolated, de-energized samples using appropriate workplace procedures and a suitable tester. OSHA work-practice rules require verification for applicable electrical work; switch position alone does not establish a safe state. This article does not instruct live-wire work. For related conductor-end preparation, see the insulated versus non-insulated terminal crimper guide.
- Inspect stripped ends under good light and magnification where practical.
- Record conductor defects separately from insulation defects.
- Compare repeat samples at the same strip length and operator method.
Inspect the copper or aluminum itself. Approve a tool only after checking both cut face and remaining insulation against written criteria.
Strip-quality checks
| Inspection point | Acceptable evidence | Hold for review when |
|---|---|---|
| Conductor | No visible nick, cut, or missing strands | Strand loss or scoring appears |
| Insulation edge | Even removal at agreed length | Ragged edge or remaining residue appears |
| Remaining insulation | No unintended cuts or tears | Blade marks extend beyond strip zone |
| Repeatability | Samples meet the agreed length tolerance | Results vary beyond buyer limit |
7. What should buyers compare in product specifications?
A useful comparison sheet separates tool type, supported wire constructions, conductor size, insulation, strip-length control, cutter function, replacement parts, and instructions. Mark unknown items as open questions. A photo, color, spring, or jaw shape cannot establish range or electrical protection.
Cost comparison should use the same scope. Include the main tool, spare blades, accessories, packaging, and any special setup equipment. Do not insert certifications, minimum order quantities, production rates, or service claims unless a supplier confirms them in writing for its quoted model.
- Ask for a dated model-specific data sheet or instruction manual.
- Request separate strip and cut ranges with units and wire construction.
- Compare spare-part details and adjustment method.
Build a side-by-side matrix. Leave cells blank until documentation or sample evidence resolves them.
Specification matrix
| Specification | Manual tool | Self-adjusting hand tool | Powered machine |
|---|---|---|---|
| Size selection | Notch or manual setting | Mechanism adapts within stated range | Control or program setting |
| Strip length | Operator placement or stop | Model-specific stop or placement | Stored or adjustable setting |
| Wire compatibility | Notch/blade and wire-specific | Supported range remains model-specific | Wire, blade, clamp, and settings matter |
| Service items | Blade or pivot parts if offered | Blade, pad, spring, or linkage if offered | Blades, feed, clamp, and electrical service |
8. How should a buyer evaluate tool samples?
Sample approval should use the intended wire family. Confirm sample identity, model marking, and written specification. Cover typical and boundary sizes, each conductor construction, insulation type, and target strip length. Resolve any mismatch with the quoted model before testing.
Follow supplied instructions and record manual settings or powered feed conditions. Inspect strip length, conductor and insulation damage, and slug removal. If repeatability matters, define the cycle count and acceptance threshold in advance.
A simple inspection record makes supplier discussion concrete. Include photos beside the sample ID, wire description, tool marking, result, defect, and disposition. Keep electrical safety separate from quality approval: all testing uses de-energized wire samples. Buyers developing crimp assortments can connect stripping quality to their terminal process, including square versus hexagonal ferrule-crimp selection.
- Test smallest and largest listed sizes.
- Include each conductor and insulation combination that matters commercially.
- Record repeat results, not only the best-looking strip.
Approve a configuration, not a category label. Tie sample acceptance to model, wire description, and document revision.
Sample approval record
| Record item | Sample entry |
|---|---|
| Tool identity | Model, markings, revision, supplier document |
| Wire identity | Material, construction, size, insulation |
| Process setting | Notch, adjustment, stop, or machine recipe |
| Result | Strip length, conductor condition, insulation condition |
| Disposition | Accept, reject, or request revised sample |
9. What maintenance and operating costs matter?
A hand stripper needs no powered controls, though wear can affect edges, pivots, springs, grips, and adjustment. A powered machine may need blade replacement, cleaning, electrical service, and setup control. Confirm model-specific parts availability and instructions.
Compare initial purchase, spare blades, setup time, changeovers, rejects, and downtime. A hand tool may suit occasional work. A powered unit may suit repeated jobs when space and setup are justified. Test using realistic material and labor assumptions. Crimping after stripping is a separate choice; see this ratcheting versus non-ratcheting crimper guide.
- Request a parts list and maintenance instructions for the quoted model.
- Record replacement frequency during a representative trial if needed.
- Include downtime and scrap in total-cost comparisons.
Price the full operating setup. Compare tools using your wire, work sequence, labor assumptions, and replacement-parts quote.
Cost and service comparison
| Cost factor | Manual hand stripper | Self-adjusting hand stripper | Powered machine |
|---|---|---|---|
| Initial equipment | Tool and accessories | Tool, stop, and any spare parts | Machine and installation items |
| Changeover | Notch or blade-setting change | Verify grip and strip settings | Setting or program change |
| Wear parts | Blade, spring, pivot if serviceable | Blades, gripping jaws, springs if serviceable | Blade, feed, clamp components |
| Quality loss | Record mis-strips and damaged wire | Record slipping, incomplete stripping, and wire damage | Record setup errors and process variation |
10. What belongs in a wire-stripper RFQ?
A precise request for quotation lets a supplier respond against a real application. Describe wire construction, conductor material, size range, insulation type, target strip length, and expected quantity. State whether you need fixed-gauge manual, adjustable, self-adjusting handheld, or powered equipment. If cutting is also required, list that function separately with its material and size limits.
Ask for a model-specific data sheet, operating instructions, sample availability, replacement-parts information, packaging options, and any markings or language requirements. Do not rely on a general catalog title to establish compatibility. For a powered machine, add supply voltage, workspace, feed arrangement, and required settings. For manual models, request clear images of the working head and all markings.
For supplier review, KOLARWIN’s hand-tools range and contact page provide starting points for product discussions. This inquiry does not imply that a particular model, range, certification, or commercial term is available; request written confirmation for the item being quoted.
- Wire: conductor material, solid/stranded class, AWG or mm² range.
- Insulation: material, outer diameter if known, target strip length.
- Tool: mechanism, separate cutting function, marking, package, and spare parts.
- Order: quantity, sample needs, destination market, and requested documents.
Send wire specifications with your request. Ask suppliers to identify open compatibility questions before sample or quotation approval.
Frequently asked questions
Q1: Are self-adjusting wire strippers always faster than manual strippers? No universal speed claim applies. Compare a timed batch using the actual wire mix, including setup and inspection.
Q2: Can one automatic stripper handle every wire gauge? No. Each model has a stated range and may distinguish solid, stranded, material, or insulation conditions.
Q3: Does a spring-loaded handle make a stripper automatic? A spring may only reopen the handles. Check whether jaws self-adjust or an operator selects a notch.
Q4: Can a wire stripper be used on energized conductors? This article covers de-energized sample work only. Electrical tasks require applicable workplace procedures and qualified personnel.
Q5: What should a distributor send for a quotation? Send conductor construction and size, insulation type, strip length, required tool mechanism, quantity, and sample or document needs.
Looking for a reliable mechanic tools manufacturer in China?
If you are sourcing hand tools, socket tools, automotive repair tools, mechanic tool sets or OEM private label tools, contact KOLARWIN Tools for factory-direct quotation, customization support and product consultation.