Home/Blog/ Ratcheting vs Non-Ratcheting Crimping Tools: A B2B Buyer’s Guide

Ratcheting vs Non-Ratcheting Crimping Tools: A B2B Buyer’s Guide

Get OEM Tool Catalog + Quote Back to Tool Sourcing Blog
Unbranded catalog product photograph of a red blue terminal crimper.
This KOLARWIN Tools article is written for overseas distributors, wholesalers, importers and private label tool brands sourcing mechanic tools, automotive repair tools, socket tools, hand tools and OEM tool sets from China. Use this guide to compare product options, check supplier quality points and move from reading to a faster B2B inquiry.

Need OEM supplier support for this product type?

Contact KOLARWIN Tools for OEM mechanic tools, private label packaging, wholesale quotation and product range support. This gives overseas buyers a clear path from article reading to supplier discussion.

A ratcheting crimping tool controls handle release through a defined closing cycle; a non-ratcheting tool opens freely. US distributors should choose between them after checking terminal family, cycle volume, die fit, and sample inspection. TE’s hand-tool documentation pairs ratchet control with specific dies, locators, and wire stops, which gives buyers a useful starting point.

Contents
  1. 1. What does a ratchet control?
  2. 2. How does a non-ratcheting tool work?
  3. 3. Does a ratchet guarantee a better crimp?
  4. 4. Which tool suits repeat bench work?
  5. 5. When can a non-ratcheting tool make sense?
  6. 6. How should dies and terminals match?
  7. 7. What sample checks catch bad tooling?
  8. 8. What should a US importer put in an RFQ?
  9. 9. How do SKU and return risks differ?
  10. 10. Which version should you buy first?

1. What does a ratchet control?
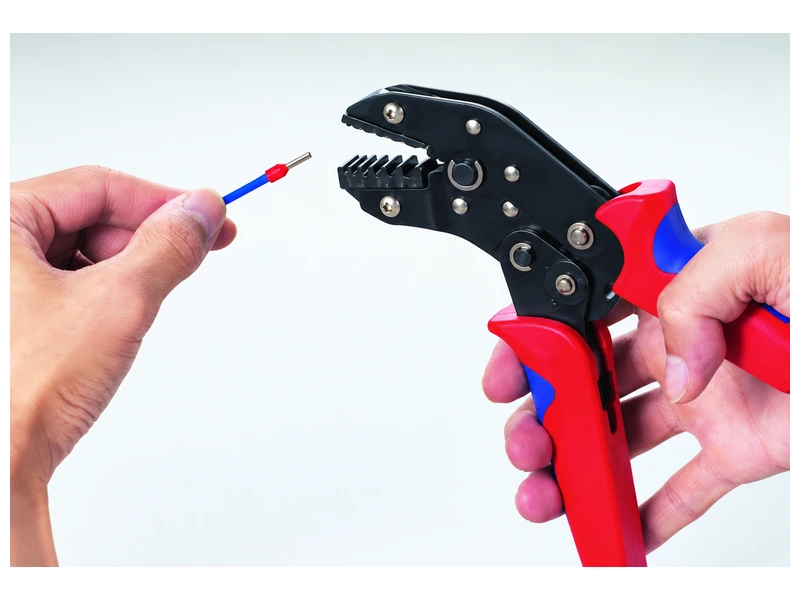
Unbranded catalog product photograph of a red blue terminal crimper
Unbranded catalog product photograph of a red blue terminal crimper.

A ratcheting crimping tool uses a mechanical release condition to hold a terminal in the die until a defined closing point. TE Connectivity describes its CERTI-CRIMP hand tools as using a ratchet that will not release until dies have fully closed. That feature can reduce one common operator error: opening a hand tool after only part of a stroke. It does not choose the right wire size, terminal barrel, or die profile for you.

For a distributor, ratchet control matters when several operators share one SKU. A new operator can feel a full cycle. A supervisor can watch whether handles reach the release point. Those cues make a work instruction easier to write. They also add parts, adjustment needs, and a release mechanism that may need inspection. Buyers building a mixed hand-tool offer can compare the adjacent specialty pliers buying guide before assigning shelf space.

  • Confirm whether the ratchet is fixed, adjustable, or operator releasable.
  • Ask where emergency release sits and how it is documented.
  • Record the die nest, wire range, terminal family, and crimp height tied to each tool.

Record the ratchet as a cycle-control feature. It does not certify finished contact performance.

Request a cycle video or sample demonstration showing a partial stroke, release operation, and completed crimp.

Decision table: what the ratchet covers

Feature What it controls What it does not prove
Mechanical stop Handle opening before a set closure Correct terminal choice
Emergency release Recovery from a loaded tool Good crimp after misuse
Marked nest Operator identification Actual fit for an unlisted terminal
Adjustable control Closure or handle setting on a model Universal wire coverage

2. How does a non-ratcheting tool work?
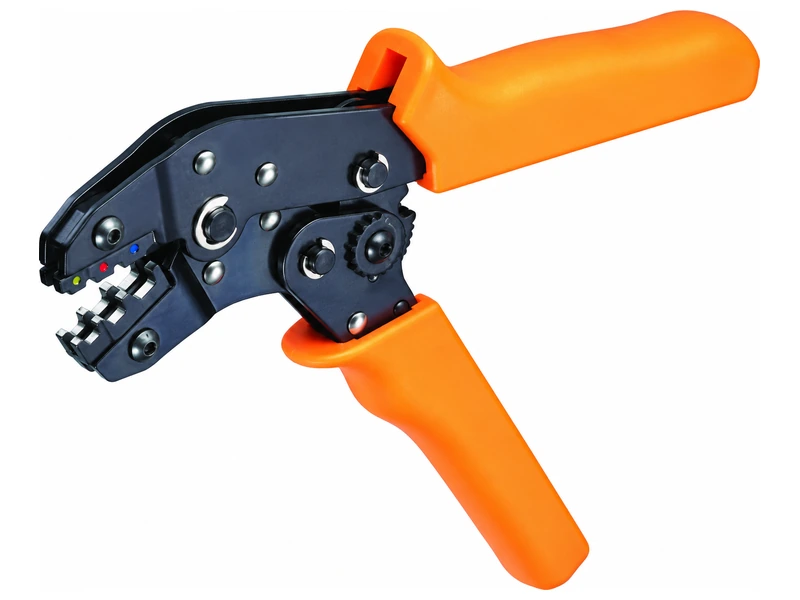
Unbranded catalog product photograph of a orange multi die crimper
Unbranded catalog product photograph of a orange multi die crimper.

A non-ratcheting crimper lets the operator close and open the handles freely. Some models use simple fixed dies. Others use a broad stamped jaw, a compression nest, or a removable die. The label covers several tool designs, so buyers need more detail before comparing prices. A free-opening tool can be fast for occasional repairs, yet it depends heavily on hand feel and visual inspection.

That control can suit a technician who crimps a known terminal in an accessible location. It can also suit a kit where the tool must release quickly after a misaligned part. The tradeoff appears when cycle quality varies between shifts. A short stroke may leave an under-crimp. Too much force may damage a terminal barrel or conductor strands.

  • Ask whether each die has a defined bottoming point or only a visual reference.
  • Check if jaw markings state wire size, terminal family, or crimp nest.
  • Run a short operator trial with the exact terminal and conductor supplied for sale.

Make closure visible in the work instruction. Operators should recognize a good stroke without guessing.

Ask the supplier for a one-page work instruction showing placement, stroke, release, and visual acceptance.

Comparison table: free-opening operation

Check Non-ratcheting implication Buyer evidence
Handle release Immediate opening after any stroke Demonstration under load
Operator skill Greater reliance on feel and inspection Trial record
Die reference May be a mark or a physical stop Die drawing
Misalignment recovery Usually quick to open Safe release instruction

3. Does a ratchet guarantee a better crimp?
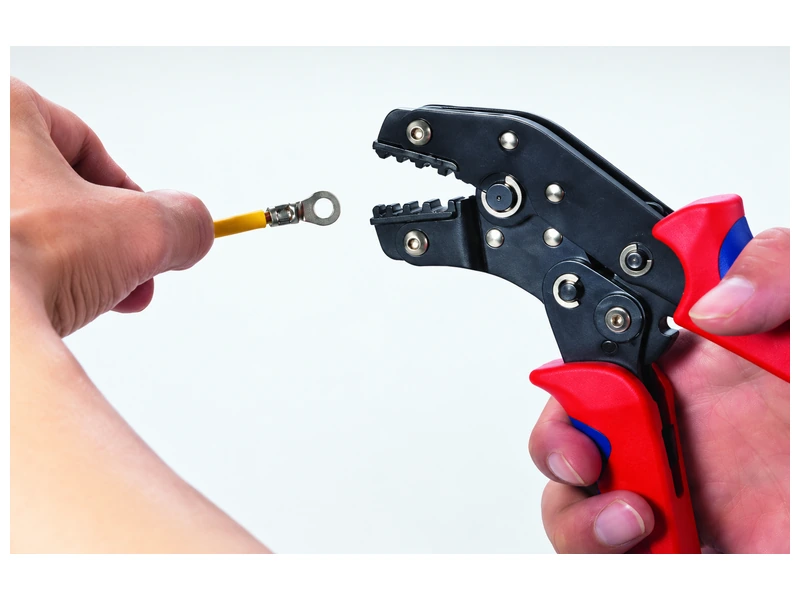
Unbranded catalog product photograph of a red terminal crimper with ring terminal
Unbranded catalog product photograph of a red terminal crimper with ring terminal.

No. A ratchet can help prevent a partial cycle, but finished quality still depends on the terminal, conductor, die geometry, strip length, insertion depth, and applied force. TE’s application-tooling pages pair ratchet control with locators, wire stops, insulation adjustments, and product-specific die sets. That combination shows why mechanism alone cannot carry a product claim.

An incorrect terminal can remain badly formed inside a fully closed ratchet. A conductor with damaged strands can pass a visual check yet fail a pull test. A die that is worn or mismatched can create the same problems with either handle style. Use ratchet language as a process-control feature, not as a promise of universal reliability.

  • Confirm the terminal manufacturer’s recommended conductor range.
  • Check crimp height or another specified acceptance measurement.
  • Define visual inspection and destructive pull-test sampling separately.

Separate mechanism wording from crimp evidence. “Ratcheting” describes a mechanism, while “qualified crimp” describes evidence.

Require a written boundary around any phrase such as professional grade, consistent, or full cycle.

Evidence table: separating mechanism from outcome

Claim under review Needed proof Safe wording before proof
Complete cycle Release condition demonstration “Ratchet controls handle release”
Correct crimp height Tool and terminal specification “For listed die and terminal combinations”
Electrical performance Applicable test record “Performance subject to approved application”
Tensile performance Pull-test method and result “Request application-specific evidence”

4. Which tool suits repeat bench work?
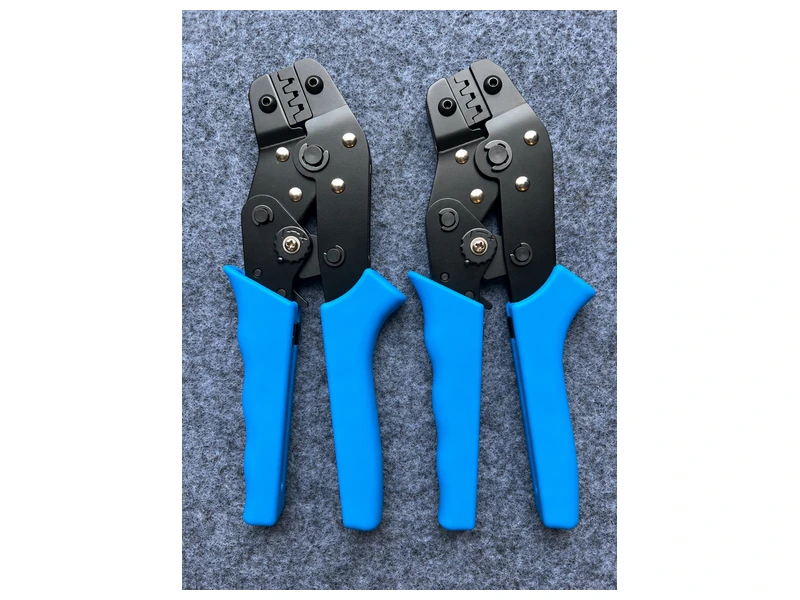
Blue terminal crimpers photographed as real products on dark fabric
Real blue terminal crimper product photograph; no process or capacity claim.

Repeat bench work usually benefits from a controlled cycle, marked nests, and a locator that keeps terminal position stable. That does not mean every bench needs a ratchet. A low-volume repair bench may value quick release more than cycle interlock. A harness cell with several operators may value a repeatable motion and a die change system.

Think about the actual work sequence. Does someone crimp one connector, inspect it, and move on? Or does a team process bags of the same terminal for hours? Hand fatigue, access, and changeover can matter as much as release control. TE’s commercial SDE system, for example, pairs ratcheted frames with interchangeable die sets. Such modularity can be useful when your assortment has confirmed families rather than random terminal types.

  • Count daily cycles by terminal family, not by tool model alone.
  • Note whether work occurs on a bench, in a cabinet, or beside installed equipment.
  • Measure die-change time and training time during the sample review.

Set up repeat work around the die and locator. A ratchet helps, but those interfaces often decide more.

Trial both mechanisms with the same conductor, terminal, and work instruction for one shift.

Workflow table: repeat-work fit

Work condition Ratcheting case Non-ratcheting case
Shared operators Full-cycle cue helps Needs stronger inspection
Frequent die changes Useful if system is modular Useful if die access is simple
Installed repair May restrict release space Quick opening can help
High repetition Controls partial strokes Fatigue and variation need study

5. When can a non-ratcheting tool make sense?
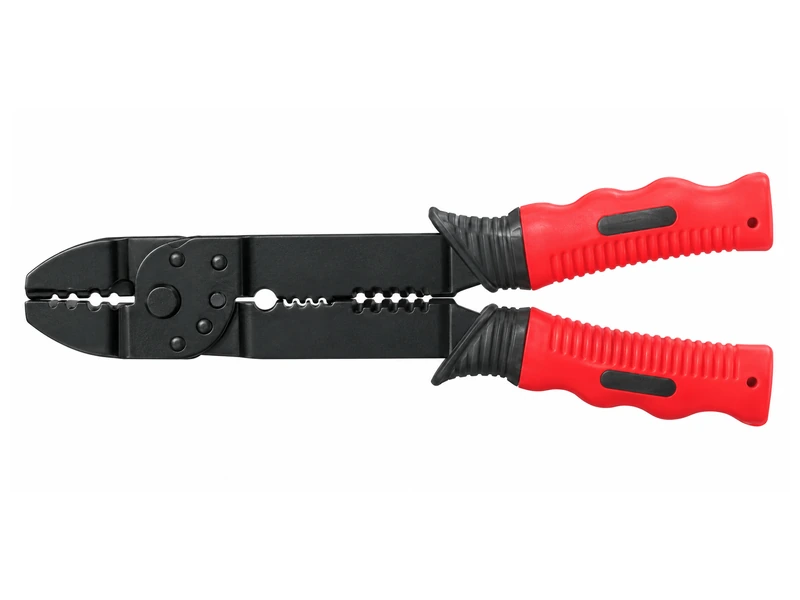
Multifunction terminal crimping tool with red-and-black grips
Multifunction terminal crimping tool product photograph; confirm mechanism details against the supplier sample.

A non-ratcheting tool can make sense for field kits, occasional service, prototype wiring, or a terminal that must be released immediately after a placement error. It can also fit a simple crimp where the manufacturer supplies a clear nest and the user can inspect every part. These are application conditions, not a claim that non-ratcheting tools outperform ratcheting ones.

Importers should ask how a tool will be sold. A technician buying one tool for a known repair may accept a free-opening handle. A distributor listing one generic crimper beside many terminal families may create returns because customers assume wider coverage than the jaw supports. Product naming, photos, and instructions must match actual use.

  • Define one approved terminal family for every basic tool listing.
  • Show the die profile and wire-range marking in product data.
  • State whether a separate inspection step is required after each crimp.

Use free opening where access and correction matter. Quick release has value when those needs outweigh cycle interlock.

Place a non-ratcheting model only when a sample work instruction names the supported terminal and inspection method.

Assortment table: likely use case

Use case Why non-ratcheting may fit Risk to control
Field repair kit Opens quickly in tight access Partial closure
Prototype bench Low repeat volume Skill variation
Single known terminal Simple setup Wrong substitute terminal
Mixed catalog listing Low entry cost Overstated compatibility

6. How should dies and terminals match?
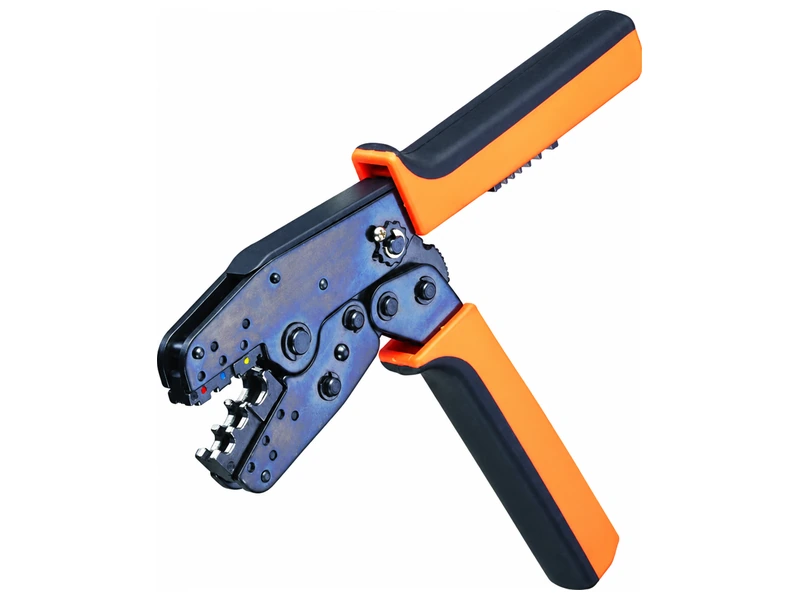
Unbranded catalog product photograph of a orange terminal crimper
Unbranded catalog product photograph of a orange terminal crimper.

Start with the terminal barrel, conductor size, insulation shape, and specified crimp location. A ratchet frame with a mismatched die remains the wrong tool. Insulated terminal barrels may need an insulation-support section separate from the conductor crimp. Open-barrel contacts may require different die movement and a locator. Ferrules use their own profile choices, covered in this site’s types of crimping tools guide.

Ask for the tool drawing, die marking, and terminal part number in one package. Avoid accepting “red-blue-yellow” shorthand as a complete specification because color systems differ between product families. Confirm actual wire range, conductor class, strip length, and insertion stop.

  • Match die nest geometry with the terminal barrel drawing.
  • Confirm whether insulation support is adjustable or fixed.
  • Check whether replaceable dies require a keyed orientation.

Match the barrel before choosing the handle. Handle style comes after terminal and die compatibility.

Send one terminal and one prepared conductor with every new tooling RFQ.

Matching table: interface fields

Field Tool-side record Terminal-side record
Conductor range Nest marking and drawing Approved wire size
Crimp zone Die profile and location Barrel crimp area
Insulation support Fixed or adjustable section Sleeve diameter and material
Position control Locator or wire stop Terminal shoulder and insertion depth

7. What sample checks catch bad tooling?
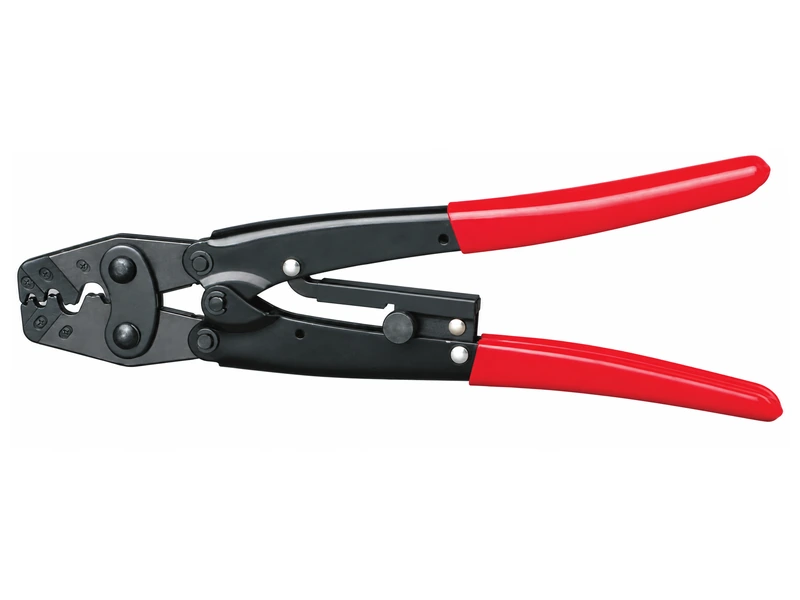
Long-handle terminal crimper with red grips and a stepped die head
Long-handle terminal crimper product frame.

A sample check should begin with identification. Record tool model, die code, terminal part number, conductor size, strip length, and operator instruction. Then inspect the crimp for full barrel contact, conductor visibility, insulation support, cracks, uneven deformation, and damaged strands. Pull testing can add evidence, but method and acceptance limits must come from the applicable terminal or buyer specification.

Do not let a polished handle or black finish substitute for a sample record. Check jaw alignment through its stroke. Look for burrs, loose die pins, inconsistent nest markings, or a release that behaves differently between samples. For ratchets, test emergency release without making an unsafe loaded-tool claim. For free-opening tools, watch whether operators stop at the same closure point.

  • Keep before-and-after photos beside measured observations.
  • Test the smallest and largest listed conductor sizes.
  • Repeat a sample after die removal and reinstallation.

Make the sample file repeatable. Another person should be able to reach the same approval decision.

Reject a sample report that omits the exact die, terminal, conductor, and acceptance method.

Sample table: minimum review record

Review item Record Escalate when
Identity Tool, die, terminal, wire Any number is missing
Geometry Crimp location and visible form Barrel is offset or cracked
Conductor Strand condition and insertion Strands are cut or exposed incorrectly
Cycle Handle closure and release Ratchet or jaw behavior changes

8. What should a US importer put in an RFQ?
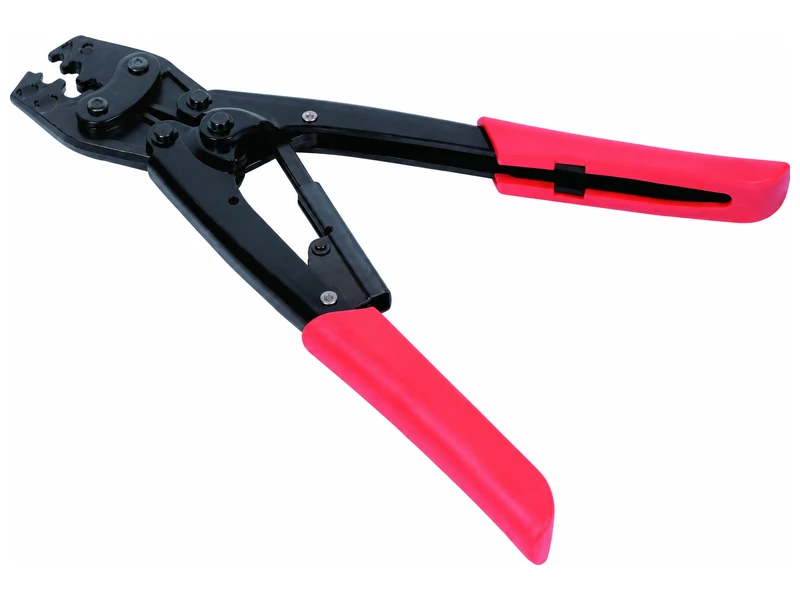
Unbranded catalog product photograph of a black red terminal crimper
Unbranded catalog product photograph of a black red terminal crimper.

An RFQ should name the terminal family before it asks for a hand-tool price. Include target market, conductor system, terminal material, insulation type, die profile, operating location, expected cycle pattern, packaging, and sample quantity. Ask for drawings and test evidence that apply to the exact SKU. A generic catalog page cannot fill those fields.

Add commercial details that affect your return rate. Request carton labels, tool markings, replacement-die availability, spare-part policy, inspection photos, and a change-notification process. If a supplier proposes a substitute terminal or die, record it as a new configuration rather than silently accepting it.

  • State US unit preferences such as AWG where applicable.
  • Ask for both ratchet behavior and emergency-release instructions.
  • Require sample approval before a production order.

Write the RFQ like a bench instruction. It should name the crimp, check, and change conditions.

Attach a one-page approval form with fields for tool, die, terminal, wire, sample, and signoff.

RFQ table: fields worth writing down

RFQ field Example request Why it protects the buyer
Tool mechanism Ratcheting or free-opening, release method Avoids vague comparisons
Die and terminal Part numbers plus drawings Prevents substitution
Wire AWG or mm², conductor construction Defines actual range
Quality file Sample photos, dimensions, test method Makes approval repeatable

9. How do SKU and return risks differ?
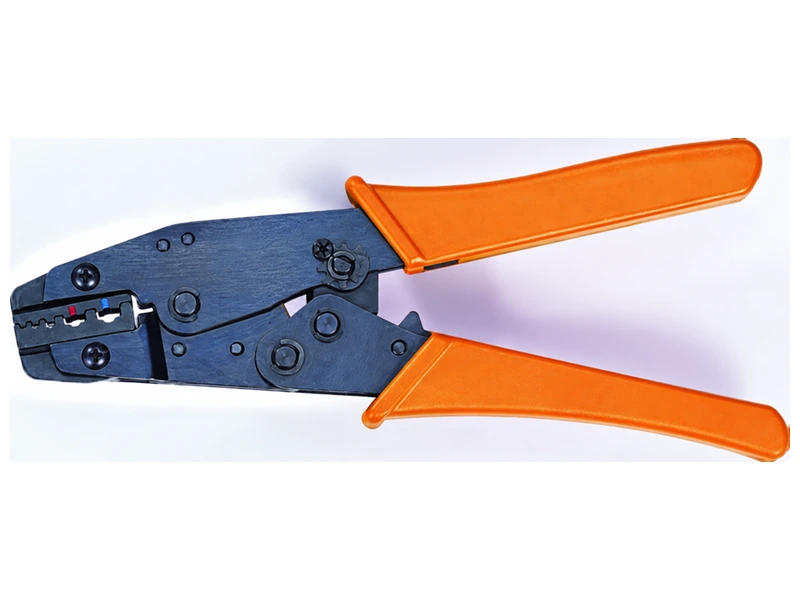
Unbranded catalog product photograph of a orange terminal crimper variant
Unbranded catalog product photograph of a orange terminal crimper variant.

Ratcheting tools often create a clearer SKU story because buyers can see a named cycle feature, replaceable dies, or marked nests. That clarity can still mislead if one frame accepts several die families that are not interchangeable. Non-ratcheting models may have fewer components, yet broad wording such as universal crimper can invite the wrong terminal into the order.

Map every listing against real customer questions. If returns frequently mention wrong wire range, change the product title and comparison chart. If users report difficult release in a cabinet, show access limits. Keep photos tied to the actual model. A supplier background page such as Kolarwin’s hand tools range can support category context, while product-level fit still needs a drawing or sample.

  • Track returns by terminal, wire size, die, and mechanism.
  • Separate frame SKUs from die-set SKUs in inventory.
  • Keep substitute approvals visible to customer service.

Treat returns as missing product fields. Fix the data before adding another model.

Review the last ten crimper returns and convert repeated reasons into required listing fields.

Risk table: assortment and returns

Failure pattern Likely cause Data fix
Wrong wire size Range shown without terminal family Add terminal and conductor fields
Partial crimp Stroke or inspection unclear State cycle and visual check
Die mismatch Modular frame assumed universal List approved die codes
Access complaint Handle and jaw envelope omitted Add clearance note and photo

10. Which version should you buy first?
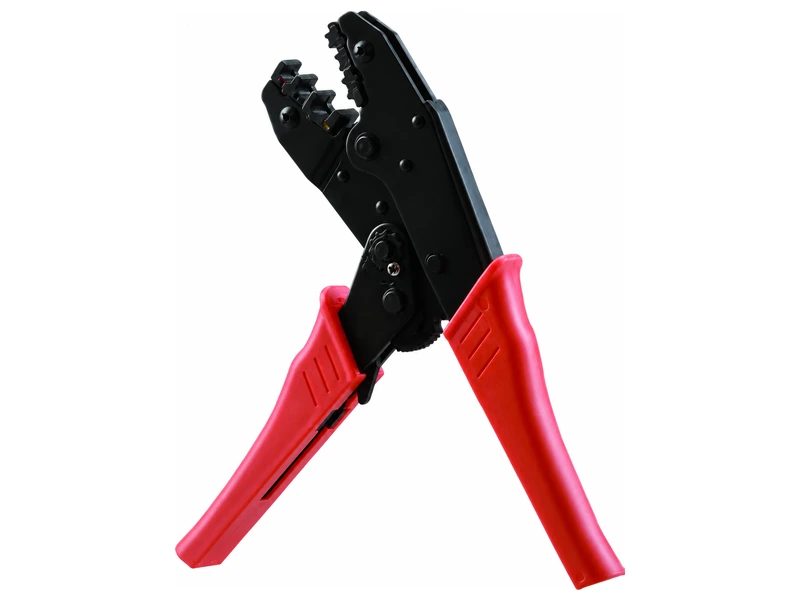
Unbranded catalog product photograph of a red terminal crimper variant
Unbranded catalog product photograph of a red terminal crimper variant.

Buy the mechanism that matches one documented application. Choose a ratcheting model when shared operators, repeat cycles, or a controlled release condition are central. Choose a non-ratcheting model when quick opening, field access, or a simple known terminal outweighs cycle interlock. In both cases, terminal and die fit comes before handle preference.

Build the first order around a sample. Include the tool, exact die, terminal, prepared conductor, work instruction, inspection record, and packaging label. If your range serves automotive work, pair the crimper discussion with the automotive repair tools range and keep wire cutting questions separate from crimping selection. For industrial buyers, the maintenance tool purchasing brief helps frame the wider kit.

  • Approve one terminal family before broadening the die range.
  • Record the mechanism, release behavior, and acceptance check.
  • Ask for a written change notice for dies, materials, or markings.

Prove the whole process with the first purchase. Tool, terminal, conductor, operator, and check must agree.

Send the approved sample record with your order and ask the supplier to reference it on production documents.

For a supplier discussion, use the industry application page and then send a detailed request through Kolarwin’s contact page. If preparation tools sit in the same kit, keep the wire stripper versus wire cutter guide as a separate reference. Supplier background can be checked on Kolarwin’s about page.

Q1: Does a ratcheting crimper always make a better connection?
No. It can control handle release, yet die fit, terminal choice, conductor preparation, and inspection still decide connection quality.

Q2: Is a non-ratcheting crimper only for low-quality work?
No. It can suit a known terminal and occasional repair when the operator follows a clear closure and inspection method.

Q3: What should match before I compare handle styles?
Match terminal family, conductor range, die profile, crimp zone, strip length, and insertion depth.

Q4: Can a modular ratchet frame accept any replacement die?
No. Confirm the frame system, die code, orientation, and approved terminal list for that combination.

Q5: What sample should a US importer request?
Request the exact tool and die with a representative terminal and prepared conductor, plus a drawing, work instruction, inspection record, and any applicable test method.

Looking for a reliable mechanic tools manufacturer in China?

If you are sourcing hand tools, socket tools, automotive repair tools, mechanic tool sets or OEM private label tools, contact KOLARWIN Tools for factory-direct quotation, customization support and product consultation.
A ratcheting crimping tool controls handle release through a defined closing cycle; a non-ratcheting tool opens freely. US distributors should choose between them after checking terminal family, cycle volume, die fit, and sample inspection. TE’s hand-tool documentation pairs ratchet control with specific dies, locators, and wire stops, which gives buyers a useful starting point.

Contents
  1. 1. What does a ratchet control?
  2. 2. How does a non-ratcheting tool work?
  3. 3. Does a ratchet guarantee a better crimp?
  4. 4. Which tool suits repeat bench work?
  5. 5. When can a non-ratcheting tool make sense?
  6. 6. How should dies and terminals match?
  7. 7. What sample checks catch bad tooling?
  8. 8. What should a US importer put in an RFQ?
  9. 9. How do SKU and return risks differ?
  10. 10. Which version should you buy first?

1. What does a ratchet control?

Unbranded catalog product photograph of a red blue terminal crimper
Unbranded catalog product photograph of a red blue terminal crimper.

A ratcheting crimping tool uses a mechanical release condition to hold a terminal in the die until a defined closing point. TE Connectivity describes its CERTI-CRIMP hand tools as using a ratchet that will not release until dies have fully closed. That feature can reduce one common operator error: opening a hand tool after only part of a stroke. It does not choose the right wire size, terminal barrel, or die profile for you.

For a distributor, ratchet control matters when several operators share one SKU. A new operator can feel a full cycle. A supervisor can watch whether handles reach the release point. Those cues make a work instruction easier to write. They also add parts, adjustment needs, and a release mechanism that may need inspection. Buyers building a mixed hand-tool offer can compare the adjacent specialty pliers buying guide before assigning shelf space.

Record the ratchet as a cycle-control feature. It does not certify finished contact performance.

Request a cycle video or sample demonstration showing a partial stroke, release operation, and completed crimp.

Decision table: what the ratchet covers

Feature What it controls What it does not prove
Mechanical stop Handle opening before a set closure Correct terminal choice
Emergency release Recovery from a loaded tool Good crimp after misuse
Marked nest Operator identification Actual fit for an unlisted terminal
Adjustable control Closure or handle setting on a model Universal wire coverage

2. How does a non-ratcheting tool work?

Unbranded catalog product photograph of a orange multi die crimper
Unbranded catalog product photograph of a orange multi die crimper.

A non-ratcheting crimper lets the operator close and open the handles freely. Some models use simple fixed dies. Others use a broad stamped jaw, a compression nest, or a removable die. The label covers several tool designs, so buyers need more detail before comparing prices. A free-opening tool can be fast for occasional repairs, yet it depends heavily on hand feel and visual inspection.

That control can suit a technician who crimps a known terminal in an accessible location. It can also suit a kit where the tool must release quickly after a misaligned part. The tradeoff appears when cycle quality varies between shifts. A short stroke may leave an under-crimp. Too much force may damage a terminal barrel or conductor strands.

Make closure visible in the work instruction. Operators should recognize a good stroke without guessing.

Ask the supplier for a one-page work instruction showing placement, stroke, release, and visual acceptance.

Comparison table: free-opening operation

Check Non-ratcheting implication Buyer evidence
Handle release Immediate opening after any stroke Demonstration under load
Operator skill Greater reliance on feel and inspection Trial record
Die reference May be a mark or a physical stop Die drawing
Misalignment recovery Usually quick to open Safe release instruction

3. Does a ratchet guarantee a better crimp?

Unbranded catalog product photograph of a red terminal crimper with ring terminal
Unbranded catalog product photograph of a red terminal crimper with ring terminal.

No. A ratchet can help prevent a partial cycle, but finished quality still depends on the terminal, conductor, die geometry, strip length, insertion depth, and applied force. TE’s application-tooling pages pair ratchet control with locators, wire stops, insulation adjustments, and product-specific die sets. That combination shows why mechanism alone cannot carry a product claim.

An incorrect terminal can remain badly formed inside a fully closed ratchet. A conductor with damaged strands can pass a visual check yet fail a pull test. A die that is worn or mismatched can create the same problems with either handle style. Use ratchet language as a process-control feature, not as a promise of universal reliability.

Separate mechanism wording from crimp evidence. “Ratcheting” describes a mechanism, while “qualified crimp” describes evidence.

Require a written boundary around any phrase such as professional grade, consistent, or full cycle.

Evidence table: separating mechanism from outcome

Claim under review Needed proof Safe wording before proof
Complete cycle Release condition demonstration “Ratchet controls handle release”
Correct crimp height Tool and terminal specification “For listed die and terminal combinations”
Electrical performance Applicable test record “Performance subject to approved application”
Tensile performance Pull-test method and result “Request application-specific evidence”

4. Which tool suits repeat bench work?

Blue terminal crimpers photographed as real products on dark fabric
Real blue terminal crimper product photograph; no process or capacity claim.

Repeat bench work usually benefits from a controlled cycle, marked nests, and a locator that keeps terminal position stable. That does not mean every bench needs a ratchet. A low-volume repair bench may value quick release more than cycle interlock. A harness cell with several operators may value a repeatable motion and a die change system.

Think about the actual work sequence. Does someone crimp one connector, inspect it, and move on? Or does a team process bags of the same terminal for hours? Hand fatigue, access, and changeover can matter as much as release control. TE’s commercial SDE system, for example, pairs ratcheted frames with interchangeable die sets. Such modularity can be useful when your assortment has confirmed families rather than random terminal types.

Set up repeat work around the die and locator. A ratchet helps, but those interfaces often decide more.

Trial both mechanisms with the same conductor, terminal, and work instruction for one shift.

Workflow table: repeat-work fit

Work condition Ratcheting case Non-ratcheting case
Shared operators Full-cycle cue helps Needs stronger inspection
Frequent die changes Useful if system is modular Useful if die access is simple
Installed repair May restrict release space Quick opening can help
High repetition Controls partial strokes Fatigue and variation need study

5. When can a non-ratcheting tool make sense?

Multifunction terminal crimping tool with red-and-black grips
Multifunction terminal crimping tool product photograph; confirm mechanism details against the supplier sample.

A non-ratcheting tool can make sense for field kits, occasional service, prototype wiring, or a terminal that must be released immediately after a placement error. It can also fit a simple crimp where the manufacturer supplies a clear nest and the user can inspect every part. These are application conditions, not a claim that non-ratcheting tools outperform ratcheting ones.

Importers should ask how a tool will be sold. A technician buying one tool for a known repair may accept a free-opening handle. A distributor listing one generic crimper beside many terminal families may create returns because customers assume wider coverage than the jaw supports. Product naming, photos, and instructions must match actual use.

Use free opening where access and correction matter. Quick release has value when those needs outweigh cycle interlock.

Place a non-ratcheting model only when a sample work instruction names the supported terminal and inspection method.

Assortment table: likely use case

Use case Why non-ratcheting may fit Risk to control
Field repair kit Opens quickly in tight access Partial closure
Prototype bench Low repeat volume Skill variation
Single known terminal Simple setup Wrong substitute terminal
Mixed catalog listing Low entry cost Overstated compatibility

6. How should dies and terminals match?

Unbranded catalog product photograph of a orange terminal crimper
Unbranded catalog product photograph of a orange terminal crimper.

Start with the terminal barrel, conductor size, insulation shape, and specified crimp location. A ratchet frame with a mismatched die remains the wrong tool. Insulated terminal barrels may need an insulation-support section separate from the conductor crimp. Open-barrel contacts may require different die movement and a locator. Ferrules use their own profile choices, covered in this site’s types of crimping tools guide.

Ask for the tool drawing, die marking, and terminal part number in one package. Avoid accepting “red-blue-yellow” shorthand as a complete specification because color systems differ between product families. Confirm actual wire range, conductor class, strip length, and insertion stop.

Match the barrel before choosing the handle. Handle style comes after terminal and die compatibility.

Send one terminal and one prepared conductor with every new tooling RFQ.

Matching table: interface fields

Field Tool-side record Terminal-side record
Conductor range Nest marking and drawing Approved wire size
Crimp zone Die profile and location Barrel crimp area
Insulation support Fixed or adjustable section Sleeve diameter and material
Position control Locator or wire stop Terminal shoulder and insertion depth

7. What sample checks catch bad tooling?

Long-handle terminal crimper with red grips and a stepped die head
Long-handle terminal crimper product frame.

A sample check should begin with identification. Record tool model, die code, terminal part number, conductor size, strip length, and operator instruction. Then inspect the crimp for full barrel contact, conductor visibility, insulation support, cracks, uneven deformation, and damaged strands. Pull testing can add evidence, but method and acceptance limits must come from the applicable terminal or buyer specification.

Do not let a polished handle or black finish substitute for a sample record. Check jaw alignment through its stroke. Look for burrs, loose die pins, inconsistent nest markings, or a release that behaves differently between samples. For ratchets, test emergency release without making an unsafe loaded-tool claim. For free-opening tools, watch whether operators stop at the same closure point.

Make the sample file repeatable. Another person should be able to reach the same approval decision.

Reject a sample report that omits the exact die, terminal, conductor, and acceptance method.

Sample table: minimum review record

Review item Record Escalate when
Identity Tool, die, terminal, wire Any number is missing
Geometry Crimp location and visible form Barrel is offset or cracked
Conductor Strand condition and insertion Strands are cut or exposed incorrectly
Cycle Handle closure and release Ratchet or jaw behavior changes

8. What should a US importer put in an RFQ?

Unbranded catalog product photograph of a black red terminal crimper
Unbranded catalog product photograph of a black red terminal crimper.

An RFQ should name the terminal family before it asks for a hand-tool price. Include target market, conductor system, terminal material, insulation type, die profile, operating location, expected cycle pattern, packaging, and sample quantity. Ask for drawings and test evidence that apply to the exact SKU. A generic catalog page cannot fill those fields.

Add commercial details that affect your return rate. Request carton labels, tool markings, replacement-die availability, spare-part policy, inspection photos, and a change-notification process. If a supplier proposes a substitute terminal or die, record it as a new configuration rather than silently accepting it.

Write the RFQ like a bench instruction. It should name the crimp, check, and change conditions.

Attach a one-page approval form with fields for tool, die, terminal, wire, sample, and signoff.

RFQ table: fields worth writing down

RFQ field Example request Why it protects the buyer
Tool mechanism Ratcheting or free-opening, release method Avoids vague comparisons
Die and terminal Part numbers plus drawings Prevents substitution
Wire AWG or mm², conductor construction Defines actual range
Quality file Sample photos, dimensions, test method Makes approval repeatable

9. How do SKU and return risks differ?

Unbranded catalog product photograph of a orange terminal crimper variant
Unbranded catalog product photograph of a orange terminal crimper variant.

Ratcheting tools often create a clearer SKU story because buyers can see a named cycle feature, replaceable dies, or marked nests. That clarity can still mislead if one frame accepts several die families that are not interchangeable. Non-ratcheting models may have fewer components, yet broad wording such as universal crimper can invite the wrong terminal into the order.

Map every listing against real customer questions. If returns frequently mention wrong wire range, change the product title and comparison chart. If users report difficult release in a cabinet, show access limits. Keep photos tied to the actual model. A supplier background page such as Kolarwin’s hand tools range can support category context, while product-level fit still needs a drawing or sample.

Treat returns as missing product fields. Fix the data before adding another model.

Review the last ten crimper returns and convert repeated reasons into required listing fields.

Risk table: assortment and returns

Failure pattern Likely cause Data fix
Wrong wire size Range shown without terminal family Add terminal and conductor fields
Partial crimp Stroke or inspection unclear State cycle and visual check
Die mismatch Modular frame assumed universal List approved die codes
Access complaint Handle and jaw envelope omitted Add clearance note and photo

10. Which version should you buy first?

Unbranded catalog product photograph of a red terminal crimper variant
Unbranded catalog product photograph of a red terminal crimper variant.

Buy the mechanism that matches one documented application. Choose a ratcheting model when shared operators, repeat cycles, or a controlled release condition are central. Choose a non-ratcheting model when quick opening, field access, or a simple known terminal outweighs cycle interlock. In both cases, terminal and die fit comes before handle preference.

Build the first order around a sample. Include the tool, exact die, terminal, prepared conductor, work instruction, inspection record, and packaging label. If your range serves automotive work, pair the crimper discussion with the automotive repair tools range and keep wire cutting questions separate from crimping selection. For industrial buyers, the maintenance tool purchasing brief helps frame the wider kit.

Prove the whole process with the first purchase. Tool, terminal, conductor, operator, and check must agree.

Send the approved sample record with your order and ask the supplier to reference it on production documents.

For a supplier discussion, use the industry application page and then send a detailed request through Kolarwin’s contact page. If preparation tools sit in the same kit, keep the wire stripper versus wire cutter guide as a separate reference. Supplier background can be checked on Kolarwin’s about page.

Q1: Does a ratcheting crimper always make a better connection?
No. It can control handle release, yet die fit, terminal choice, conductor preparation, and inspection still decide connection quality.

Q2: Is a non-ratcheting crimper only for low-quality work?
No. It can suit a known terminal and occasional repair when the operator follows a clear closure and inspection method.

Q3: What should match before I compare handle styles?
Match terminal family, conductor range, die profile, crimp zone, strip length, and insertion depth.

Q4: Can a modular ratchet frame accept any replacement die?
No. Confirm the frame system, die code, orientation, and approved terminal list for that combination.

Q5: What sample should a US importer request?
Request the exact tool and die with a representative terminal and prepared conductor, plus a drawing, work instruction, inspection record, and any applicable test method.

Why Partner with Kolarwin Tools?

Factory-Direct Pricing Skip the middleman — access competitive wholesale prices and protect your margins
Private Label & OEM Ready Your brand, our expertise — full customization from logo to packaging
Fast Global Shipping Reliable delivery to 60+ countries with full export documentation support
Low MOQ, High Flexibility Start small, scale fast — flexible order quantities to fit your business
Dedicated B2B Support One-on-one account management from quote to delivery, every time

Get Your Free Quote in 24 Hours

Tell us your sourcing needs — we'll respond with a tailored quote, product specs, and the best pricing for your market. No commitment required.

Chat on WhatsApp Email Us Directly